G10 Installation Guide 7.13.2 12
1
G10 New Installation and Upgrade Workflows
Rev. 005-140228
If the G10 is supporting two controller disk arrays, before removing the cabling,
identify and label the controllers on the disk array attached to the currently installed
IAP100 SAS AMC in the front of the probe. For example, “Controller 0 to PRM200 RTM
SAS
Port 1” and “Controller 1 to PRM200 SAS Port 2”. You will be reconnecting the
SAS cables to the PRM200 RTM on the rear of the probe after its install.
2. Remove SAS and Ethernet cabling from the
IAP
and RTM and remove the
blades from chassis. For IAP100, verify that the current Ethernet cabling
can reach the rear of the chassis; pull extra cabling if necessary.
3. Perform one of the following:
IAP200 configurations: Insert the PRM200 RTM in the rear bottom slot of
the chassis and tighten its thumbscrews.
IAP320 configurations: Insert the PRM300 RTM in the rear bottom slot of
the chassis and tighten its thumbscrews.
4. Insert an RJ45 (or optional fiber) SFP into Port A on the RTM.
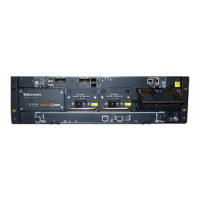
5. Install the IAP (front of probe).
6. Continue with the upgrade workflow defined in Table 1.2.
Upgrade IIC Blade
The Iris server and probe software must be upgraded to the minimum software
version that your upgrade scenario requires before performing this procedure (see
Table 1.3). The Iris server and G10 probe MUST be on the same version of software.
Perform the following steps to upgrade a probe from the IIC100 to the IIC200. The IIC200
suppor
ts two RTMs:
SRM200 RTM (default configuration)
TRM100 RTM (eHRPD monitoring only)
Tektronix Communications | For Licensed Users | Unauthorized Duplication and Distribution Prohibited
 Loading...