Model 200E Instruction Manual M200E Documentation
LIST OF FIGURES
Figure 3-1: Location of Shipping Screws and Power Configuration Plug............................... 10
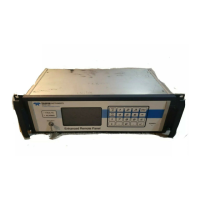
Figure 3-2: M200E Layout............................................................................................ 11
Figure 3-3: M200E Rear Panel Layout ............................................................................ 12
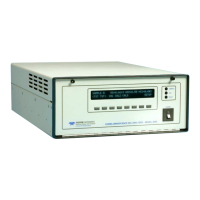
Figure 3-4: M200E Front Panel Layout ........................................................................... 12
Figure 3-5: Basic Pneumatic Connections for Units Without Valve Options........................... 14
Figure 3-6: Basic Pneumatic Connections for Units With Valve Options ............................... 16
Figure 3-7: Analog Output Connector ............................................................................ 17
Figure 3-8: Status Output Connector............................................................................. 18
Figure 3-9: Control Input Connector.............................................................................. 19
Figure 3-10: Front Panel Display During Startup Sequence................................................. 21
Figure 3-11: M200E Pneumatic Diagram In Standard Configuration ..................................... 24
Figure 3-12: M200E Pneumatic Diagram With Options Installed .......................................... 25
Figure 5-1: Current Loop Option Installed on the Motherboard .......................................... 34
Figure 5-2: M200E Ethernet Card and Rear Panel With Ethernet Installed ........................... 39
Figure 6-1: Analog Output Connector Key ...................................................................... 48
Figure 6-2: Setup for Calibrating Analog Outputs ............................................................ 64
Figure 6-3: Setup for Calibrating Current Outputs ........................................................... 67
Figure 6-4: Status Output Connector............................................................................. 73
Figure 6-5: Control Inputs with Local and External 5 V Power Supply ................................. 74
Figure 6-6: APICOM Graphical User Interface for Configuring the iDAS ..............................101
Figure 6-7: iDAS Configuration Through a Terminal Emulation Program.............................102
Figure 6-8: APICOM Remote Control Program Interface...................................................107
Figure 7-1: Gas Supply Setup for Determination of NO
2
Conversion Efficiency ....................111
Figure 7-2: Setup for Manual Calibration without Z/S valve or IZS Option..........................113
Figure 7-3: Pneumatic Connections for Manual Calibration Checks with IZS........................117
Figure 7-4: Setup for Manual Calibration Check with Z/S Valve or IZS Option.....................119
Figure 8-1: GPT Calibration System..............................................................................133
Figure 9-1: Sample Particulate Filter Assembly ..............................................................144
Figure 9-2: Particle Filter on O
3
Supply Air Dryer............................................................145
Figure 9-3: 04419 Ozone Filter Unit .............................................................................146
Figure 9-4: Zero Air Scrubber Assembly........................................................................150
Figure 9-5: NO
2
Converter Assembly ............................................................................151
Figure 9-6: Reaction Cell Assembly ..............................................................................152
Figure 9-7: Critical Flow Orifice Assembly......................................................................153
Figure 10-1: M200E Sensitivity Spectrum .......................................................................156
Figure 10-2: NO
2
Conversion Principle ............................................................................157
Figure 10-3: Reaction Cell with PMT Tube .......................................................................158
Figure 10-4: Reaction Cell During the AutoZero Cycle.......................................................159
Figure 10-5: External Pump Pack...................................................................................162
Figure 10-6: Ozone Generator Principle ..........................................................................164
Figure 10-7: Semi-Permeable Membrane Drying Process...................................................165
Figure 10-8: M200E Perma Pure
®
Dryer..........................................................................166
Figure 10-9: Location of Flow Control Assemblies.............................................................168
Figure 10-10: Flow Control Assembly & Critical Flow Orifice ................................................168
Figure 10-11: M200E Electronic Block Diagram..................................................................171
Figure 10-12: M200E CPU Board Annotated ......................................................................172
Figure 10-13: Schematic of Basic PMT Design and Functionality...........................................174
Figure 10-14: PMT Preamp Block Diagram ........................................................................176
Figure 10-15: Power Distribution Block Diagram................................................................181
Figure 10-16: M200E Electronic Interface Block Diagram ....................................................182
Figure 10-17: Keyboard and Display Interface Block Diagram..............................................184
044100102 Rev A ix