Model 200E Instruction Manual Instrument Maintenance
• Remove the tube fittings from the converter.
• Disconnect the power and the thermocouple of the converter. Unscrew the
grounding clamp of the power leads with a Phillips-head screw driver.
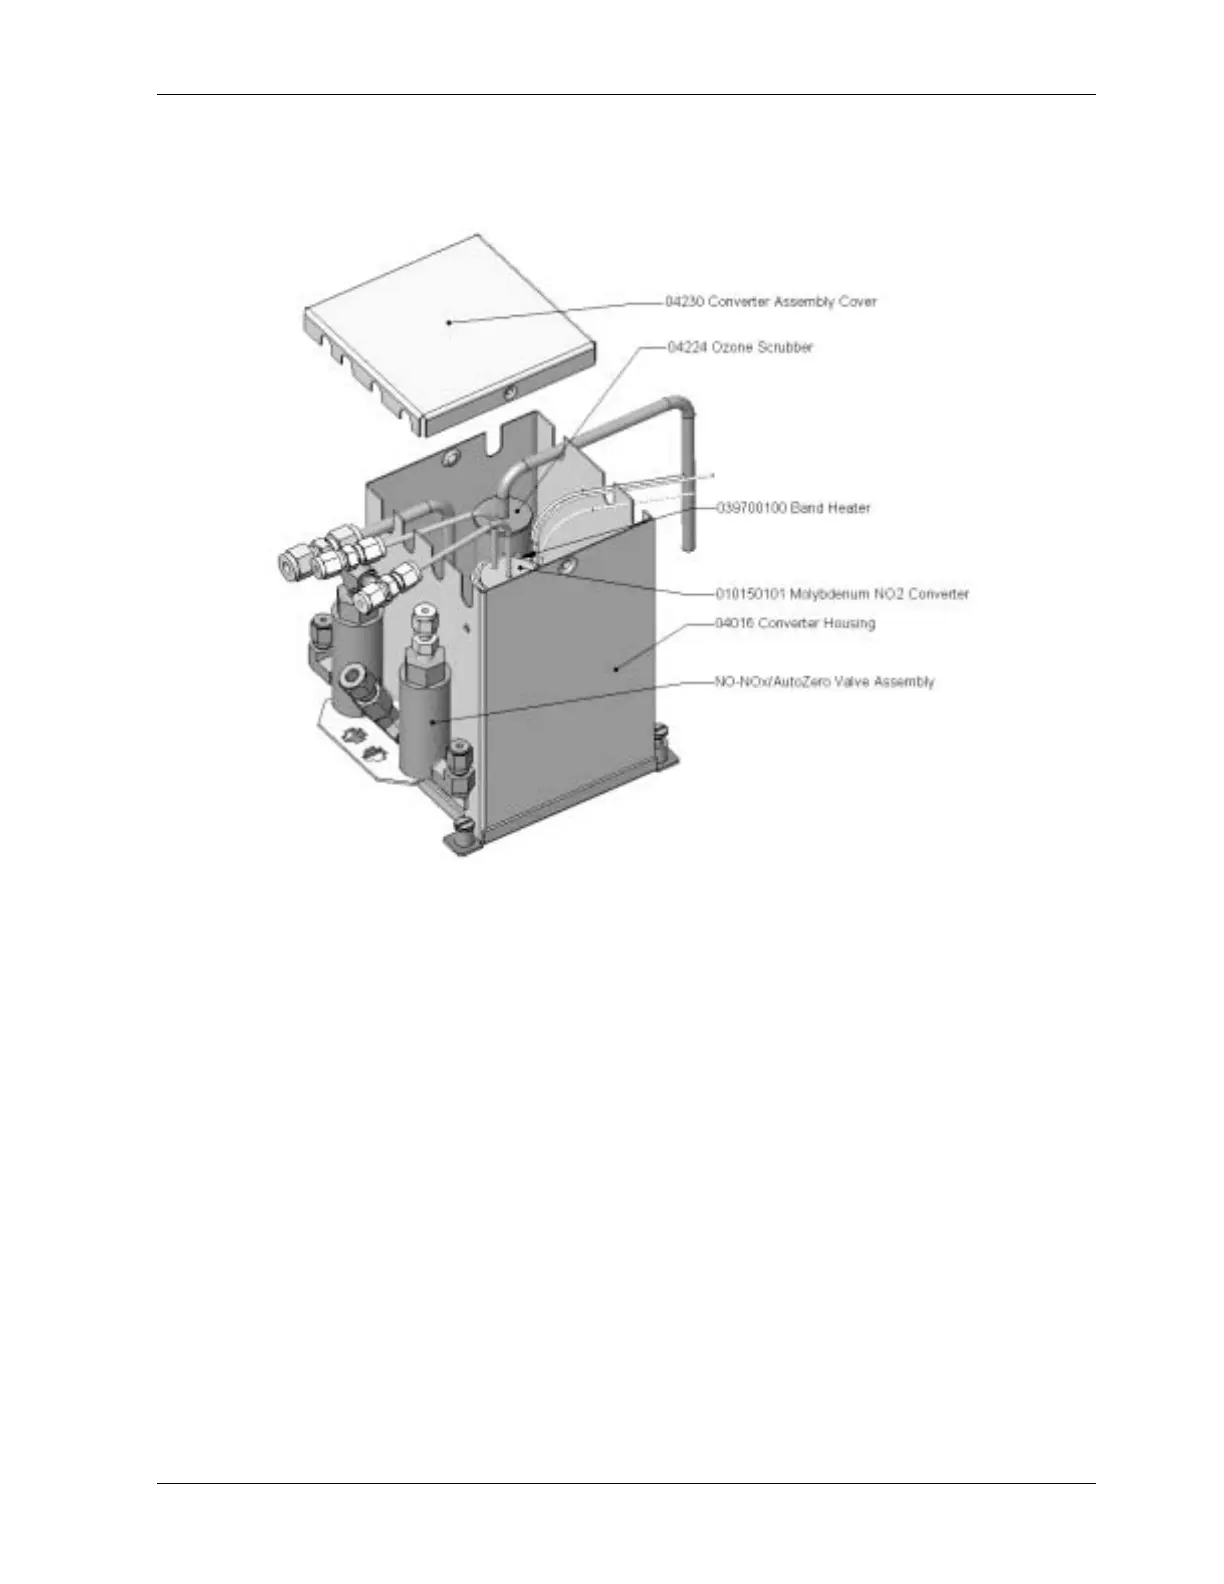
Figure 9-5: NO
2
Converter Assembly
• Remove the converter assembly (cartridge and band heater) from the can. Make a
note of the orientation of the tubes relative to the heater cartridge.
• Unscrew the band heater and loosen it, take out the old converter cartridge.
• Wrap the band heater around the new replacement cartridge and tighten the screws
using a high-temperature anti-seize agent such as copper paste. Make sure to use
proper alignment of the heater with respect to the converter tubes.
• Replace the converter assembly, route the cables through the holes in the can and
reconnect them properly. Reconnect the grounding clamp around the heater leads
for safe operation.
• Re-attach the tube fittings to the converter and replace the insulation and cover.
• Replace the instrument cover and power up the analyzer.
• Allow the converter to burn-in for 24 hours, then re-calibrate the instrument.
9.3.9. Cleaning the Reaction Cell
The reaction cell should be cleaned whenever troubleshooting suggests. A dirty reaction cell
will cause excessive noise, drifting zero or span values, low response or a combination of
044100102 Rev A 151