6. Maintenance System Manual
Page 2-100 8/09 76.7300FP11/2, Rev A
Replacing a Fan Tray (Tellabs 7345 Switch only)
6.17 The following procedure may be used to remove the Fan Tray from the
shelf.
6.18 Replace a Fan Tray from the shelf by performing the following steps:
__ 1. Observe the Caution at the beginning of this procedure and verify that
you have the replacement fan available and removed from its static
bag before continuing with the next step.
__ 2. Perform the steps in the Module Replacement Pre-Checklist,
page 2-92.
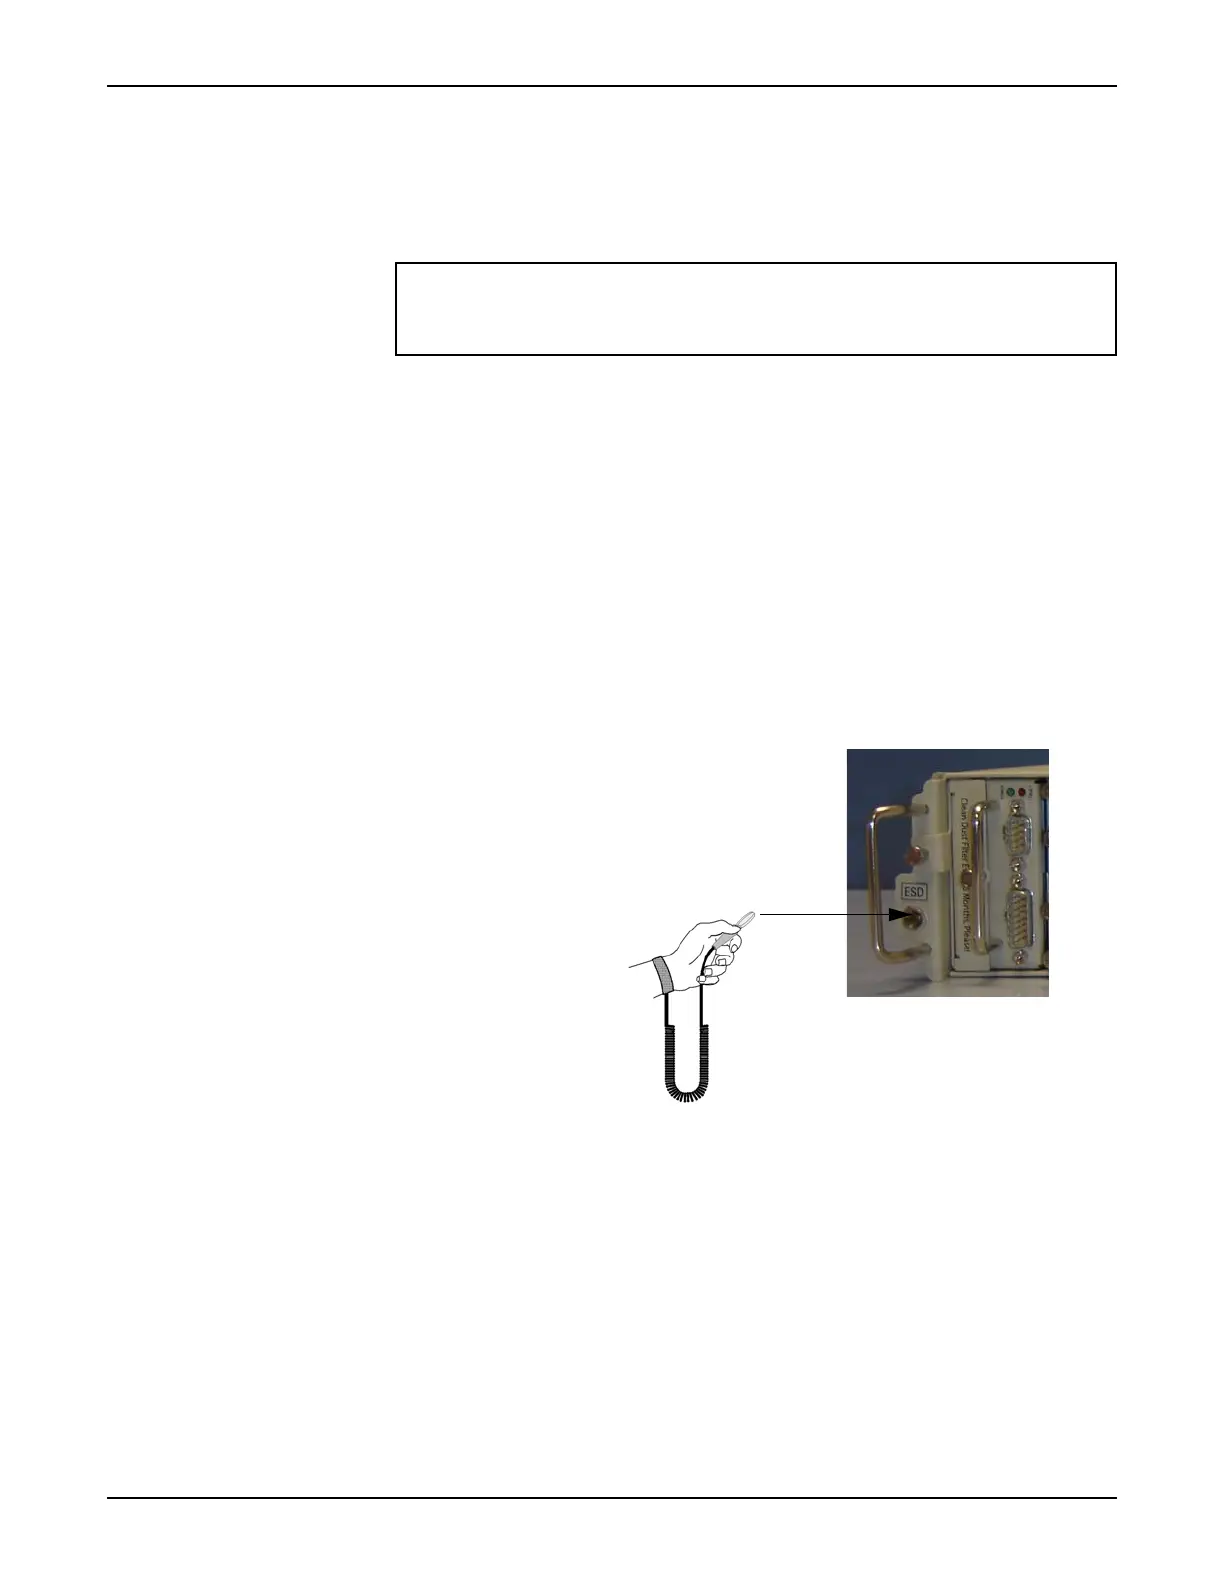
__ 3. Use an antistatic wriststrap connected to the shelf to ensure you are
adequately grounded while installing or servicing the system. Do this
to avoid damaging components sensitive to static electricity. Connect
the antistatic wriststrap to the shelf as shown in Figure 6.10,
page 2-100.
Figure 6.10 Connect Antistatic Wriststrap to Shelf
__ 4. Disconnect all cables connected to the Fan Tray.
__ 5. Loosen the thumbscrew that fastens the module to the shelf.
__ 6. Pull out the Fan Tray using the handle and store it in its antistatic
packaging.
__ 7. Remove the replacement Fan Tray from its antistatic packaging.
__ 8. Install the replacement Fan Tray in slot 1 of the shelf.
__ 9. Securely fasten the replacement Fan Tray to the shelf by tightening
the module’s thumbscrew.
__ 10. Reconnect all cables to the replacement Fan Tray.
__ 11. Verify that the Power LED is green and the Fault LED is off.
Caution:
The system may overheat if this procedure is not completed in a timely manner.
 Loading...