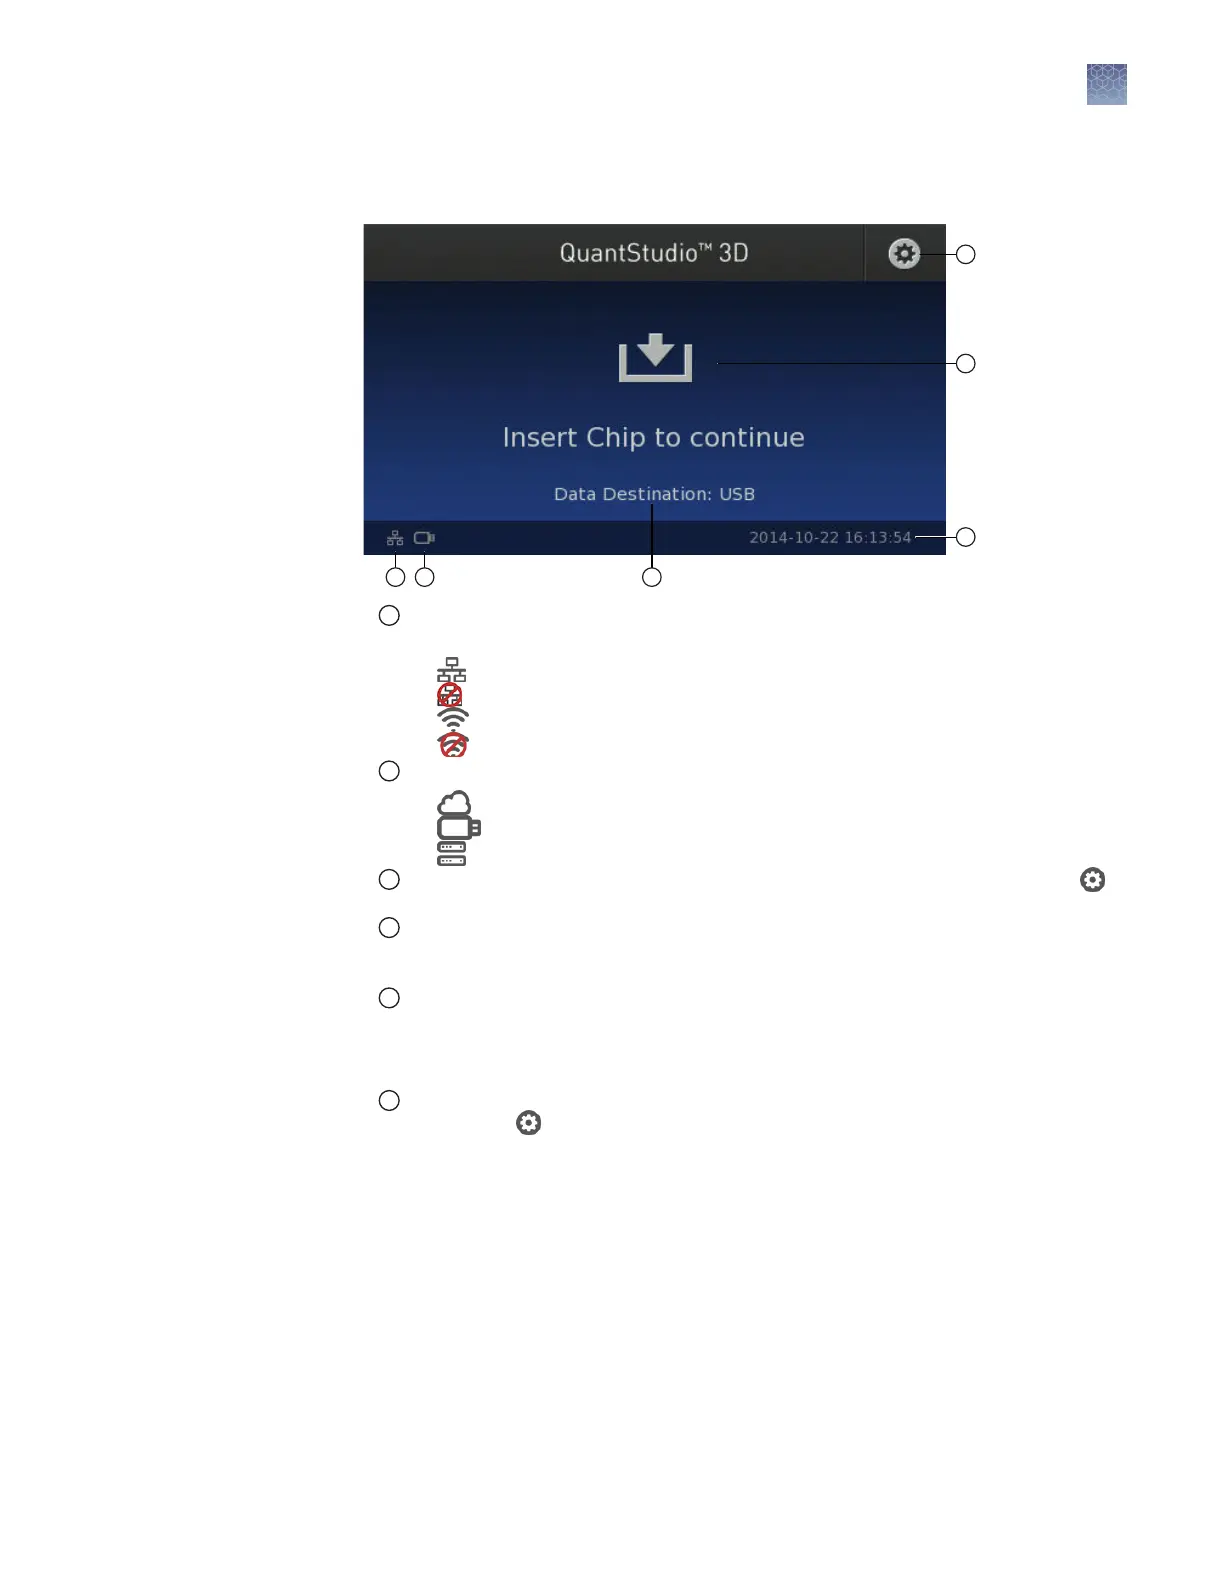
About the instrument interface
1
Network status icon—Represents the status of the QuantStudio
™
3D Digital PCR Instrument
network connection:
•
—Wired (Ethernet) connection selected; connected to network.
•
—Wired (Ethernet) connection selected; no connection available.
•
—Wireless connection selected; connected to network.
•
—Wireless connection selected; no connection available.
2
Data destination icon—Represents the selected data destination:
•
—Connect cloud-based platform destination selected.
•
—USB drive destination selected.
•
—Network share destination selected.
3
Data Destination—The name of the location where the instrument will save data. Touch ,
then touch Data Destinations to select a location.
4
Settings button—Touch to open the Instrument Settings menu that allows you to set the
system date and time, the network connection, the data destination, and perform other
maintenance and conguration tasks.
5
Chip presence indicator—Indicates whether the instrument is ready to load a chip. The
instrument immediately begins processing when a chip is loaded.
Note: If the instrument can read the chip ID on the chip lid, the ID is displayed on the
touchscreen. If the instrument cannot read the ID, it is listed as unknown.
6
Date/time stamp—Displays the date and time of the system in <yyyy-mm-dd>_<hh:mm:ss>
format. Touch , then touch Instrument Settings to set the system date and time.
Chapter 5 Image and analyze the chips
About the instrument interface
5
QuantStudio
™
3D Digital PCR System User Guide
41