1.
Prepare the physical connection to the network:
Connection Action
Wired
1.
Power on the QuantStudio
™
3D Instrument.
2.
Connect one end of a standard category-6 Ethernet cable to
the RJ-45 port on the back panel of the instrument and the
other end to an open network port.
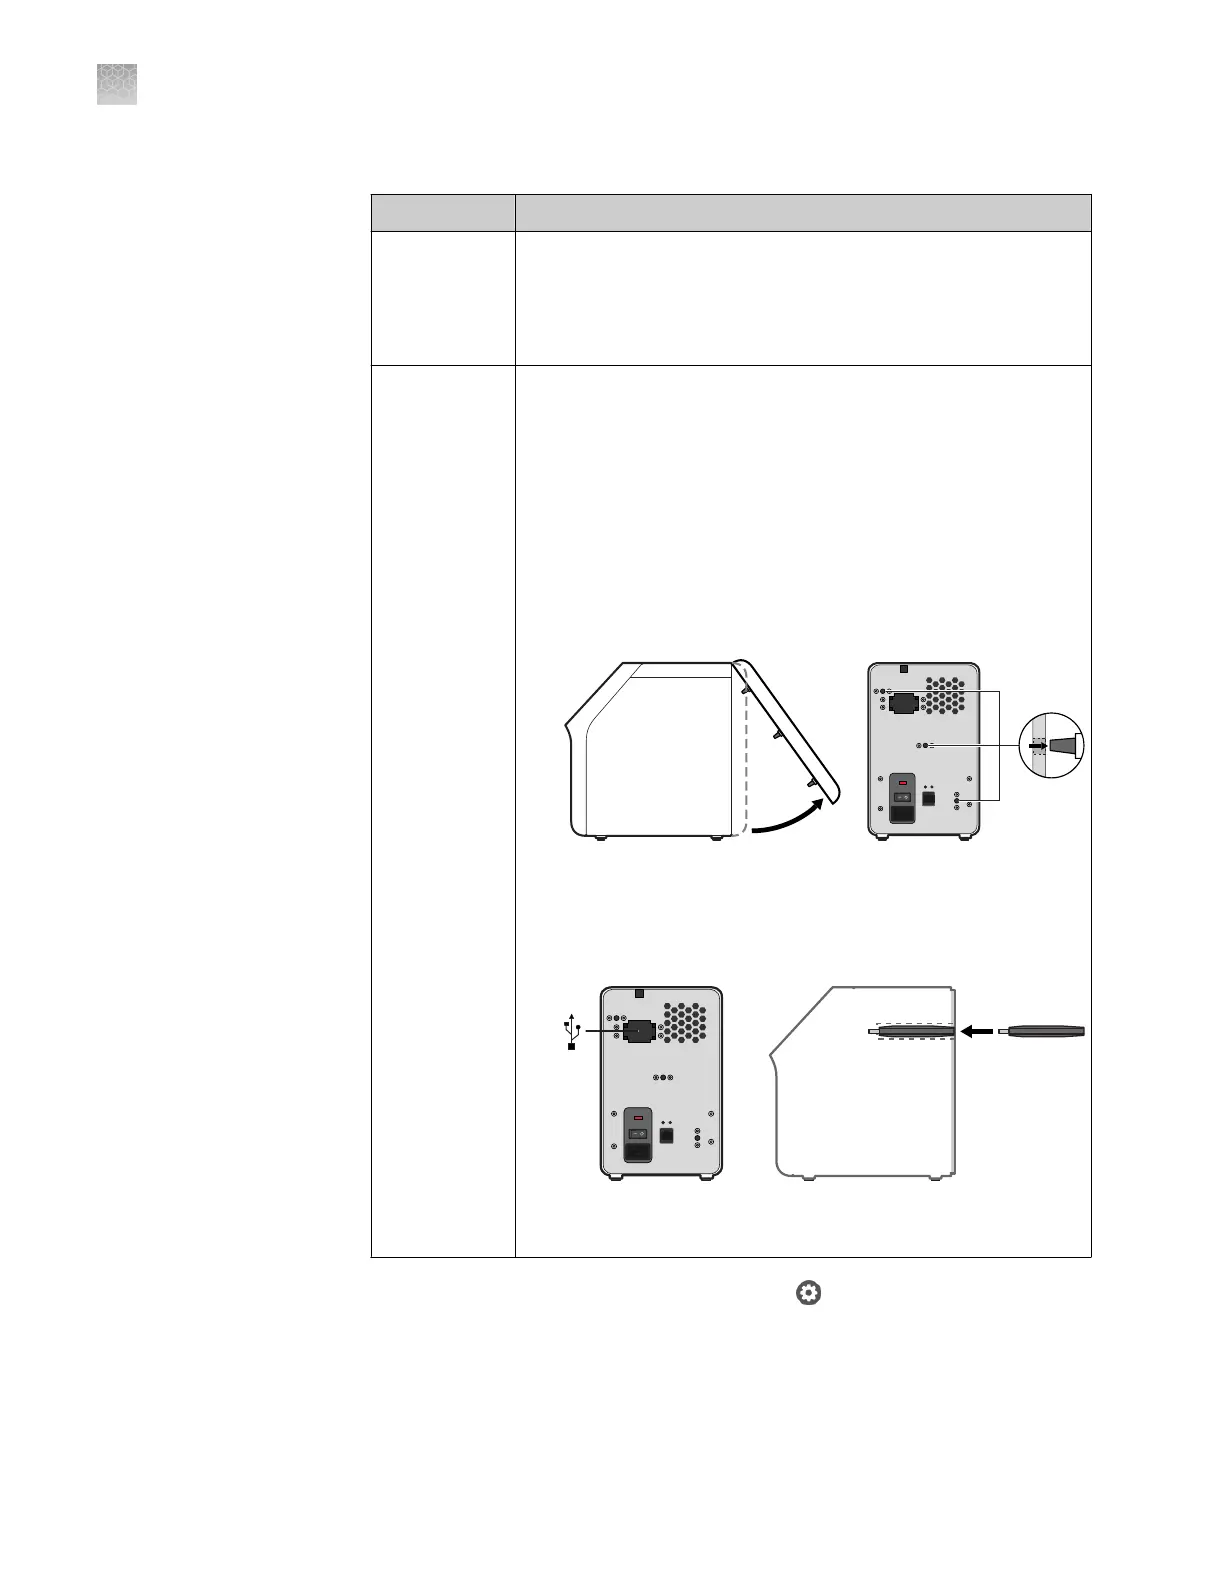
Wireless
1.
If required for network setup, record the MAC address of the
QuantStudio
™
3D Extended Arm WiFi Adapter, which is
located on the underside of the adapter.
2.
Power off and unplug the QuantStudio
™
3D Instrument.
3.
Turn the QuantStudio
™
3D Instrument over, then use your
ngers to carefully pry open the rear panel.
IMPORTANT! The rear panel is secured to the instrument
by three pegs that require signicant force to decouple. If
necessary, insert a athead screwdriver into the slot at the
base of the panel to pry it from the instrument chassis.
4.
Turn the instrument over, then uncap the WiFi Adapter and
insert it into the USB port inside the instrument. Firmly push
on the adapter to ensure that it is plugged in completely.
The internal USB port is accessed through a small opening in
the instrument chassis.
5.
Reattach the rear panel to the instrument chassis, then plug
in and power on the QuantStudio
™
3D Instrument.
2.
From the Main Menu of the touchscreen, touch
, then touch Instrument
Settings.
Connect the
QuantStudio
™
3D Digital PCR
Instrument to a
network
Appendix D Networking
Connect the instrument to the network
D
98
QuantStudio
™
3D Digital PCR System User Guide