5.
Pack the instrument in the provided packaging, without any accessories or
power cords. Include a hard copy of the Certicate of Instrument
Decontamination in the box.
Note: Repairs for instruments without the Certicate of Instrument
Decontamination are delayed.
6.
Afx the provided postage to the box, then ship the instrument to the
designated facility.
The repair process requires 2 to 3 weeks.
Replace the instrument fuses
If the fuses of your QuantStudio
™
3D Digital PCR Instrument fail, perform the
following procedure to replace them.
•
Fuses, 1.6A, Time-Lag T, 250VAC, 5 × 20-mm (2)
•
Safety glasses
•
Powder-free gloves
•
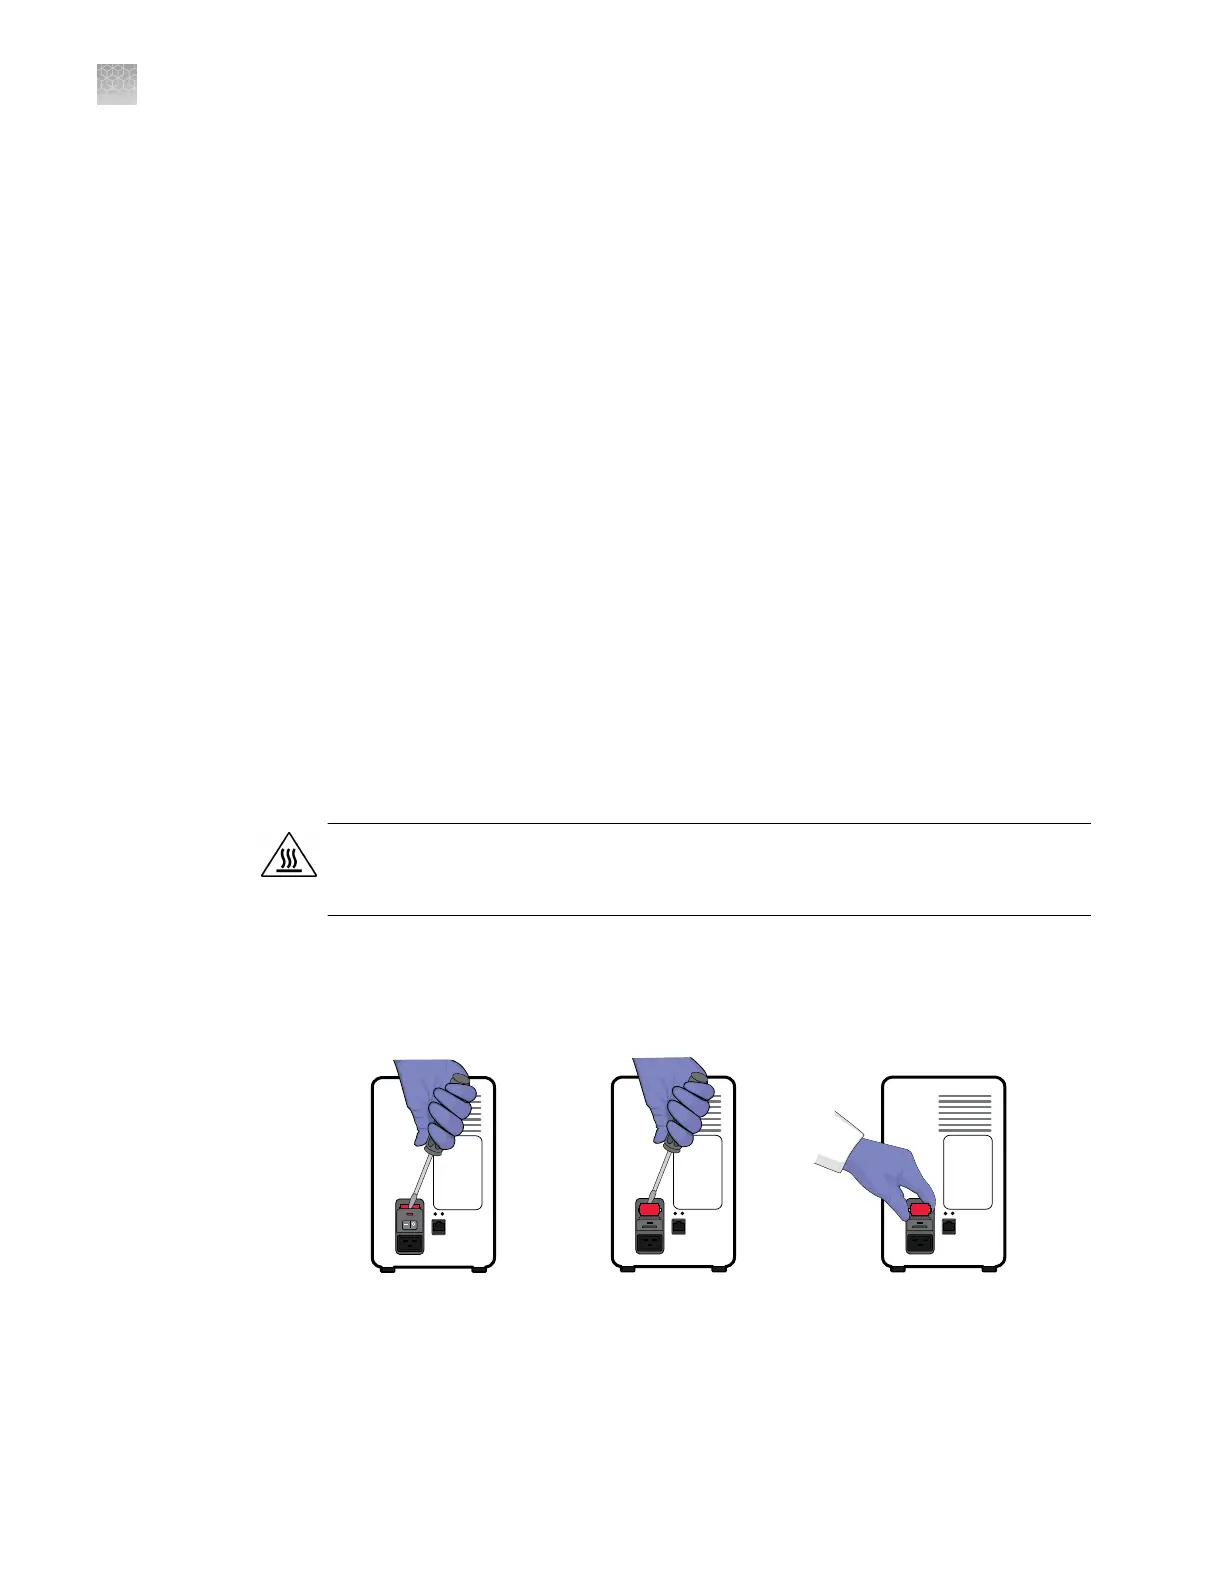
Screwdriver, athead
Replace the fuses
CAUTION! FIRE HAZARD. For continued protection against the risk of re, replace
fuses only with listed and certied fuses of the same type and rating as those
currently in the QuantStudio
™
3D Digital PCR Instrument.
1.
Power off, then unplug the QuantStudio
™
3D Digital PCR Instrument.
2.
Using a at-head screwdriver, pry open the fuse door, and remove the fuse
holder.
Materials
required
Appendix C Maintenance
Replace the instrument fuses
C
90
QuantStudio
™
3D Digital PCR System User Guide