Chip imaging
•
Prepared and thermal cycled chips
•
Isopropanol
•
Gloves, powder-free, nitrile
•
Low-lint polyester wipes, clean-room grade
For optimal efciency when running large numbers (>6) of chips, follow the guidelines
below:
•
Run the chips in alphanumeric order (according to chip ID) to help avoid
mistakes when entering sample information.
•
If you are running multiple chips, you can run the next chip in the series when the
touchscreen displays the Analyzing Chip screen, as described in the following
procedure.
Imaging data is always saved on the instrument, but you can also automatically
transfer the data from a run to a USB, the Connect cloud-based platform, or a
network destination, as described below.
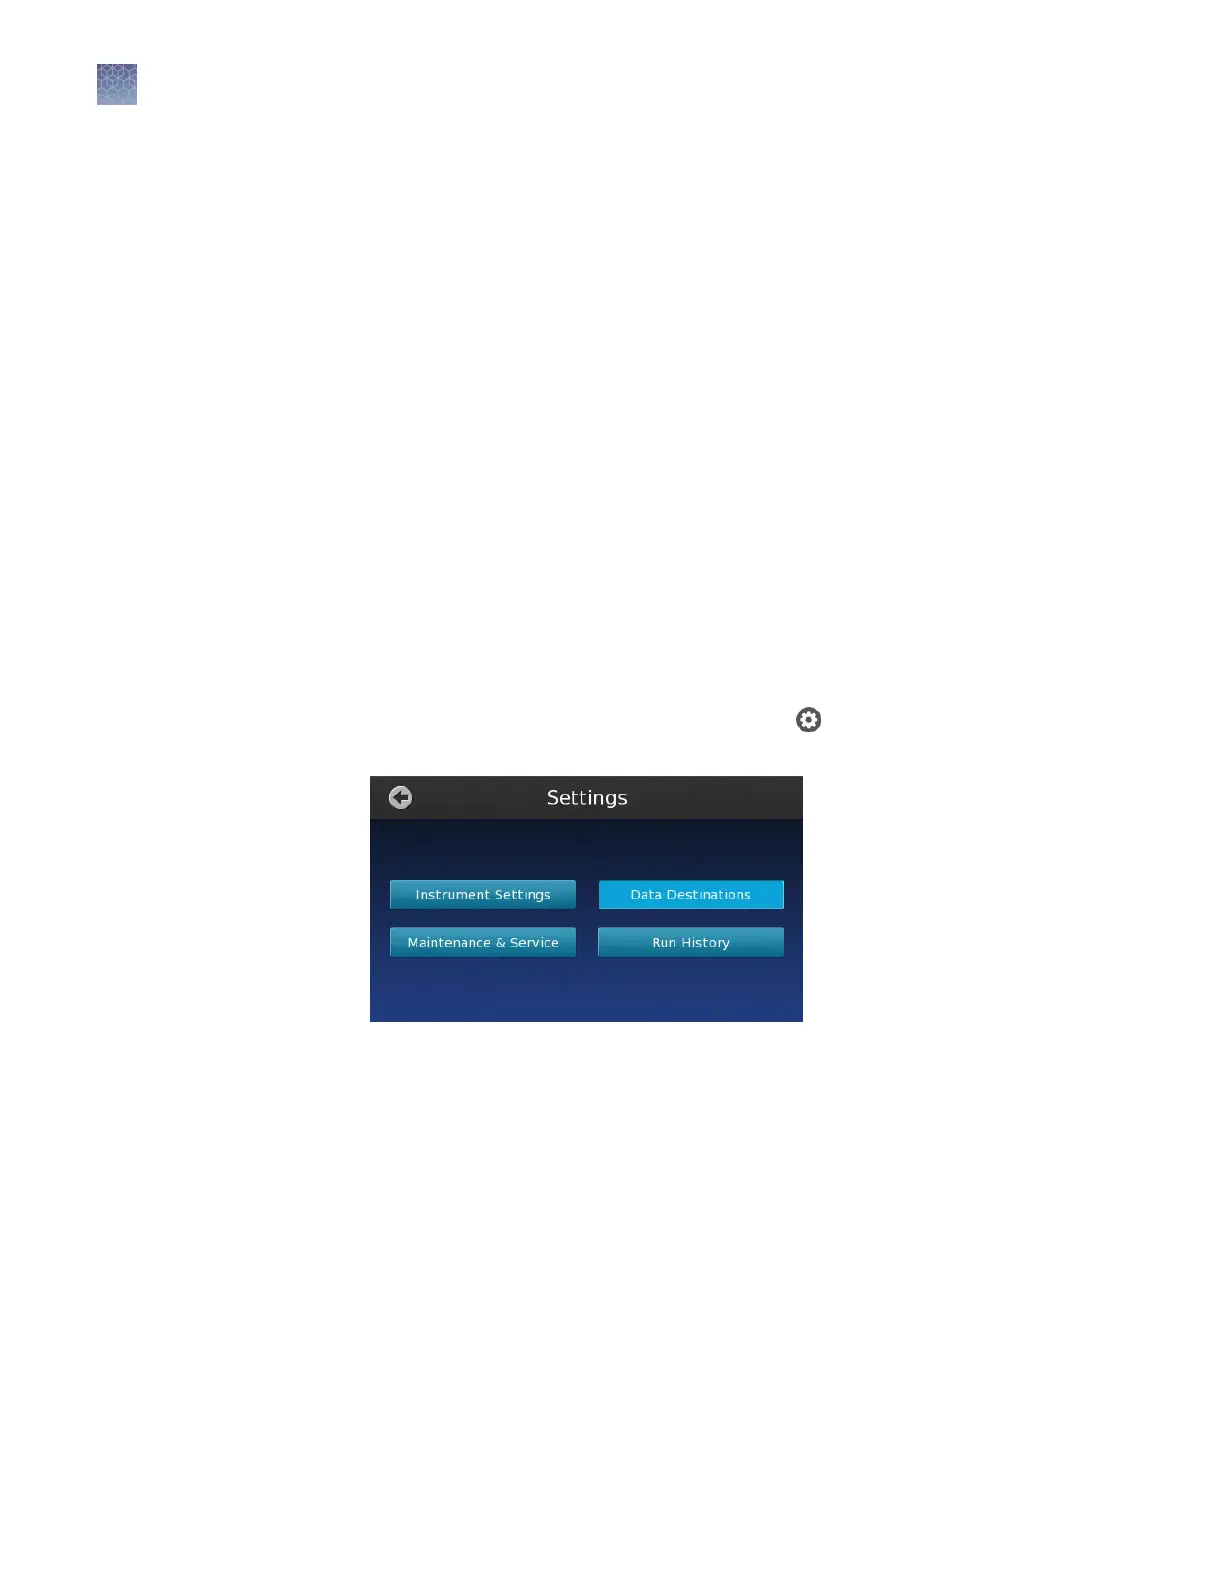
1.
From the Main Menu of the touchscreen, touch
to open the Settings menu,
then touch Instrument Settings followed by Data Destinations.
2.
In the Data Destinations screen, touch the desired option:
•
Select Instrument to only save data on the instrument.
•
Select My Cloud Profile (the Connect cloud-based platform) or My
Network Share to save to destinations that you can set up as described in
“Create a network destination to receive run data” on page 103.
•
Select USB to save to a USB key that you insert into the slot on the
instrument before imaging.
Materials
required
Guidelines for
imaging
multiple chips
Specify the
data
destination
Chapter 5 Image and analyze the chips
Chip imaging
5
42
QuantStudio
™
3D Digital PCR System User Guide