Before using the QuantStudio
™
3D Digital PCR Chip Loader, wait until the status light
illuminates solid green, indicating that the chip nest has reached operating
temperature.
1.
Open the package containing a QuantStudio
™
3D Digital PCR 20K Chip v2.
Gently grasp the chip by its sides and load it face-up into the chip nest.
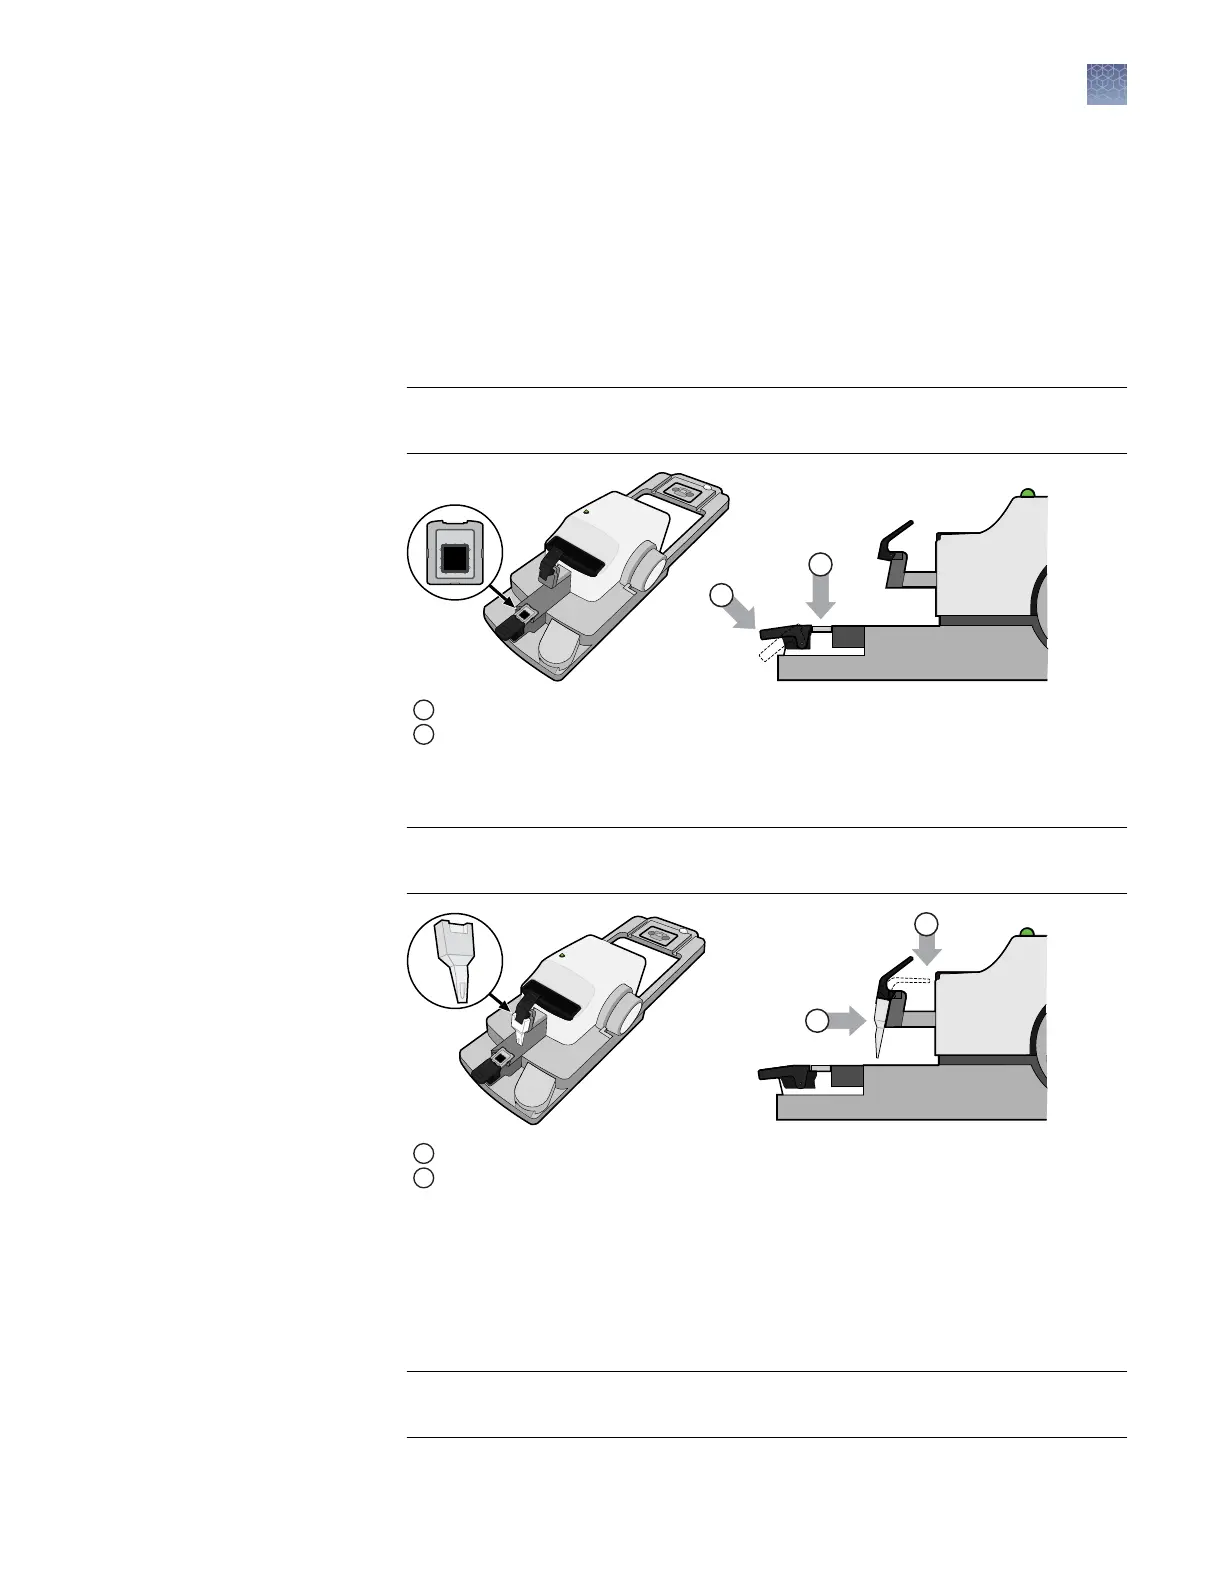
2.
Press down on the chip nest lever to open the clamp, and place the chip in the
nest. Release the lever to lock the chip into place.
IMPORTANT! Use the image next to the chip nest to correctly orient the chip
within the chip loader.
1
Chip nest lever
2
Chip nest
3.
Press the sample loading blade lever, then install the QuantStudio
™
3D
Digital PCR Sample Loading Blade into the loader head.
IMPORTANT! Press the blade rmly against the loader head to conrm that the
blade is properly seated.
1
Loading blade lever
2
Loading blade
4.
Grasping the lid by its sides, peel away the red protective lm from the back of
the chip lid. Avoid contact with the exposed sticky surface.
5.
Press the lid nest button, and carefully place the lid with the sticky side up into
the nest in the correct orientation. Slowly release the button to lock the lid in
place.
IMPORTANT! Ensure that the lid is oriented correctly, as shown in the gure
below. Do not release the lid nest button too quickly or the lid may pop out.
Load and seal
the chips
Chapter 3 Prepare the digital PCR reaction and load the chips
Load the chips using the QuantStudio
™
3D Digital PCR Chip Loader
3
QuantStudio
™
3D Digital PCR System User Guide
27