4.
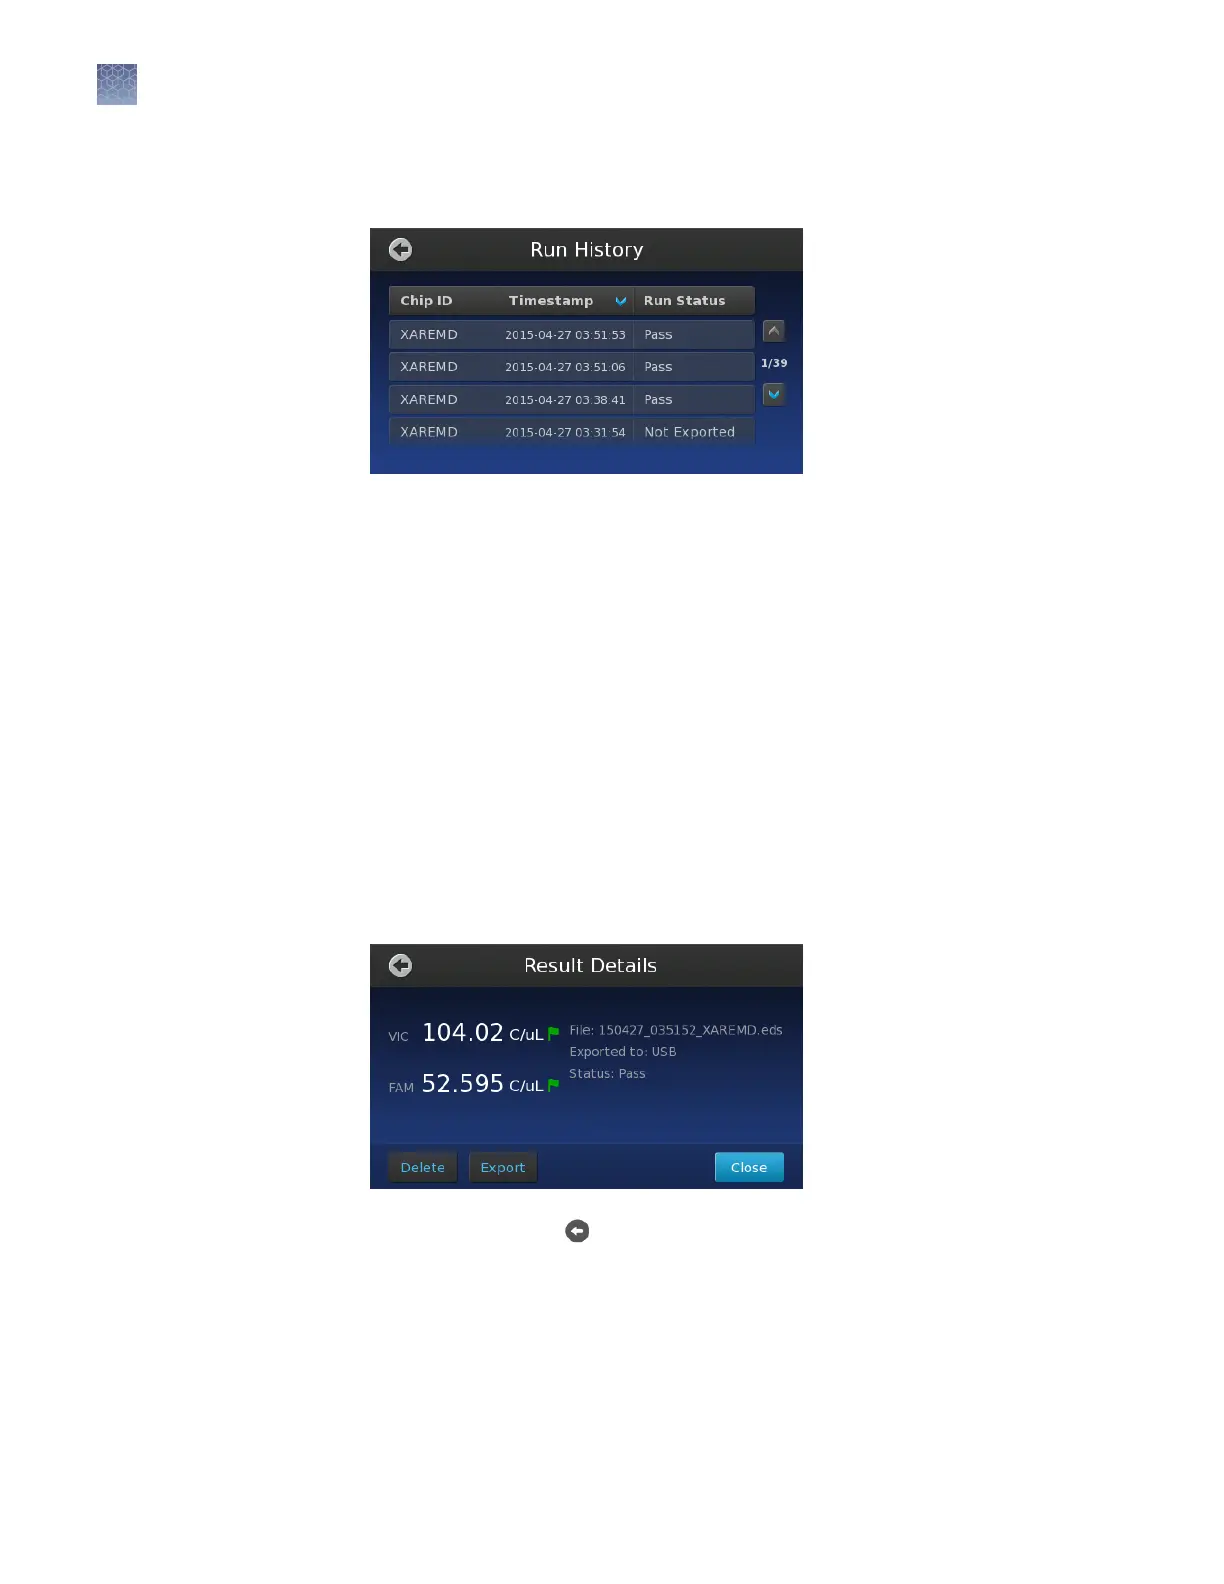
In the Run History screen, touch the entry of the experiment that you want to
transfer or view.
The Run History screen displays the data transfer status next to each le in the
instrument memory:
•
Pass
– The instrument successfully transferred the le to the selected
destination.
•
In Progress
– The instrument is either processing the imaging data for the
associated le, or transferring the le to the selected destination.
•
Not exported – File transfer not attempted, or the selected destination is
the instrument (le transfer not required).
•
Export Failed – The instrument was unable to transfer the le to the
selected destination.
•
Run Failed – The instrument was unable to process the imaging data for
the chip.
5.
In the Results Details screen, touch Export, then touch Export again to transfer
the le to the USB drive.
6.
When nished, touch
several times to return to the Main Menu, then remove
the USB drive from the instrument.
After exporting experiment (.eds) les to the USB drive, you can upload them to the
Connect cloud-based platform for analysis using the QuantStudio
™
3D
AnalysisSuite
™
Software.
Chapter 5
Image and analyze the chips
Primary analysis
5
50
QuantStudio
™
3D Digital PCR System User Guide