2.HOW TO MAKE COPIES
50 Enlarging or Reducing Images
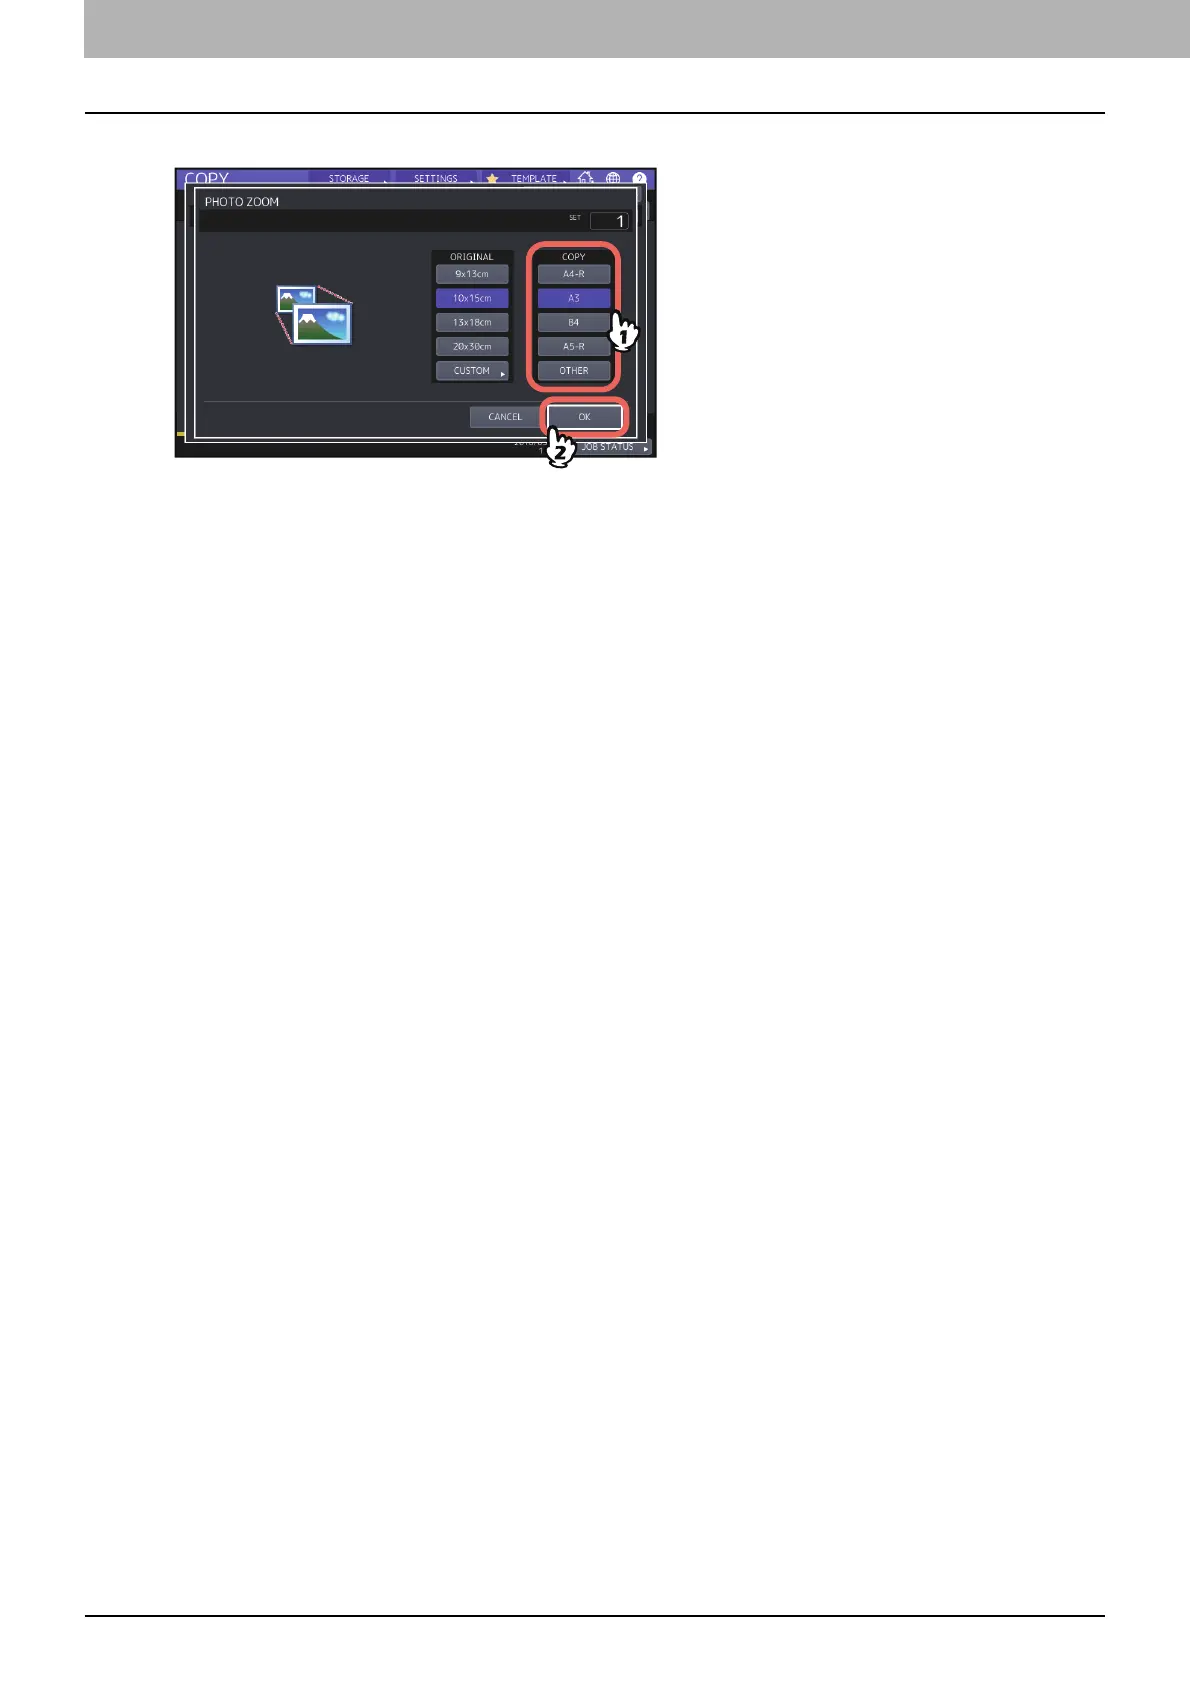
4
Select the desired copy paper size, and then press [OK].
5
Select other copy modes as required, and then press the [START] button on the control panel.
If “NON-SORT NON-STAPLE” is selected as a sorting mode, scanning of the original starts. If another sorting mode
is selected, follow the procedure below.
6
Place the next original, and then press [NEXT COPY] on the touch panel or the [START] button on
the control panel.
Scanning of the next original starts. If you have more than one original, repeat this step until the scanning of all
the originals is finished.
7
When the scanning of all the originals is finished, press [JOB FINISH] on the touch panel.
Copying starts.
 Loading...