2.HOW TO MAKE COPIES
Enlarging or Reducing Images 49
HOW TO MAKE COPIES
Copying photo originals in the optimal reproduction ratio for copy paper size (PHOTO
ZOOM)
Place the original on the original glass in a landscape direction.
If you want to select a paper size other than the following, you need to register the size as “OTHER” size. In this
case, register it in a landscape direction. Once you register this size, it will be specified every time you press
[OTHER] on the touch panel.
North America: LD, LG, LT, ST
Other than North America: A3, A4, B4, A5
For how to register it, see the following page:
P.46 “Registering paper sizes to “OTHER” size”
1
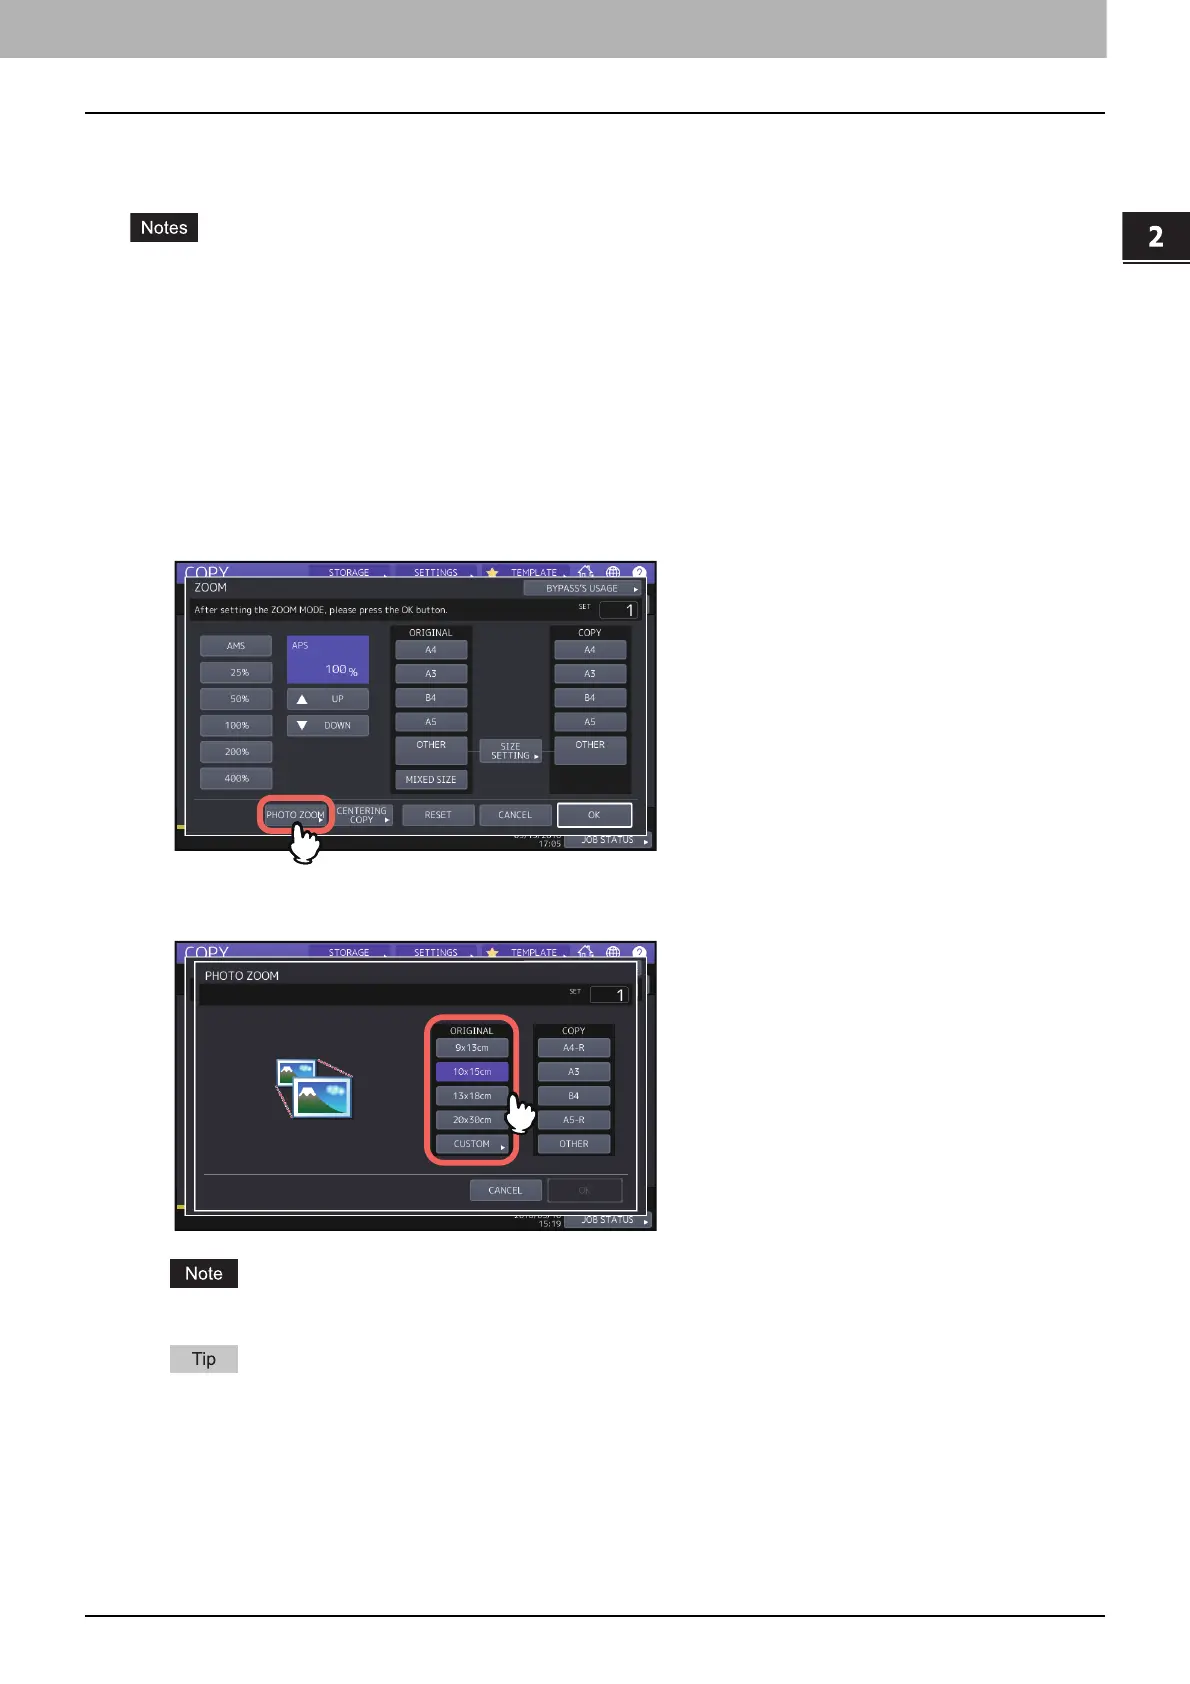
Press [ZOOM] on the BASIC menu.
2
Press [PHOTO ZOOM].
3
Select the original size.
The actual size for the [3" x 5"] button is 3.5" x 5.0".
When the size of the original is other than the ones below, key in the dimension of the original manually.
North America: 3" x 5", 4" x 6", 5" x 7" or 8" x 10"
Other than North America: 9 x 13 cm, 10 x 15 cm, 13 x 18 cm or 20 x 30 cm
P.51 “Setting photo originals in other sizes”
 Loading...