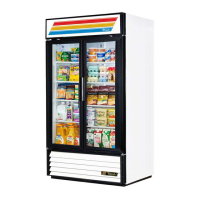
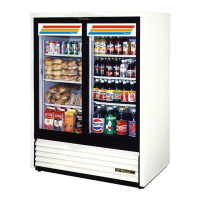
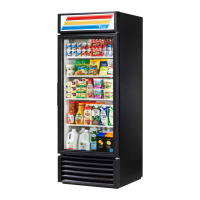
Do you have a question about the True GDM Series and is the answer not in the manual?
Instructions for removing packing materials from swing doors.
Instructions for removing packing materials from slide doors.
Procedure for installing castors on the bottom rail assembly.
Procedure for screwing leg levelers into corners of the rail assembly.
Instructions for leveling the unit using castors or leg levelers.
Inspect equipment for damage upon receipt.
Recommendations for refrigerant piping and joint types.
Procedures for leak checking and evacuating the system.
Steps for drawing a vacuum to dehydrate the system.
Steps for charging the system with refrigerant.
Final checks on pressure controls, thermostat, and voltage.
List of tools needed for temperature control adjustment.
Note regarding pre-calibrated controls for upright models.
Definitions for cut-out and cut-in temperatures.
Steps for adjusting Danfoss temperature controls for high altitude.
Factory-set defrost times and recommended settings.
List of tools for defrost timer adjustment.
Instructions for locating the defrost timer in different cabinet models.
Procedure for adjusting time-initiated, temperature-terminated defrost controls.
Explanation of time-initiated, time-terminated defrost systems.
Monthly maintenance tasks for the cabinet.
Quarterly maintenance tasks for the cabinet.
Yearly maintenance tasks for the cabinet.
Explanation of Polyol Ester lubricant and its properties.
Precautions for service contractors using specific compressors.
Diagram and explanation of the capillary tube refrigeration system.
Schematic diagram of the remote refrigeration system.
Explanation of liquid floodback and prevention methods.
Instructions for replacing perimeter heaters.
Instructions for replacing lid rails, trunions, and gaskets.
Warning about electrical hazards for field personnel.
List of tools needed for temperature control replacement.
List of components in the relay kit.
Procedure for disconnecting power before starting.
Instructions for removing the louvered grill.
Steps to access wire connections by removing ballast box cover.
Instructions for mounting the relay to the underside of the unit.
Detailed wiring instructions for the relay and temperature control.
Steps for replacing the existing temperature control with a new one.
Procedure for securing the relay shield.
Instruction to unplug the cooler.
Steps to check the relay operation after installation.
Instructions for reinstalling the ballast box cover.
Instructions for reinstalling the louvered grill.
Instruction to reconnect the power cord.
Final step to check cabinet operation after replacement.
List of tools needed for temperature control change-out.
Instruction to unplug the cooler.
Setting the temperature control to the OFF position.
Procedure for removing the control knob.
Removing screws holding the mounting plate.
Removing screws holding the control.
Disconnecting wires from the temperature control.
Removing permagum and control bulb.
List of tools for installing the new control.
Inserting the control bulb into the copper sleeve.
Sealing the sleeve end with permagum.
Connecting wires to the new temperature control.
Fastening the control to the mounting plate.
Fastening the mounting plate to the cooler.
Replacing the knob and setting the control.
Plugging in the cooler.
Recommended procedure for installing surge protection.
List of tools required for surge protector installation.
Steps to remove the louvered grill.
Steps to access the ballast box.
Locating knockout and installing a snap bushing.
Steps to create wire connections for the surge protector.
Identifying power cord wiring for cutting.
Continuation of locating power cord wiring for cutting.
Attaching the surge protector to the ballast box.
Splicing interconnecting wires to the surge protector.
Enclosing wiring and starting up the unit.
List of tools for glass insert replacement.
Removing the slide door.
Removing the nylon cord.
Preparing the door for work.
Removing glass insert holders.
Carefully prying loose broken glass.
Cleaning the door frame lip.
Positioning the new glass insert.
Replacing glass insert holders.
Reconnecting the nylon cord and replacing the door.
List of tools for wiper gasket installation.
Marking doors for wiper gasket placement.
Removing the doors.
Drilling out rivets to remove the wiper gasket.
Applying the new wiper gasket.
Securing the wiper gasket holder.
Adjusting wiper gasket for 3-door coolers.
List of tools for door removal and installation.
Safety note recommending two people to assist.
Note about unplugging heater wires on freezer doors.
Turning off the cooler.
Removing the louvered grill.
Unplugging door light feature.
Locating the top hinge assembly.
Removing the door stop pin and relieving spring tension.
Note about unplugging door light and heater wires.
Removing the bottom hinge assembly.
Placing the door on a flat surface.
List of tools for door replacement.
Note about checking stop pin location.
Assembling the top hinge of the replacement door.
Note on seating the hinge shaft.
Assembling the bottom hinge.
Aligning and attaching hinges.
Replacing the louvered grill.
Adjusting spring tension and stop pin.
Note about plugging in door light.
Note about plugging in heater wires.
Instructions for adjusting door hang.
List of tools for torsion spring replacement.
Note about skipping steps if spring is broken.
Turning off the cooler.
Locating the top hinge assembly.
Relieving spring tension.
Removing the stop pin and rotating the hinge shaft.
Technique for relieving spring pressure.
Note on reversed operation for left side doors.
Note about plugging in door light.
Removing the louvered grill.
Removing the bottom hinge assembly.
Placing the door on a flat surface.
Removing brass bushings.
Note on checking stop pin location.
Removing the broken torsion spring.
Inserting the new torsion spring.
Assembling the top hinge.
Note on seating the hinge shaft.
Assembling the bottom hinge.
Aligning and attaching hinges.
Adjusting spring tension.
Note about plugging in door light.
Note about plugging in heater wires.
Replacing the louvered grill.
Instructions for adjusting door hang.
List of tools for glass insert replacement.
Recommendation for two people to assist.
Note that door removal is not necessary.
Turning off the cooler.
Removing the rubber gasket.
Removing the door handle.
Removing back plates.
Prying loose broken glass.
Cleaning the door frame lip.
Supporting the glass insert with shims.
Placing the new glass insert.
Squaring the door with shims.
Applying tape to the glass insert.
Replacing back plates.
Replacing the door handle.
Snapping the gasket back.
List of tools for glass insert replacement.
Recommendation for two people to assist.
Note that door removal is not necessary.
Reference to earlier steps.
Freezing door heater wire disconnection.
Reference to earlier steps.
Rejoining heater wires with connectors.
List of tools for glass insert gas release.
Removing the slide door.
Removing the nylon cord.
Preparing the door for work.
Removing glass insert holders.
Prying loose broken glass.
Drilling holes for gas release.
Resealing drilled holes.
Cleaning the door frame lip.
Placing the new glass insert.
Replacing glass insert holders.
Reconnecting the nylon cord and replacing the door.
Warning about sharp glass edges.
List of tools for glass insert replacement.
Disconnecting power.
Disconnecting the IDL plug.
Loosening spring and removing door.
Removing door handle and preparing door.
Removing gasket and back plates.
Prying loose broken glass.
Disconnecting heater wires.
Cleaning the door frame lip.
Installing the new glass insert.
Note on logo placement.
Installing gasket and back plates.
Mounting door and tightening spring.
List of required tools.
Safety note recommending two persons.
Note on not needing to remove the door.
Disconnecting electrical power.
Removing and preparing the door.
Removing the door gasket.
Removing the door handle.
Removing back plates.
Prying out plastic shims.
Disconnecting wiring to heaters.
Wiring connection information.
Removing the glass insert.
Safety note for handling glass.
Exposing heater wires.
Removing old tape from the door frame.
Re-installing the glass insert.
Note on logo placement.
Squaring the glass insert.
Replacing backplates, handle, and gasket.
Re-installing the door.
Unplugging and removing grill.
Removing and preparing the door.
Removing the door gasket.
Removing back plastic.
Removing the glass insert.
Removing strain relief bushing.
Accessing lamp holder and harness.
Cutting lamp holder wires.
Removing the door harness.
Checking new cord dimensions.
Placing strain relief.
Routing the door harness.
Stripping wires.
Matching and crimping wires.
Reinstalling light channel.
Reinstalling strain relief.
Replacing the glass insert.
Replacing back plastic.
Replacing gasket and hanging door.
Note on running a test before re-hanging.
Routing harness per figures.
Placing the "P" clip.
Note on replacing p-clip for larger cords.
Plugging in receptacle and reinstalling grill.
Plugging in and testing.
Wiring pairing guide for door harness and lamp holder.
Checking for damage to door or cabinet.
Leveling doors by adjusting legs.
Aligning doors via bottom hinge adjustment.
Safety warning for handling glass.
Removing gasket from base.
Removing gasket base screws.
Loosening glass insert.
Lifting the door frame.
Shimming the glass insert.
Pressing insert and reinstalling gasket.
List of required tools.
Drilling pilot hole for lock cup.
Drilling hole for lock cup.
Drilling insulation for lock cup.
Marking line for lock cup.
Inserting lock cup and assembly.
Installing the latch.
Preparing door trim for lock plate.
Note for consulting technical service.
List of required tools.
Marking center lines for barrel lock installation.
Drilling hole for barrel lock.
Removing door jam gasket.
Marking plastic fill-in for alignment.
Cutting plastic breaker.
Forming lock box in foam.
Installing lock assembly.
Installing fill-in plate and checking latch.
Reminder to install left door gasket.
Marking door for latch tube.
Installing lock bar assembly.
Positioning lock bar.
List of required tools.
Preparing for installation.
Drilling hole for lock installation.
Drilling inner wall for lock.
Caution about drilling depth.
Removing insulation.
Checking lock cylinder fit.
Placing backing plate and securing cylinder.
Attaching lock arm.
Removing door gasket.
Determining strike plate height.
Removing plastic channel section.
Attaching strike plate.
Replacing rubber gasket.
Checking operation.
Installing split standard.
Note on shorter piece placement.
List of required tools.
Removing the left side door.
Positioning the ratchet bar.
Drilling pilot hole for ratchet bar.
Caution about drilling depth.
Cutting gasket for ratchet bar.
Replacing door and checking operation.
Note on bending ratchet bar.
Locking the cabinet.
List of required tools.
Removing the left side door.
Positioning and marking plastic door stop.
Applying double-sided tape.
Drilling holes for door stop.
Installing screws for door stop.
Replacing door and checking operation.
Note on door stop length and screw count.
List of required tools.
Replacing the lid handle.
Sliding ratchet bar through handle.
Sliding locking cylinder.
List of kit contents for overshelf.
List of required tools.
Placing washer and inserting bolts.
Positioning shelf support.
Threading bolts into inserts.
Installing the second shelf support.
Holding shelf and threading bolts.
Adjusting shelf assembly.
Tightening bolts.
Caution about weight limits and standing on overshelf.
Procedure for installing crumb catcher.
List of required tools.
Positioning crumb tray template.
Removing burs from drilled holes.
Removing cutting board.
Temporarily holding crumb tray.
Drilling holes for crumb catcher.
Installing plastic inserts.
Fastening crumb catcher.
List of required tools.
Aligning cutting board holes.
Taping work surface.
Placing anchor bracket.
Marking and drilling holes.
Assembling and lubricating riv-nut tool.
Inserting rivnut assembly.
Securing and turning crimping tool.
Rivnut expansion.
Locating and positioning hood cover.
Removing slotted thumb screw.
Placing and aligning hood cover.
Repeating for both ends.
List of required tools.
Masking mounting surface.
Positioning service shelf.
Marking mounting holes.
Threading rivnut onto tool.
Caution about overtightening.
Turning hex nut, breaking loose, removing tool.
Removing tape and replacing shelf.
Aligning and screwing bolts into threaded rivnuts.
List of required tools.
Taping off area for anchoring.
Positioning shelf legs.
Centering shelf legs.
Adjusting rear legs for positioning.
Marking elevated surface.
Assembling and lubricating riv-nut tool.
Inserting rivnut assembly.
Securing and turning crimping tool.
Rivnut expansion.
Note on hardware tapping.
List of kit contents for sneeze guard.
List of required tools.
Placing washers on bolts.
Inserting bolts into support component.
Threading bolts into inserts.
Repeating steps for other end.
Removing protective covering.
Securing plastic shield.
Adjusting and tightening supports.
Care and cleaning instructions for sneeze guard components.
Instructions for installing castors or leg frames.
Procedure for installing remote CO2 container.
List of required tools.
Removing knockout plug.
Boring hole for CO2 line.
Procedure for installing remote CO2 container.
List of required tools.
Removing knockout plug.
Boring hole through insulation.
List of kit materials.
Positioning upper mounting brackets.
Mounting lower mounting brackets.
Sliding Vandal panel onto brackets.
Repeating for other panel.
List of required tools.
Unplugging the cooler.
Positioning bracket A.
Centering bracket.
Drilling holes for bracket A.
Riveting bracket A.
Mounting brackets B.
Caution to check dimensions.
Positioning bracket B.
Checking bracket height.
Drilling and fastening bracket B.
Note on defining right side.
Drilling holes in door tracks.
Sliding panel into vertical track.
Hanging center panel on bracket A.
Note on locked panels.
Locking panels into brackets B.
List of required tools.
Instructions for calibrating refrigerator temperature control.
Instructions for calibrating freezer temperature control.
Steps for calibrating temperature control.
Unplugging the cabinet.
Setting control to #9.
Removing control and locating screws.
Adjusting temperature control.
Note on turn adjustment equivalence.
Re-installing the control.
Resetting control to #5.
Checking control operation.
Calibration instructions for 20DT thermometer.
Note on factory calibration.
Immersing sensor in liquid bath.
Recalibrating thermometer.
List of common compressor complaints.
Potential causes for compressor complaints.
Recommended repairs for compressor issues.
List of common unit complaints.
Potential causes for unit complaints.
Recommended repairs for unit issues.
List of required tools.
Inspecting the capillary tube assembly.
Note on securing cap tube.
Removing power supply.
Recovering refrigerant.
Removing shelves.
Removing wire back guards.
Note for freezers only.
Disconnecting drain line.
Lowering evaporator housing.
Removing left side evaporator screws.
Unsoldering capillary tube.
Recommendation for heat shield.
Unsoldering accumulator.
Recommendation for heat shield.
Drilling a hole in the floor.
Placing capillary tube assembly.
Marking suction line for cutting.
Joining suction line and accumulator.
Note on performing step outside cabinet.
Insulating suction line.
Placing assembly inside cabinet.
Soldering capillary tube and accumulator.
Soldering suction line.
Soldering cap tube to copper line.
Pressurizing system for leak check.
Pulling vacuum on unit.
Note on micron gauge recommendation.
Reassembling evaporator section.
Checking cabinet operation.
Placing and securing cover.
Replacing back guards.
Finishing cabinet reassembly.
Troubleshooting warm refrigerator.
Troubleshooting warm freezer.
Methods for replacing capillary tubes in refrigerators.
Methods for replacing capillary tubes in freezers.
Troubleshooting compressor not running.
Safety note on discharging capacitors.
Substituting start capacitor.
Using ohmmeter for capacitor testing.
Troubleshooting compressor tripping on overload.
Low suction pressure indicating charge loss.
Troubleshooting compressor running but not refrigerating.
Diagnosis and replacement of freezer components.
Checking defrost time clock functionality.
Checking defrost control on drain pan.
Checking coil defrost heater.
Checking drain tube heater.
Checking cabinet temperature control.
Checking evaporator fan motor.
Checking C.R.O. valve.
Checking fan door switch.
Instructions for replacing freezer perimeter heater wire.
Warning about using qualified technicians.
Tests for electromagnetic rapid start circuits.
Tests for instant start electronic circuits.
Tests for preheat fluorescent circuits.
Wiring diagram for 2-door IDL cooler.
Wiring diagram for 2-door IDL freezer.
Instructions for cleaning the cabinet.
Introduction to stainless steel care.
Steps to prevent stainless steel rust.
Using appropriate tools for cleaning.
Cleaning with polish lines.
Using appropriate cleaners.
Treating water for cleaning.
Keeping equipment clean.
List of items not to use for cleaning.
Rinsing procedures after cleaning.
Warning against using hydrochloric acid.
Restoring passivity of stainless steel.
Recommended cleaners for various cleaning tasks.
Description of corroded stainless steel.
Explanation of passive film breakdown.
Information on stainless steel rusting susceptibility.
Factors that break down stainless steel passivity.
Explanation of mechanical abrasion.
Explanation of deposits and water effects.
Explanation of chloride effects.
Summary of stainless steel care points.
| Defrost Type | Automatic |
|---|---|
| Weight | Varies by model |
| Shelves | Adjustable Wire Shelves |
| Lighting | LED |
| Interior Finish | Stainless Steel |
| Compressor Location | Bottom |
| Energy Efficiency | Energy Star Certified |
| Capacity | Varies by model |
| Dimensions | Varies by model |