Vectorworks 2010 Products 77
Vectorworks Spotlight 2010 Getting Started Guide
Textures
Vectorworks provides a large number of predened textures with the installation of Vectorworks. As always, you’ll nd them, if you
haven’t already, in the Libraries. There will also be a le of textures on the DVD with this book.
While you can use the library textures, they are also useful for reviewing to see how they have been created. Use this study as the
basis for the creation of your own textures.
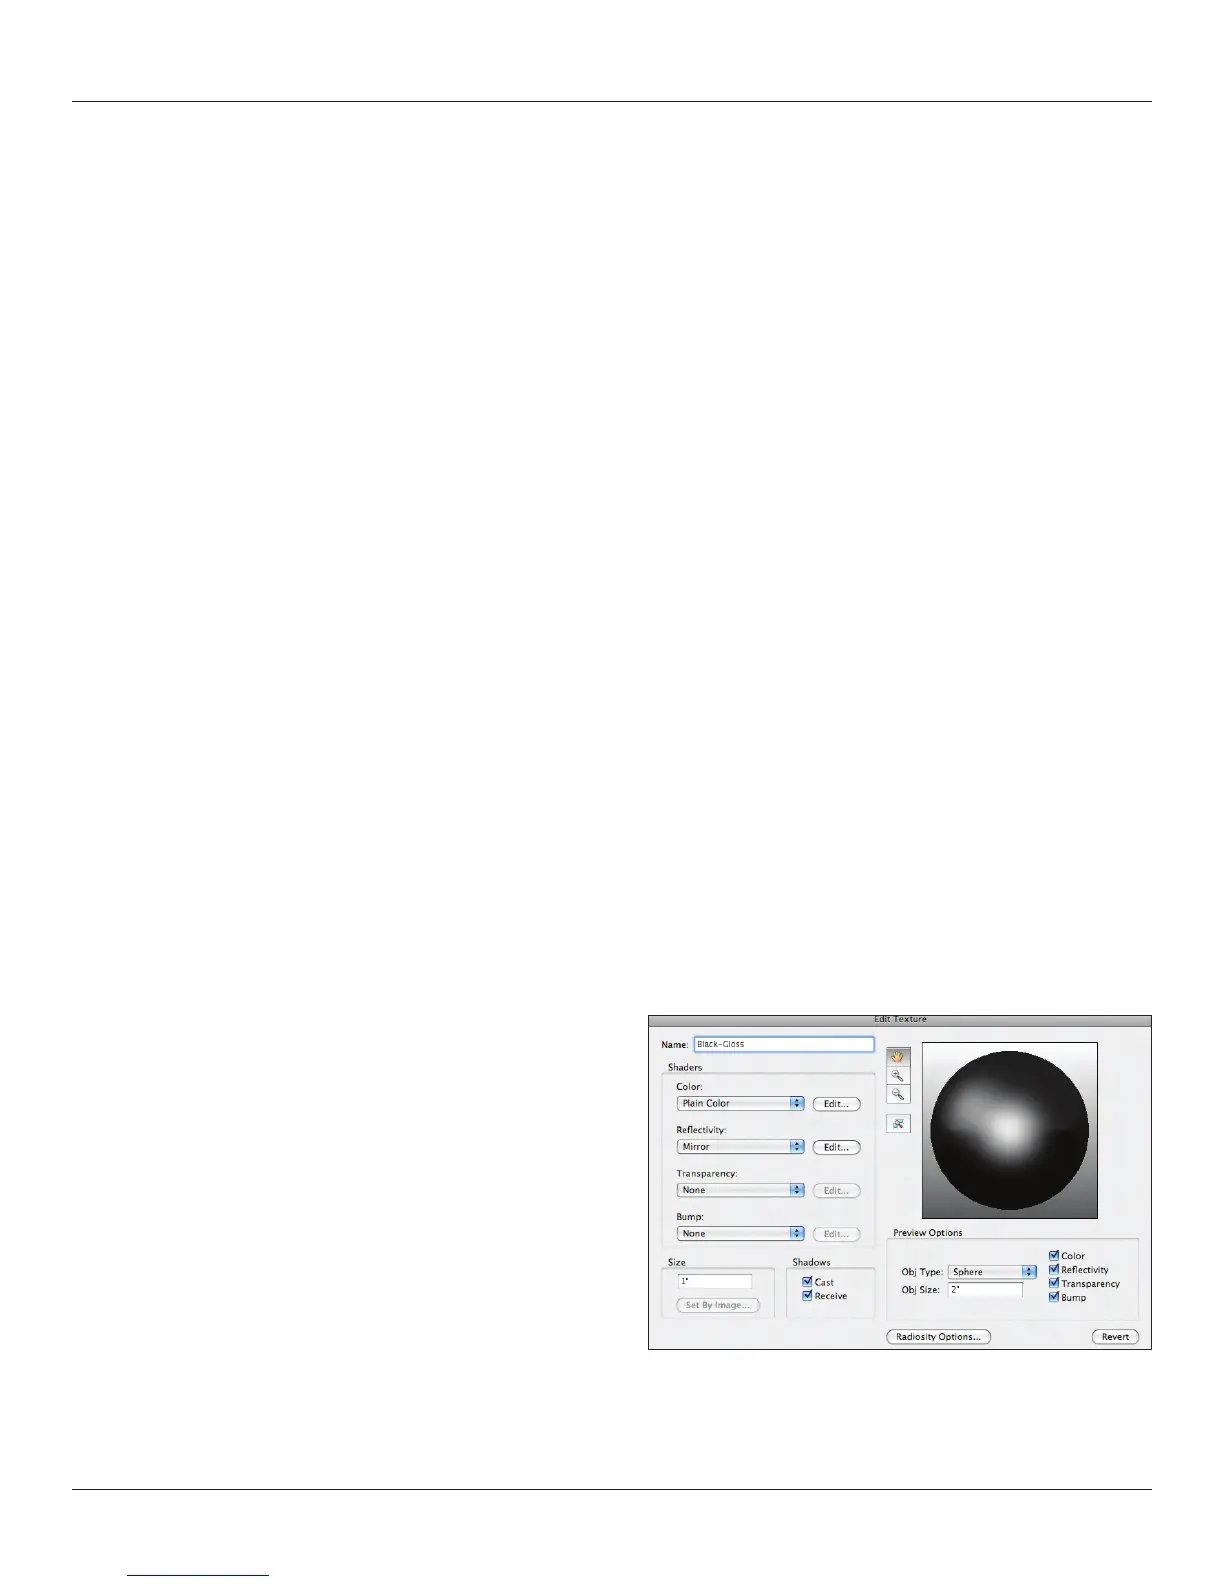
Creating Textures
You create a new texture just as you create a new Renderworks Background. Right click in the RB and select New Resource>New
Renderworks Texture. Note that in both cases, once you have a background or texture created, you can right click under the sub head
and you have ready access to the ‘new’ choice.
Let’s take a look at the dialogue. We’ll skip Name and move directly to the left columns of drop down choices. Take a look at each one
and well go through a couple of processes. Note now that you can affect each option by selecting the ‘edit’
button. Your texture will
preview in the right window and you can select the preview size and shape at the bottom right.
Notice that you can set the size of the texture on the bottom left. Like with Image Props, this option can be very useful. For example,
if you have a backdrop and you want the backdrop to be 50’ [15.24m] wide, set that size here and size the artwork appropriately to
your output.
If you will be using a repeating or tiling texture, keep the size of that texture as small as possible. A tiling texture is designed to repeat
without any seams or detectable pattern.
Let’s start with the top two options or ‘Shaders’ in the Color drop down; Filtered Image and Image Color. Both of these choice work in
essentially the same manner, EXCEPT that a ltered image can have a color overlay.
Notice that some of the choices in the Color menu are asterisked. Wrapped Shaders are 2D patterns projected onto a 3D face and
indicated by the asterisk. The other shaders are Image Based (discussed above and images mapped onto a surface) and Solid
Shaders which are 3D patterns applied to a 3D Surface.
Let’s start with a solid color. We’re going to make black, but
rst we’re going to look at the choices in the color libraries.
Notice that you have access to a large number of commercial
paint lines. Under the Reectivity Shader drop down you will
nd a predetermined setting for multi-layered paint. A very
useful combination. We’re just going to select a basic black for
the moment.