Vectorworks 2010 Products 89
Vectorworks Spotlight 2010 Getting Started Guide
Presenting your Drawings
Now you have a lovely 3D model, but you need to be able to disseminate this information to all kinds of people. Fortunately,
Vectorworks is also a powerful page layout application. We are going to create Viewports of your model and place them in Sheet
layers for organizing, annotation, and printing.
So, let’s be sure that you have that model and plot available and open to work with. I’ll wait.
Viewports and Sheet Layers
Before we start this, I want to remind you of what I said about the plot when discussing Create Plot and Model Command.
When we create Viewports to present the drawings, you will
Make a Top/Plan Viewport of the Plot Layer, with other appropriate
•
layers visible.
Cut Section Viewports of the Model Layer using
• View>Unied View
and with other layers visible as required/desired.
Use the Model View, Camera Tool, Unied View and other layers to
•
render and visualize the design and/or specic cues.
In the annotations space of your Plot Viewport, you will want to add a
•
2D symbol indicating boom placement. The 3D View of the
instruments shows the 3D Detail and you will want the 2D Symbol for
graphic clarity.
Let’s get started.
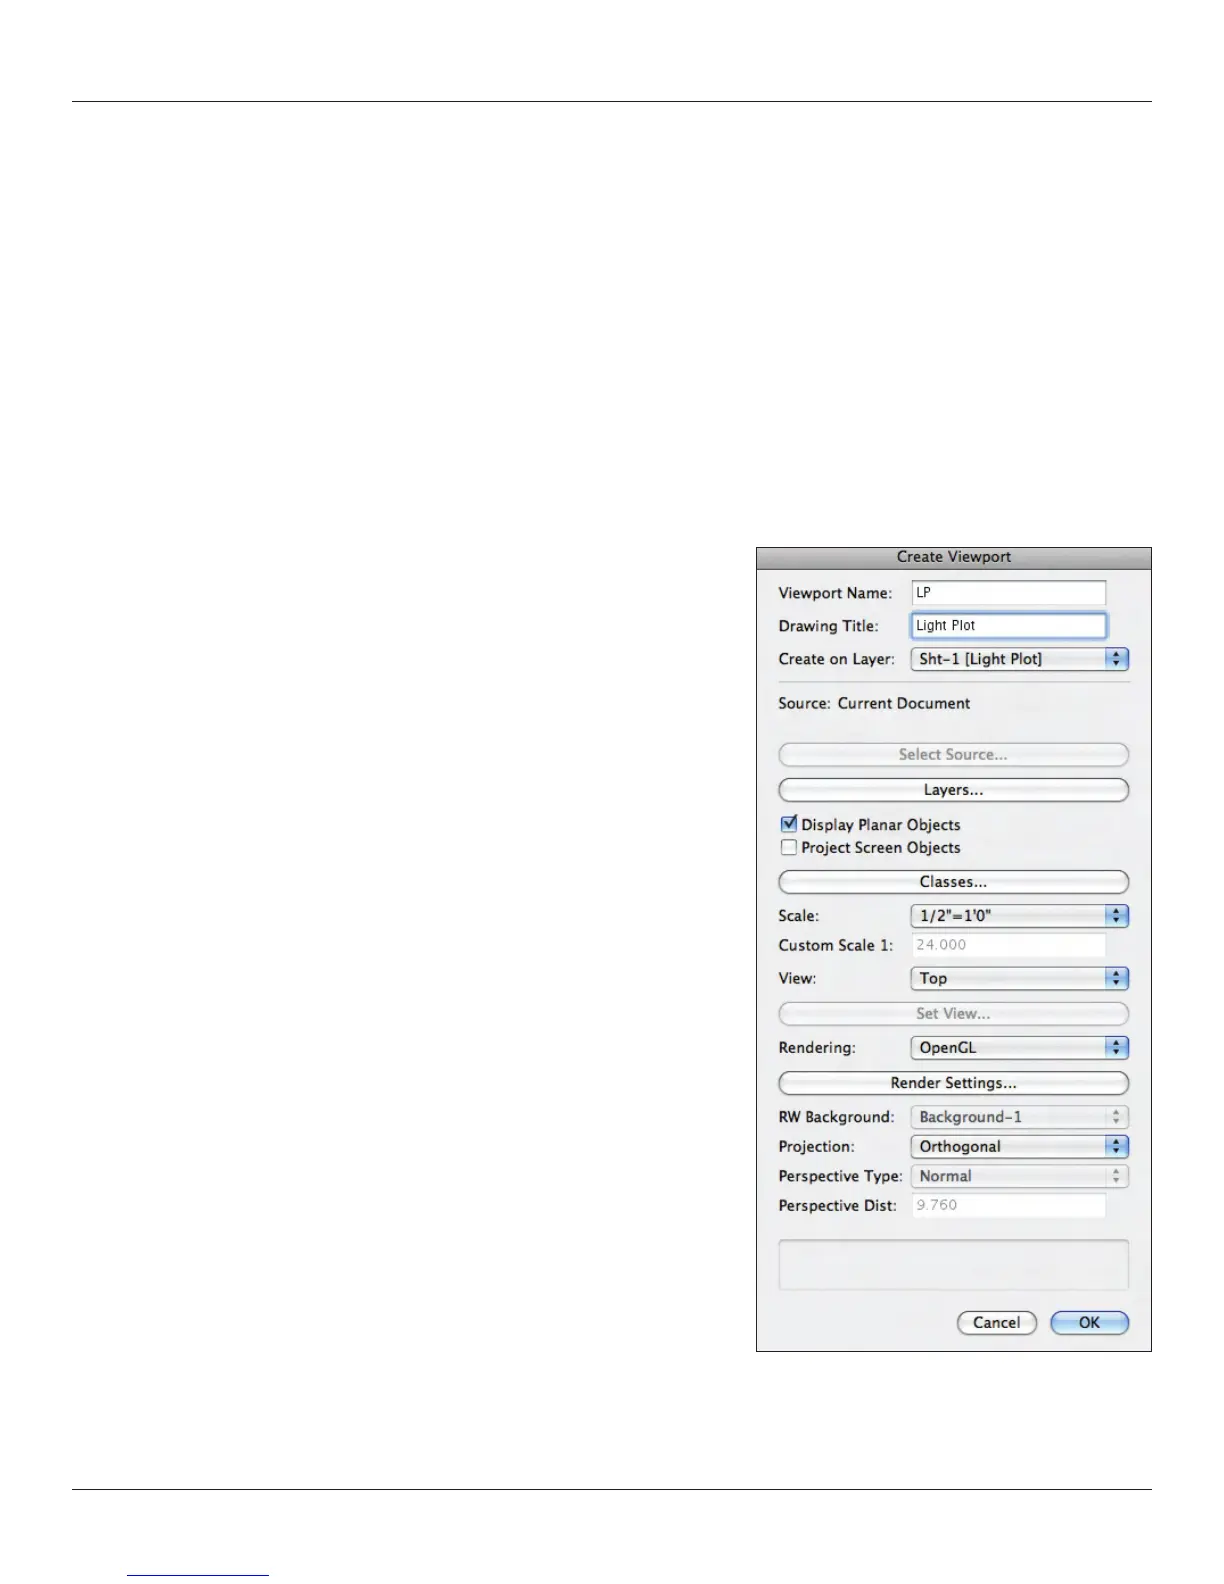
In the Top/Plan view go to View>Create Viewport and you will be presented
with the Create Viewport dialog box. Note that you can select the view, as
well as which layers and classes are visible.
Select New Sheet Layer from the Create on Layer drop down.