Vectorworks 2010 Products 15
Vectorworks Spotlight 2010 Getting Started Guide
Creating a Template
As mentioned, Vectorworks is completely customizable. We’re going to begin by looking at some of those customizations, just to get a
basic setup established.
Go to File>New to create a new document; you will have a choice between selecting a Blank Document or using a Template. A
Template le has various predetermined characteristics. Select Create blank document and we will determine our own parameters.
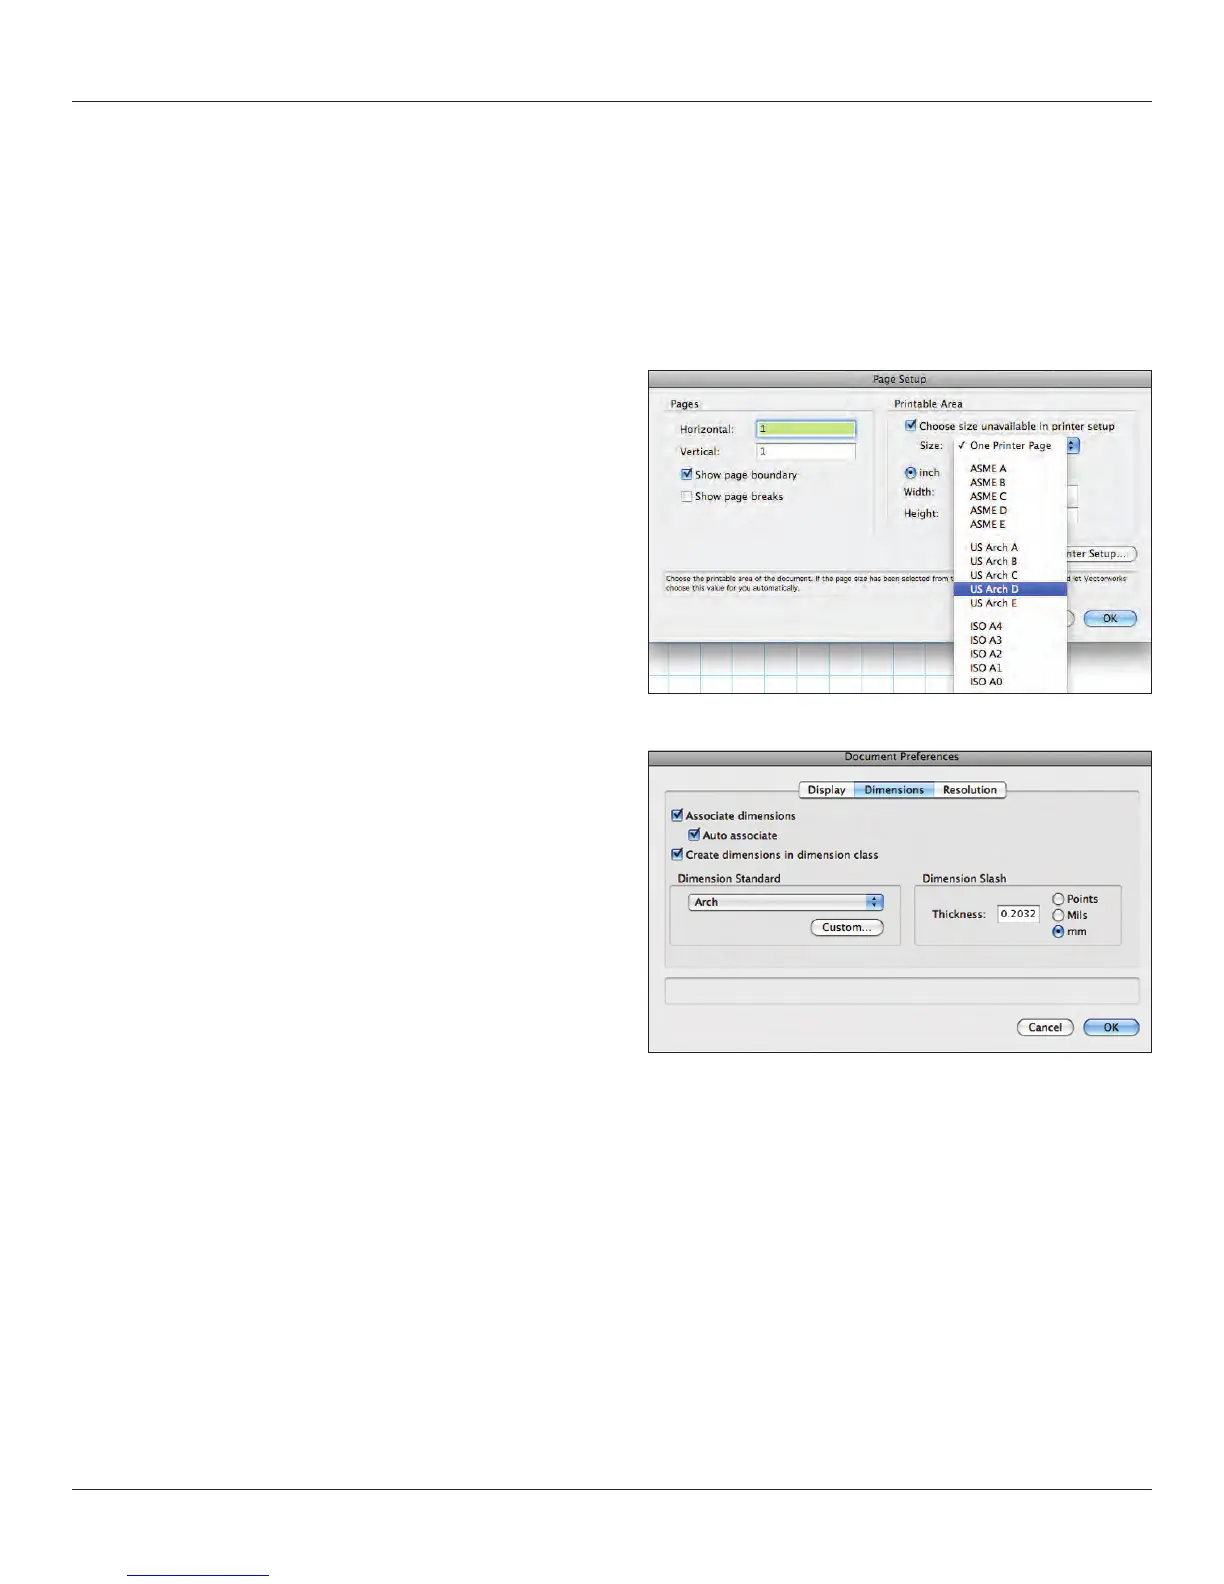
Go to File>Page Setup. Here we can establish the size of the page
and select a printer. The printer does not need to be selected now if
you will be printing from a PDF, which I recommend. Draw on a
sheet size that is the same as the size on which you plan to print.
Let’s establish an Architectural size D sheet (24” by 36”). If you are
not connected to a plotter, you will have to check “Choose size
unavailable in printer setup” on the top right and then US Arch D
from the drop down menu. On the left select “Show page boundary”
and de-select “Show page breaks.” Showing breaks will clutter your
drawing area with division markers, likely dividing the 24 x 36
pages into 8 ½ x 11 chunks.
Click OK and now we will begin to make some specic settings.
Go to File>Document Settings> Document Preferences; you will
see three tabs. We will leave the left and right tabs set to the
default; select the Dimensions tab. Make sure the three check
boxes are checked and that the drop down menu is set to Arch.
Click OK.
Go to File>Document Settings>Units and be sure that your
document is set to feet and inches or metric units, as appropriate.
Of course, if you design the show in one system, you can go back
later and convert the document from imperial to metric, or vice
versa. Click OK.
OK, remember the View bar? Now we’re going to use it. There
should be a data eld that says, 1:1 and next to that, on the right, a
ruler icon. If not, select Layer Scale from the View bar menu. Click
on the ruler and set the scale to 1/2”=1’-0” and select OK.
Select Tools>Options>Line Thickness... and review the default settings. Right now, this guide is about awareness; as we progress,
you will need to experiment with these settings.
Let’s select and set a default font. With nothing selected on the page, go to Text>Font and select your preferred font. This should be
something generally readable and if you will be sharing les, something that is cross platform and likely installed on your colleagues’
systems. You can make adjustments to text later in the OIP or Text menu.