78 Vectorworks 2010 Products
Vectorworks Spotlight 2010 Getting Started Guide
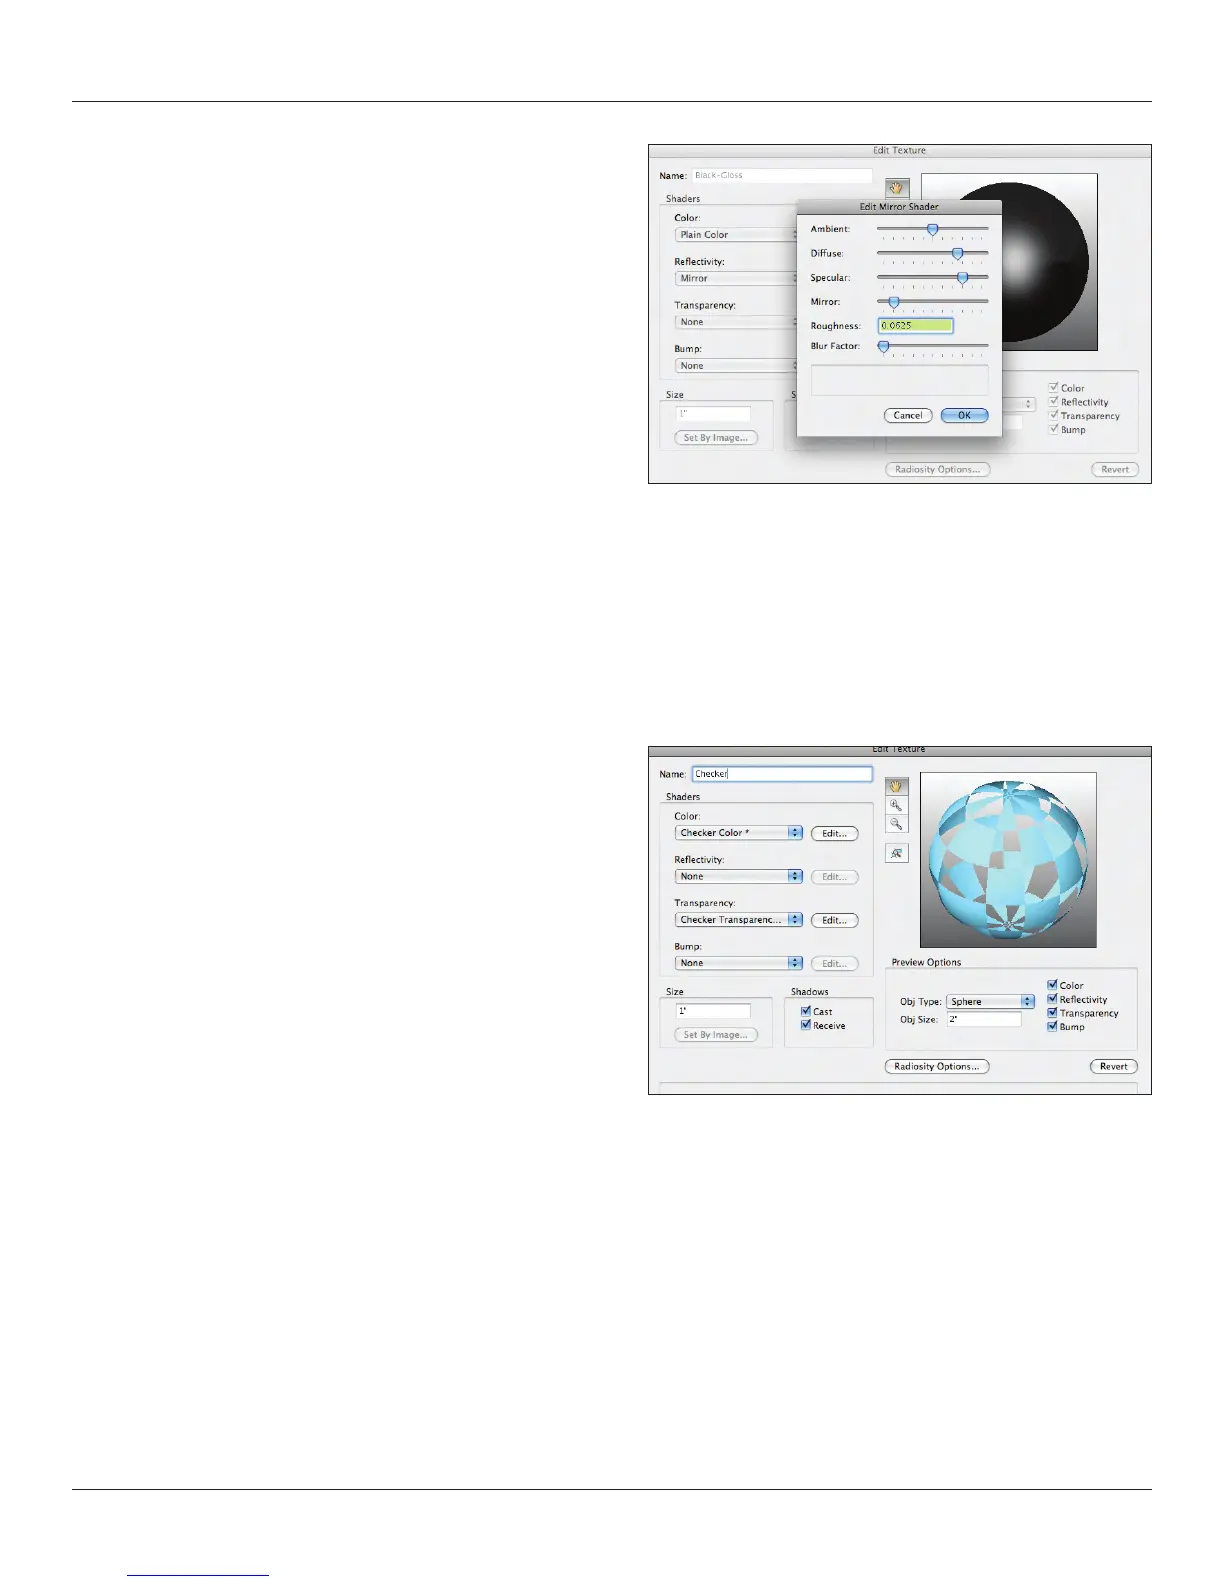
I don’t know whoever decided the at black was a good thing in
theatre. Flat black gets dirty and turns gray. Plus, it has no life. I
prefer a gloss black, so under the Reectivity Shader I am going to
select mirror and edit the settings so that I only have about
10-15% mirror. I’ll leave the other settings alone. Notice how the
preview changes.
I just want to take a moment and discuss the options available
in the Edit Reectivity Window. These are similar in most of the
dialogues. Ambient light allows you to adjust the amount of light
that surrounds the object or texture. We’ll discuss ambient light in
the 3D world in the next section. Diffuse and Specular light
are compliments. Diffuse is the reection of light off of an
uneven surface. Specular is the mirror like quality of reection off
of a smooth surface. Blur allows you to soften the reections in
Vectorworks. Blurring will add to your rendering time, the more blur, the more calculations and the longer the render.
As with everything, experiment with the different shaders and edit the options. We discussed Constant Reectivity in the Image
Prop section.
I don’t want this texture to have any Transparency or Bump, so let’s save this and start another texture. We used an image mask when
we made our Image Props.
Create a Polka Dot Checker or Stripe, experiment with the settings,
then use the Color Filter Transparency Shader to get on color to
drop out. Look at the same texture with other transparencies. Set
the Transparency back to None.