ArcLight Hub User’s Guide
Screen Descriptions for NMS Client
3-16 1081006 Rev. 001
3.3.2.1 New …
This screen is used to add a VMT to the ArcLight network. Click on
VMTs on the main menu bar and select New… to display the New VMT
screen shown in
Figure 3-14.
To add a new VMT perform the following steps:
Type the name of the new VMT in the site Name field.
Type the serial number of the new VMT in the Serial Number field.
Type the model number of the new VMT in the Model Number field.
Type the IP address of the new VMT in the IP Address field.
Select a VNO from the pulldown menu.
Select a Target Data Rate from the pulldown menu.
Before proceeding with the addition of a new VMT, it is strongly
recommended that the user complete the checklist in
Table 3-3 to
assemble all of the information they will need to complete the new VMT
addition.
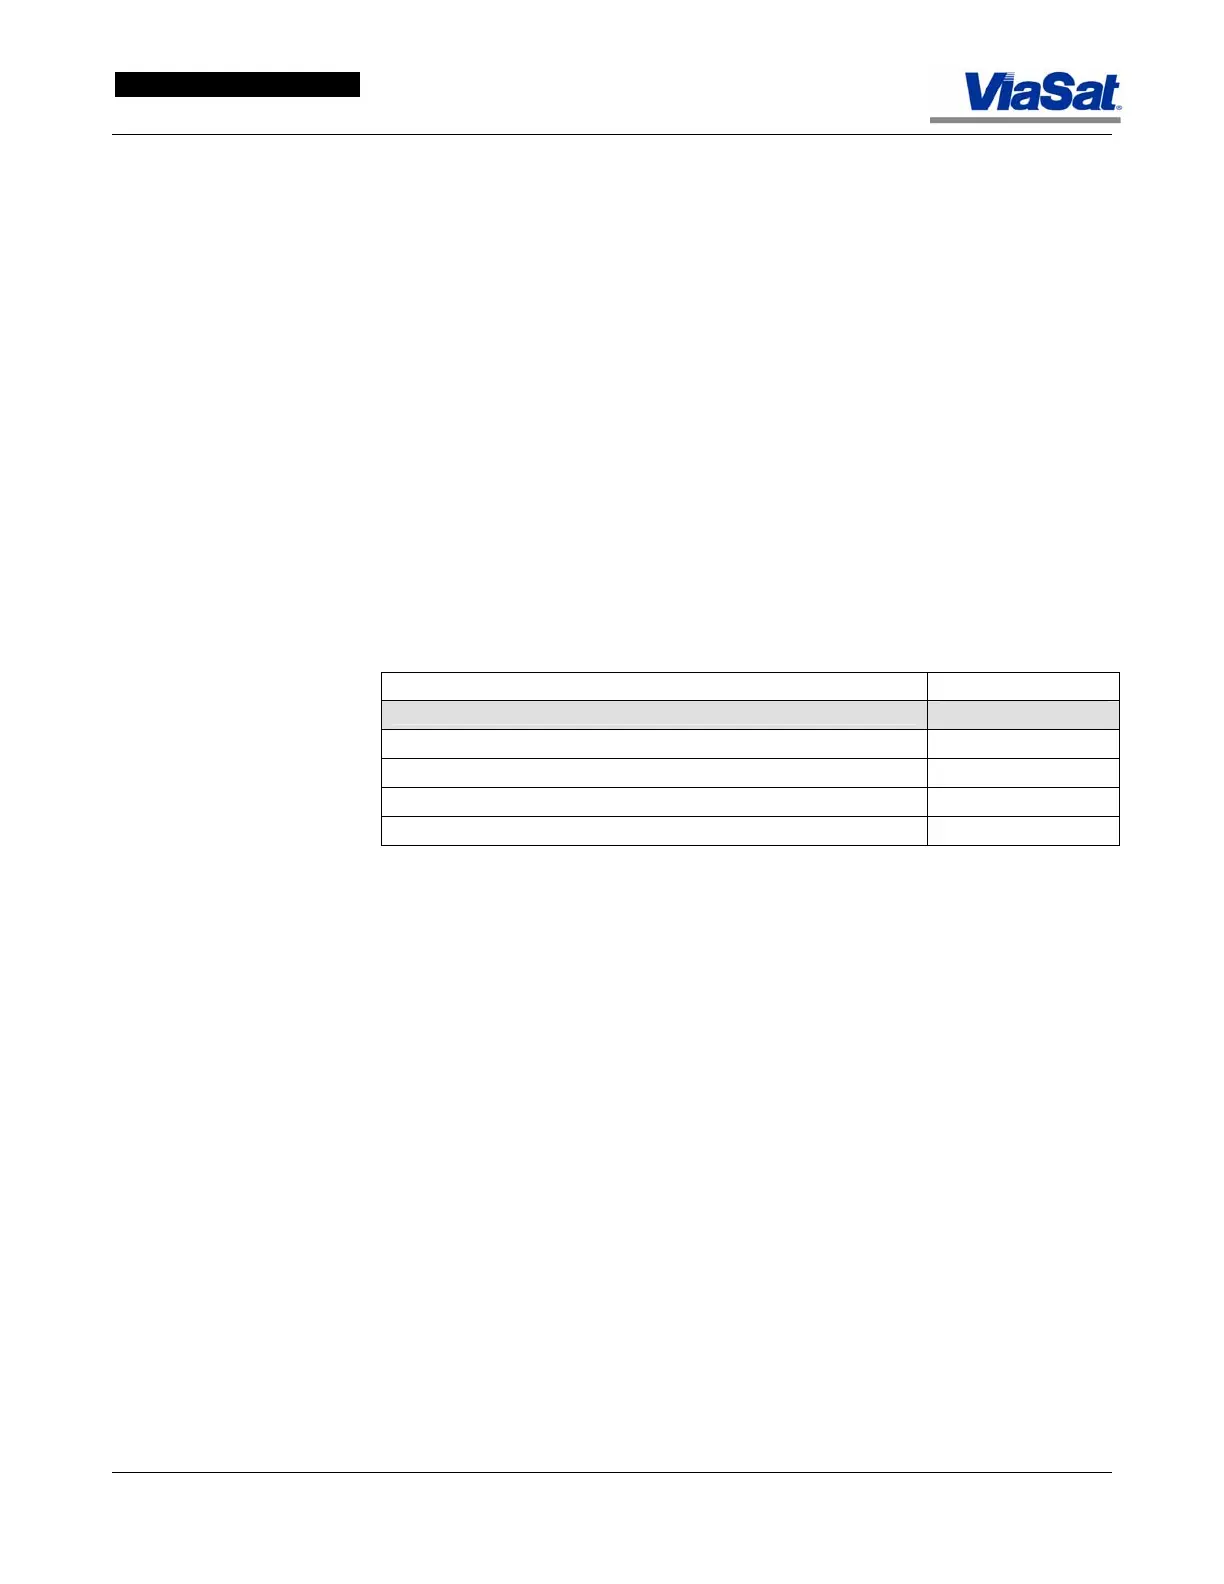
Table 3-3. New VMT Addition Checklist.
DESCRIPTION VALUE
WAN – VMT Configuration General Tab
ViaSat Mobile Terminal Site Name
ViaSat Mobile Terminal Serial Number
ViaSat Mobile Terminal Model Number
ViaSat Mobile Terminal Access Type ID
Note: If this screen is being edited from a NOC, the Profiles panel will
not be visible on the screen.
There are three tabs to this screen: General, Group Management, and
Installation Utilities. These tab screens are presented and explained
below.