SuperRack SoundGrid / User Guide
Inserting Plugins
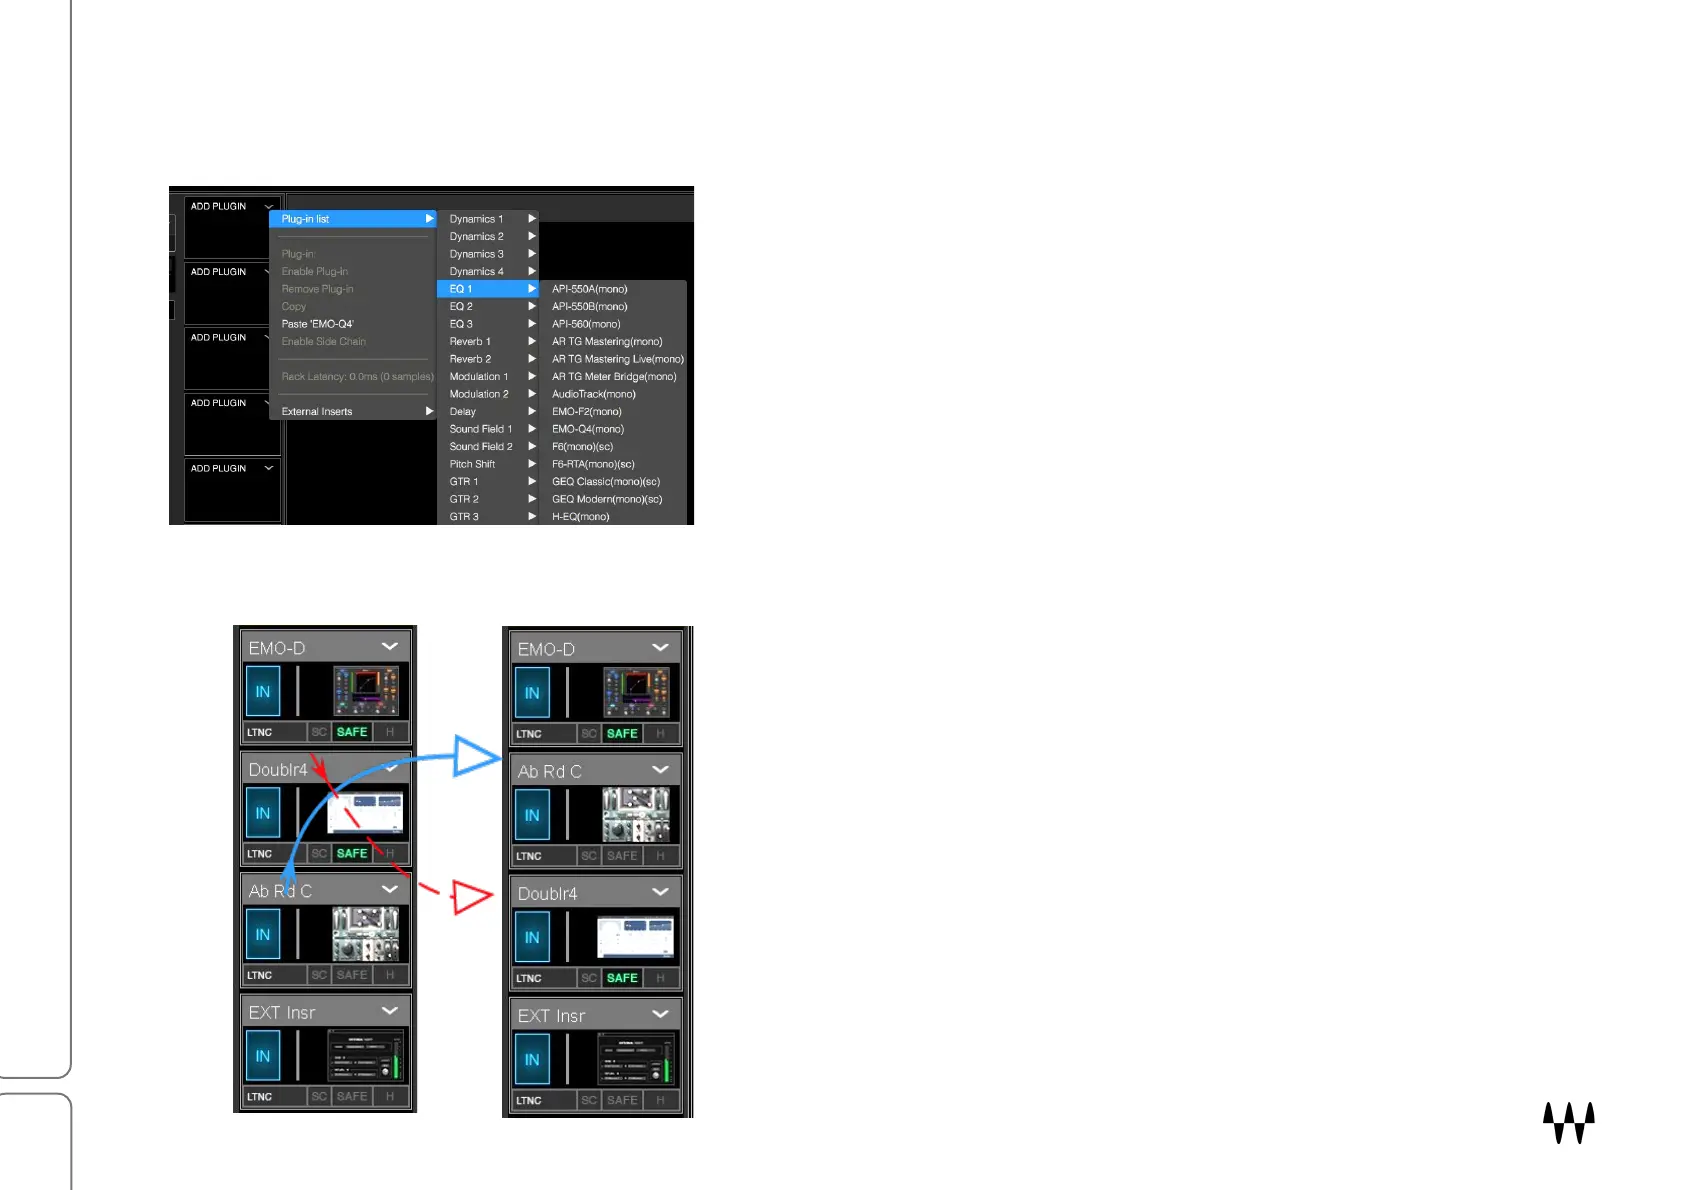
Each Rack has a plugin chainer with eight slots for inserting plugins. Plugin signal flow is from top to bottom.
1. To insert a plugin in a slot, click on the down arrow (Rack
window) or plus symbol (Overview window). This opens the
drop-down Plugin menu.
2. Choose a plugin from the list. The input/output structure of the
plugins rack determines if a plugin can be inserted. If a plugin
cannot provide a component that is compatible with the rack
input/output structure, it will not appear in the menu (e.g., a 5.1
rack will not let you insert a stereo component). Also, certain
plugins (e.g., mono-to-stereo) change the channel structure of
the plugins rack.
3. You can insert a plugin into any slot. The plugin’s icon will
appear in the slot. Click a plugin icon to open the plugin’s
interface in the plugin pane.
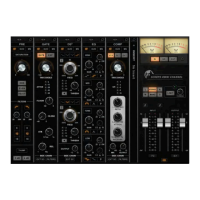
A plugin’s position in the chainer determines its place in the
signal flow. You can change a plugin’s position by dragging an
icon up and down in the rack.
In this example, Abbey Road Chambers slides upward (blue
path) to displace Doubler (red path).
Changing plugin order may result in a short audio drop. Wait for
a convenient time to rearrange the rack.
To learn more about routing and adding plugins to a rack, refer
to Part 5: Rack Window (begins on page 77).