Settings
98 / 112 28.03.2022
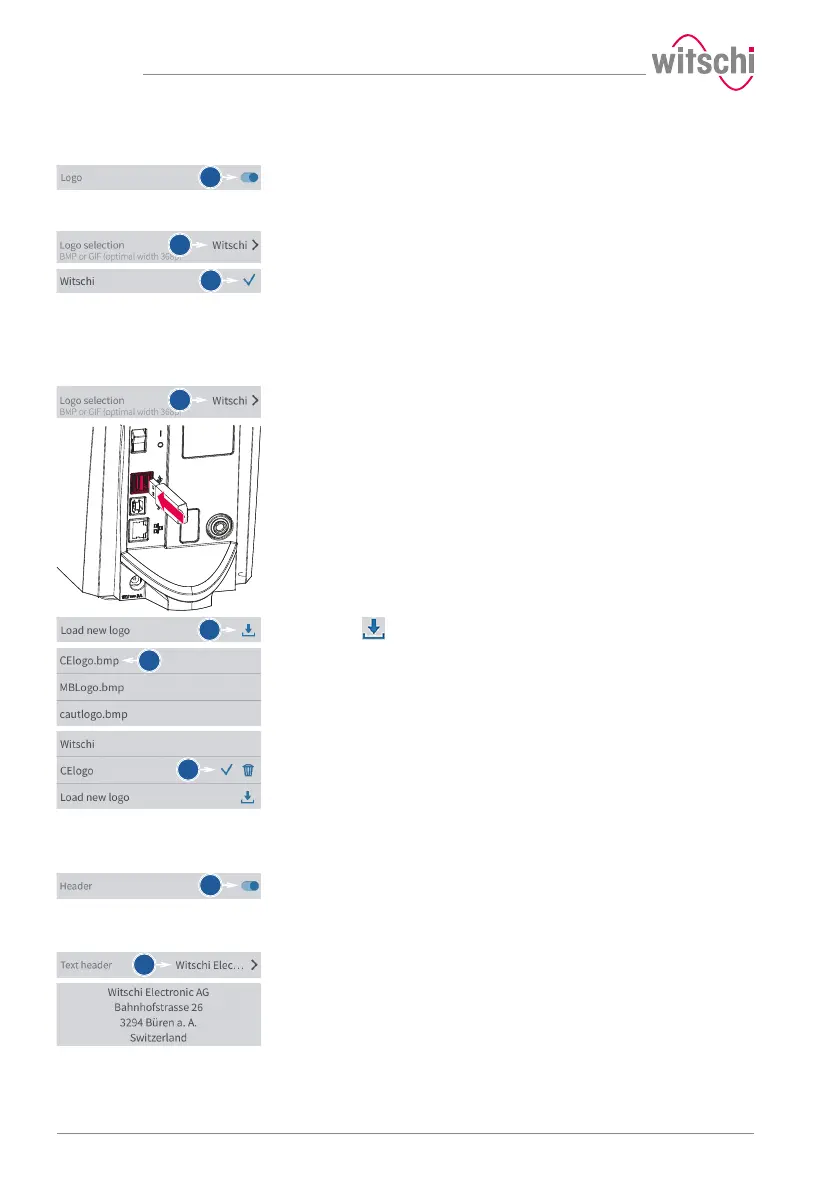
Printing the logo
a) Enable or disable the printing of the logo.
ð The button is blue when the function is enabled and grey
when it is not.
Selecting the logo
a) Open the logo selection by tapping the name of the displayed logo.
b) Select the desired logo from the list.
ð In the above example, Witschi.
ð The Witschi logo is printed on the label.
Importing the logo
a) Open the logo selection by tapping the name of the displayed logo.
b) Insert a USB stick with the desired logo into the ProofMaster (BPM
or GIF, optimal width: 368 p).
c) Press Load new logo.
d) Select the desired logo from the list.
ð All image files (png, jpg, bmp, tec etc.) on the USB stick
appear in the list.
ð In the above example, selection of CElogo.
ð The CElogo is now in the list and selected.
ð The CElogo logo is printed on the label.
Printing the header
a) Enable or disable the printing of the header.
ð The button is blue when the function is enabled and grey
when it is not.
Configuring the header
a) Open the header configuration by tapping the beginning of the
displayed header.
b) Tap on the text area to open the alphanumeric keypad.