EA
$1
AC
141
2
REMOVING THE FRONT FORK LEGS
The following procedure applies to both of t
he
front fork legs.
TIP
~~~~~~~~~~~~~~~
Each front fork leg is equipped with a spring pre·
load
ad
justi
ng
bo
l
t,
the right fork leg is equipped
wi
th a rebound damping f
or
ce a
dj
usti
ng
screw
a
nd
compression damping force adjusting
screw. Pay attention not to mistake the
ri
ght a
nd
left.
1. Stand the ve
hi
cle on a level surface.
E
WA
Ul120
AwARNING
Securely
support
the
vehicle
so
that
there
is
no
danger
of
it
falling
over.
TIP
~~~~~~~~~~~~~~
Place the vehicle
on
a suitable stand so that t
he
front wheel is elevated.
2. Remove:
• Front brake caliper
Refer to "FRO
NT
BRAKE" on page 4-20.
• Front wheel
Refer
to
"FRONT WHEEL" on page 4-8.
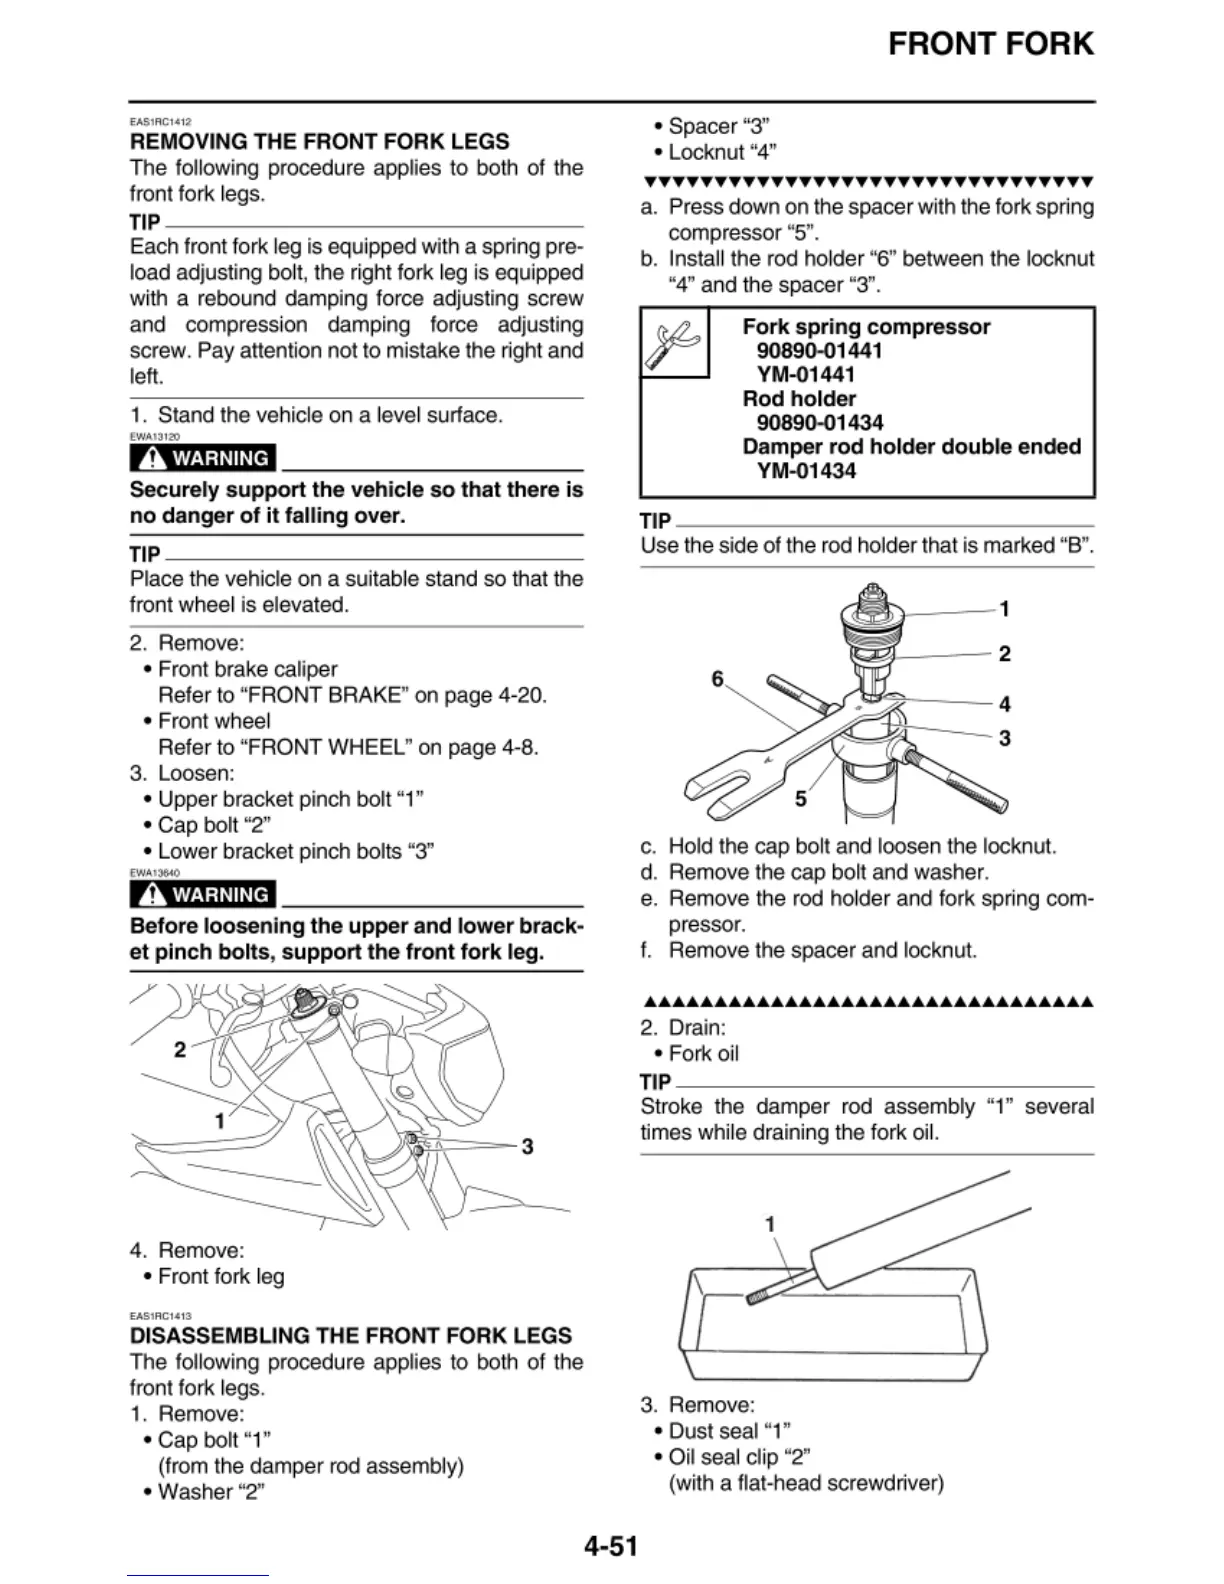
3. Loosen:
• Upper bracket pinch bolt "1"
• Cap bolt "2"
• Lower bracket pinch bolts "3"
EW
Al$$40
AwARNING
Before
loosening
the
upper
and
lower
brack
·
et
pinch
bolts
,
support
the
front
fork
leg.
4. Remove:
• Front fork leg
DISASSEMBLING THE FRONT FORK LEGS
The following procedure applies to both of the
front fork legs.
1. Remove:
• Cap bolt "1"
(from the damper rod assembly)
• Washer "2"
4-51
FRONT FORK
• Spacer
"3
"
• Locknut "4"
TTTTTTTTTTTTTTTTTTTTTTTTTTTTTTTT
a. Press down on the spacer with the fork spring
compressor
"5".
b.
Insta
ll
the rod holder "6" between the locknut
"4" and the spacer "3".
Fork
spring
compressor
90890-01441
YM--01441
Rod
holder
90890-01434
Damper
rod
holder
double
ended
YM-01434
TIP
~~~~~~~~~~~~~~~
U
se
the si
de
of the rod holder that is marked "B
".
6
)-
--
1
~;?J-
--
2
c. Hold the cap bolt a
nd
loosen the locknut.
d. Remove the cap
bo
lt and washe
r.
e.
Remove the rod
ho
lder and fork spring com-
pressor.
f. Remove the spacer and locknut.
• •••••••••••••••••••••••••••••••
2.
Drain:
•
Fo
rk oil
TIP
~~~~~~~~~~~~~~
Stroke the damper rod assembly "1" several
tim
es
while draining the fork oil.
3. Remove:
• Dust seal "1"
• Oil seal clip "2"
(w
ith a flat-he
ad
screwd
ri
ver)



 To Next Page