CONNECTING RODS AND PISTONS
••••••••••••••••••••••••••••••••
2. Select:
• Big end bearings (P
1
-P
3
)
TIP
---------------
• The numbers "fl(' stamped
in
to the crankshaft
web and the numbers "1" on the
co
nnecting
rods are used to determine the replacement
big end bearings s
iz
es.
• "P
1
"-
"P
3
" refer to the bearings shown in the
crankshaft illustration.
For example, if the connecting rod "P
1
"
and
the crankshaft web "P { numbers are 5 and 2
respecti
ve
ly, then the bea
ri
ng
si
ze
for "P
1
"
i
s:
"P
1
"
(connecting rod
)-
"P
1
"
(crankshaft) = 5 -
2 =
3 (brown)
Bear
ing
col
or
code
1.
Blu
e 2. Black
3.
Brown
4.
Green
(8)
p, P2 p,
.
zzz
322
~~
t:J~===""
~~~,
·
~
l
~
s
::-(
_1_(
a
1
......
.
..
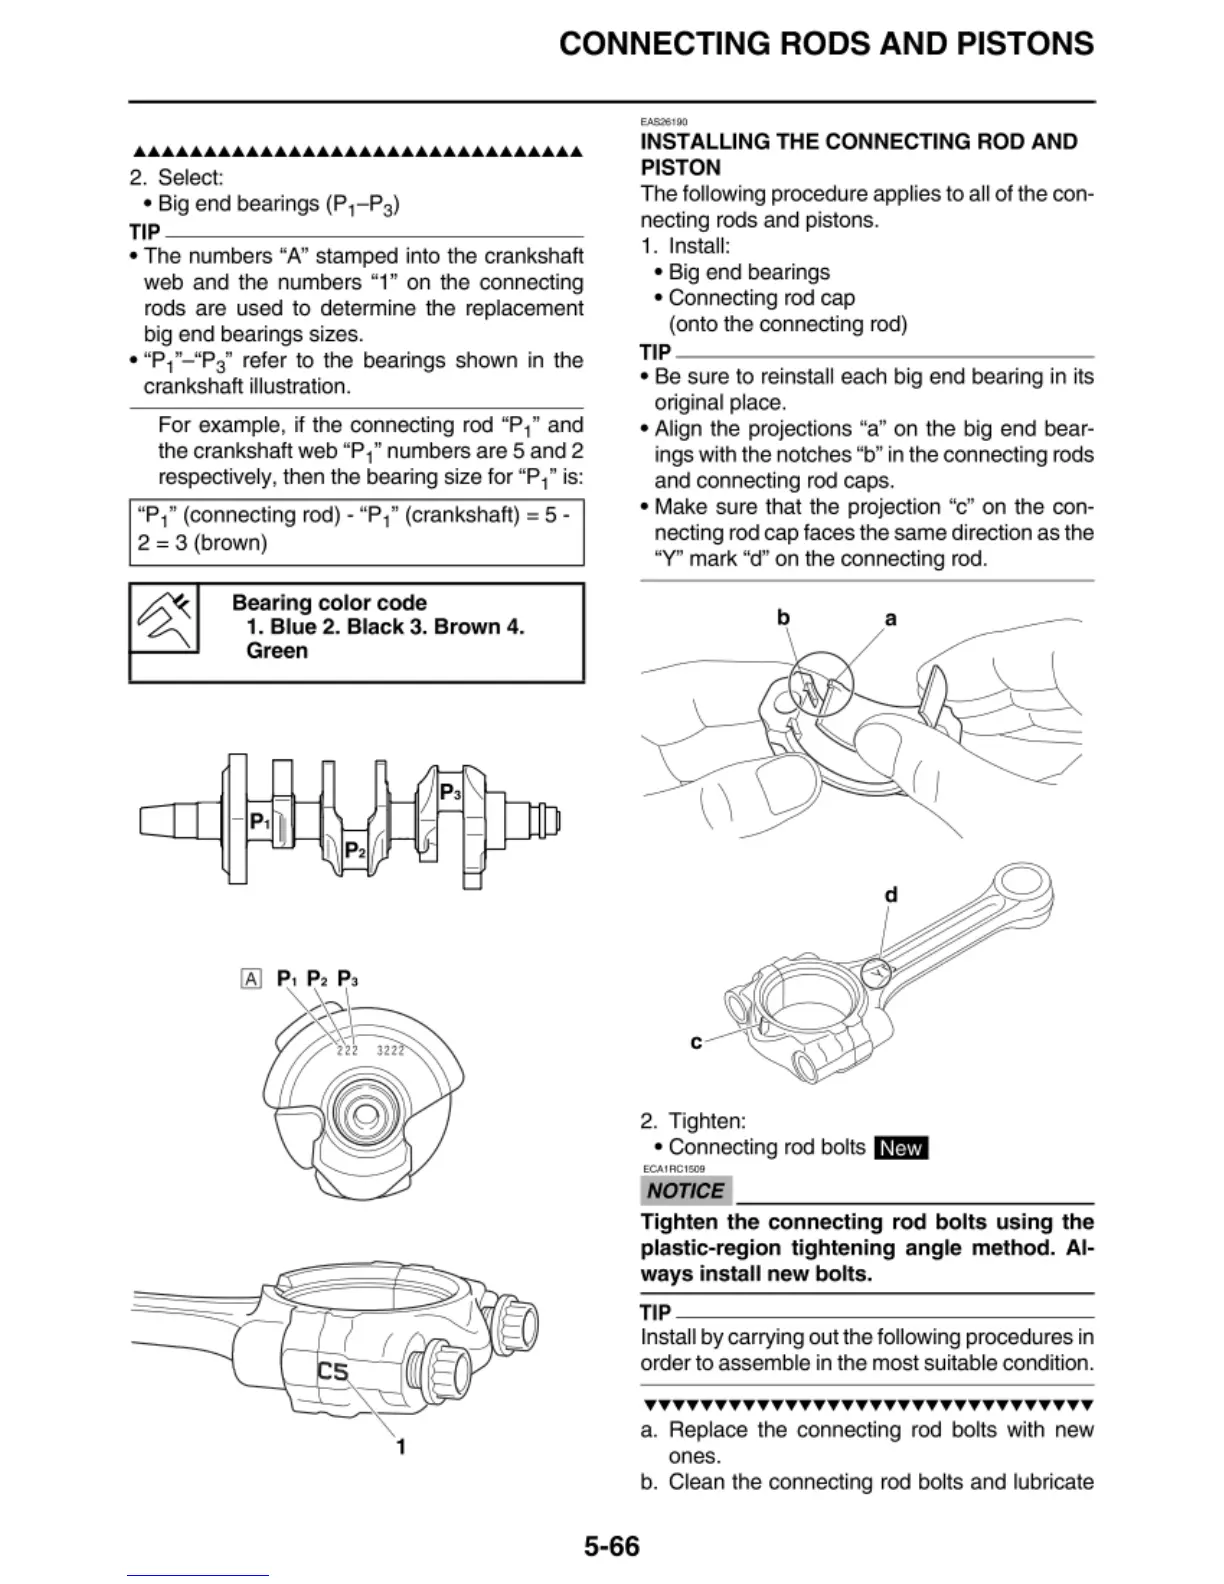
INSTALLING THE CONNECTING ROD AND
PI
STON
The following procedure applies to a
ll
of
the con-
necting rods and pistons.
1. Insta
ll
:
• Big end bearings
• Connecting rod cap
(onto t
he
connecting rod)
TIP
---------------
•
Be
sure to reinsta
ll
each big end bearing in i
ts
original place.
• Align the projections "a" on the big end bear-
ings with the notches "b" in the connecting rods
and connecting rod caps.
• Make
su
re that the projection "c" on the con-
nect
in
g rod cap faces the same direction as the
"Y" mark "d" on the connecting rod.
c
2. Tighten:
• Connecting rod bolts
1~@4
ECA
I
RCll509
NOTICE
Tighten
the
conn
e
ct
i
ng
rod
bo
lts usi
ng
the
pl
astic-region ti
ght
eni
ng
a
ng
le method. Al-
wa
ys
in
sta
ll
new
bo
lts.
TI
P
---------------
lnstall by carrying out the following procedu
res
in
order to assemble in the most s
ui
table
co
ndition.
TTTTTTTTTTTTTTTTTTTTTTTTTTTTTTTT
a.
Rep
lace the connecting rod bolts
wi
th new
ones.
b.
Clean the connecting rod
bo
lts and lubricate
5-66