CONNECTING RODS AND PISTONS
the
bo
lt threads and seats with mo
ly
bdenum
di
su
lfide oil.
c. After insta
lli
ng the big end bearing, assemble
the connecting rod and connecting rod cap
without insta
ll
in
g them onto the crankshaft.
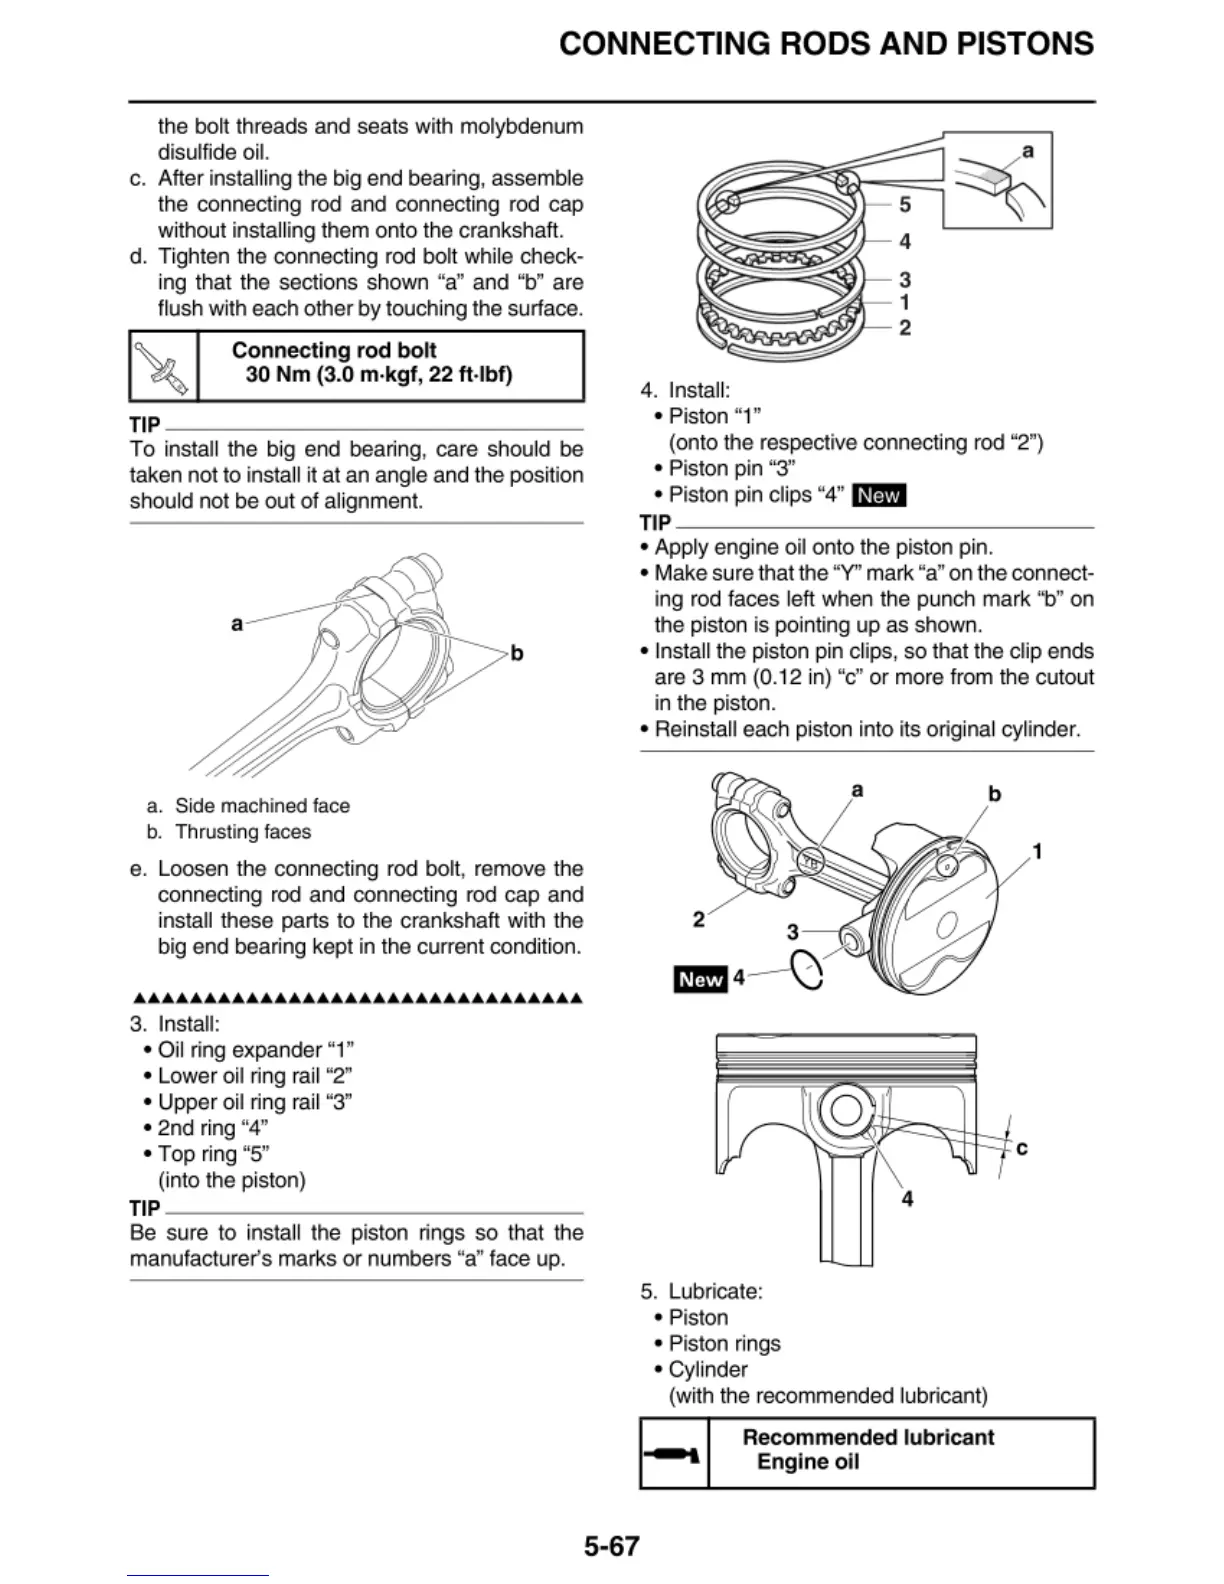
d. Tighten the connecting rod bolt while check-
ing that the sections shown "a" and "b" are
flush with each ot
her
by touch
in
g the surface.
Connecting rod bolt
30
Nm
(3.0 m·kgf, 22 ft·lbf)
TIP
~~~~~~~~~~~~~~
To install the big end bearin
g,
ca
re should be
taken not to insta
ll
it at an angle and t
he
position
should not be out
of
a
li
gnment.
b
a.
Si
de
machined
face
b. Thrusting faces
e. Loosen the
co
nn
ecting rod
bo
lt, remove the
co
nnecti
ng
rod and connecting rod cap and
install these parts to the crankshaft with the
big end bearing kept in the
cu
rrent condition .
••••••••••••••••••••••••••••••••
3. Install:
• O
il
ring expander "1"
• Lower oil ring ra
il
"2"
• Upper oil ring ra
il
"3"
• 2nd ring "4"
• Top
ri
ng "5"
(into the piston)
TIP
~~~~~~~~~~~~~~
Be sure
to
insta
ll
the piston rings so that the
manufacturer's marks or numbe
rs
"a" face up.
4. Insta
ll
:
• Pi
ston
"1"
(onto t
he
respective connecting r
od
"2")
• Piston pin "3"
•
Piston
p
in
clips
'
'4
11
l@Mll
TIP
~~~~~~~~~~~~~~-
• Apply engine oil
on
to the piston pin.
• Make sure that t
he
"Y" mark "a"
on
t
he
connect-
ing rod faces left when the pu
nc
h mark "b"
on
t
he
piston is po
in
ting
up
as shown.
• Insta
ll
the piston pin clips,
so
that the clip ends
are 3 mm (0.12 in)
"d' or
mo
re
fr
om
the
cu
tout
in the piston.
• Re
in
stall each piston into its original cylinder.
5. Lubricate:
• Piston
• Piston rings
• Cy
li
nder
4
(with the recommended
lu
bricant)
'
5-67
Re
commende
d lubricant
Engi
ne
oil
1



 To Next Page