CONNECTING RODS AND PISTONS
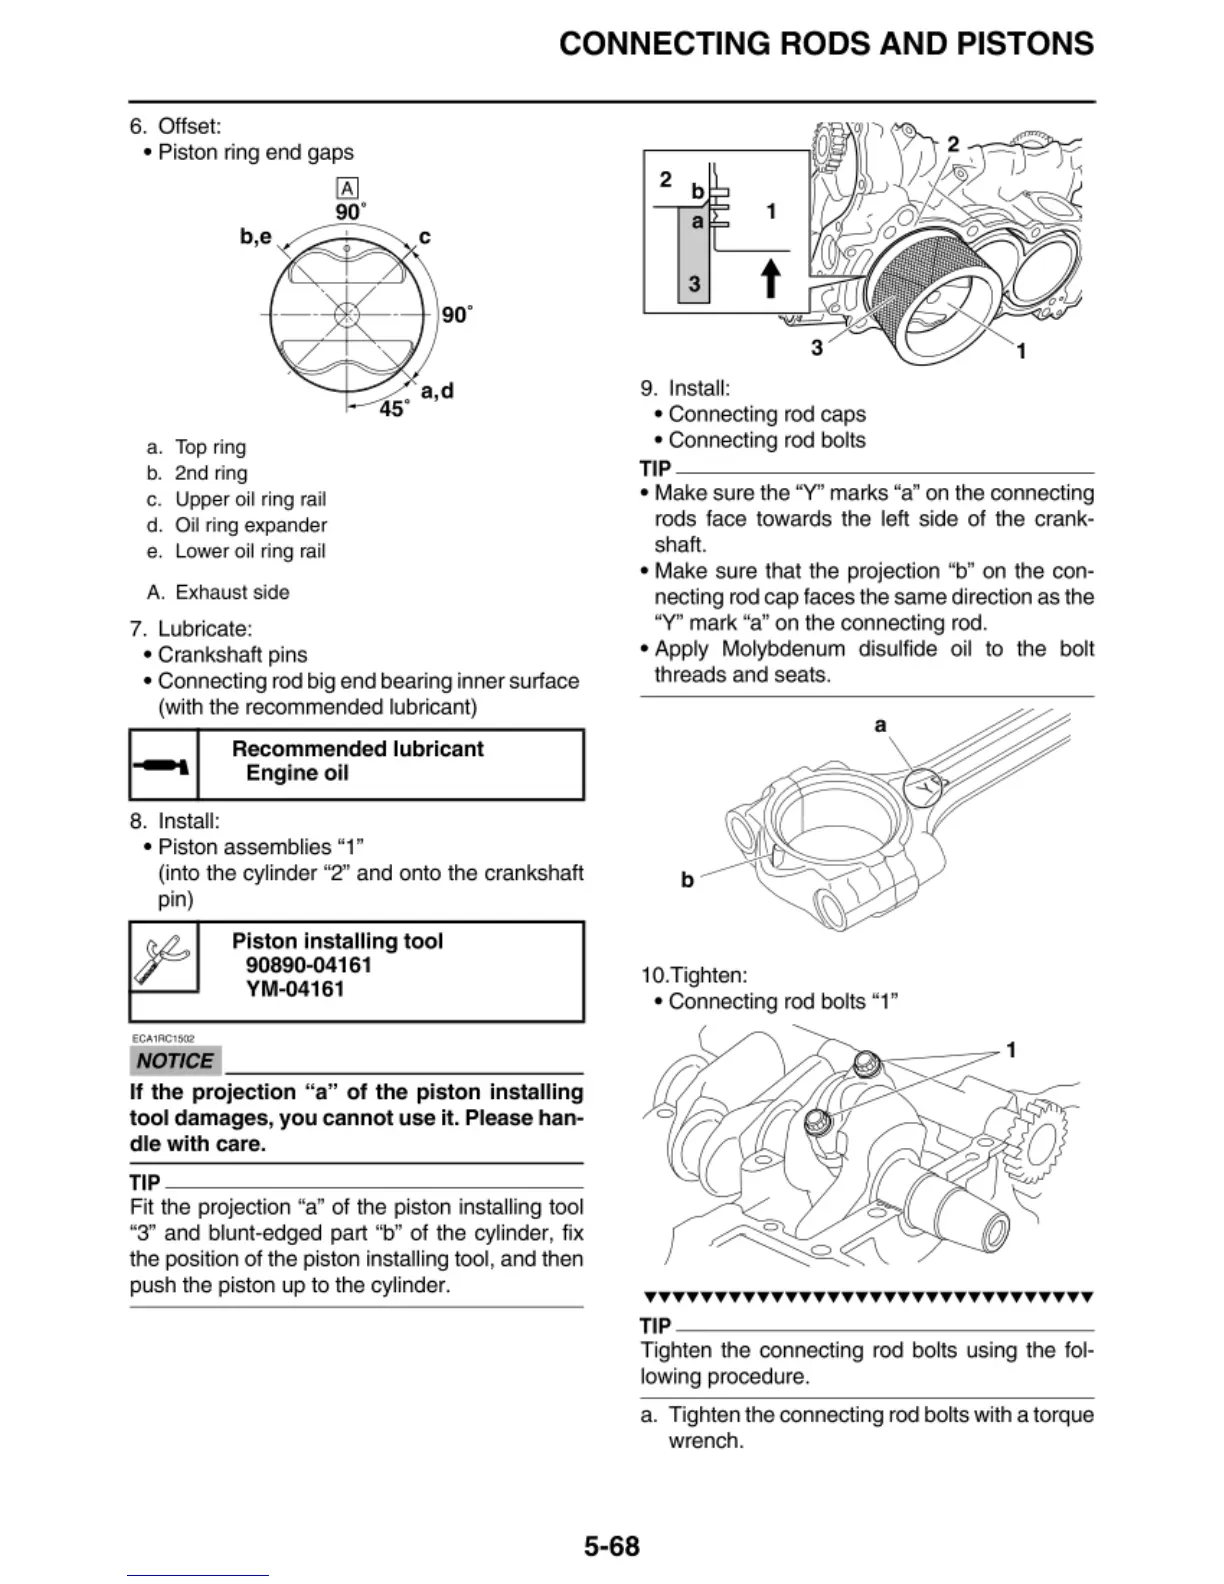
6. Offset:
• Piston ring end gaps
a.
To
p ri
ng
b.
2n
d ri
ng
c.
Upp
er
o
il
ri
ng
ra
il
d. O
il
ring
ex
pander
e. Lower o
il
ri
ng
r
ai
l
A.
Exhaust si
de
7. Lub
ri
cate:
• Crankshaft pins
[8]
90'
90'
• Connecting r
od
big end bearing inn
er
surface
(with t
he
recommended lubricant)
l
8. Install:
Re
comm
e
nd
ed
lubricant
E
ngi
ne
oil
• Piston assemblies "1"
2 b
a
1
3 t
9. Insta
ll
:
• Connecting rod caps
• Connecting rod bol
ts
TIP
~~~~~~~~~~~~~~-
• Make sure the "
Y'
' marks "a" on the connecting
rods face towar
ds
the left si
de
of
the cran
k·
sha
ft
.
• Make sure that the projection "b" on the con-
necting rod cap faces the same direction as the
"Y" mark "
a"
on the connecting rod.
• App
ly
Mo
lybdenum disulfide oil to the bolt
threads and seats.
(into the
cy
li
nder "2" and onto the crankshaft b
pin)
NOTICE
Pis
ton
in
s
talling
tool
90890-04161
YM-04161
~~~~~~~~~~~~~
If
th
e
proj
ec
tion
"a"
of
th
e
pi
s
ton
installing
tool
damag
es,
you
c
ann
ot u
se
it. Please han-
dl
e
with
c
ar
e.
TIP
~~~~~~~~~~~~~~
Fi
t the projection "a" of the piston insta
ll
ing tool
"3" and blunt-edged part "b"
of
the cylinder, fix
the position
of
the piston installing tool, and then
push the piston up to the cy
li
nder.
1
O.Tig
hten:
• Connecting rod bol
ts
"1"
TIP
~~~~~~~~~~~~~~~
Tighten t
he
connecting rod bolts usi
ng
the fol·
l
ow
ing procedure.
a. Tighten the connecting rod
bo
lts with a torque
wrench.
5-68