EA$2$S50
DISASSEMBLING THE CRANKCASE
1. Place the engine upside down.
2. Remove:
• Crankcase bolts
TIP
~~~~~~~~~~~~~~~
• Loosen each bolt 1/4 of a tum at a time, in stag-
es
and
in
a crisscross pattern. After all of
th
e
bol
ts
are fully loosened, remove them.
• Loosen the bolts in the proper sequence as
shown.
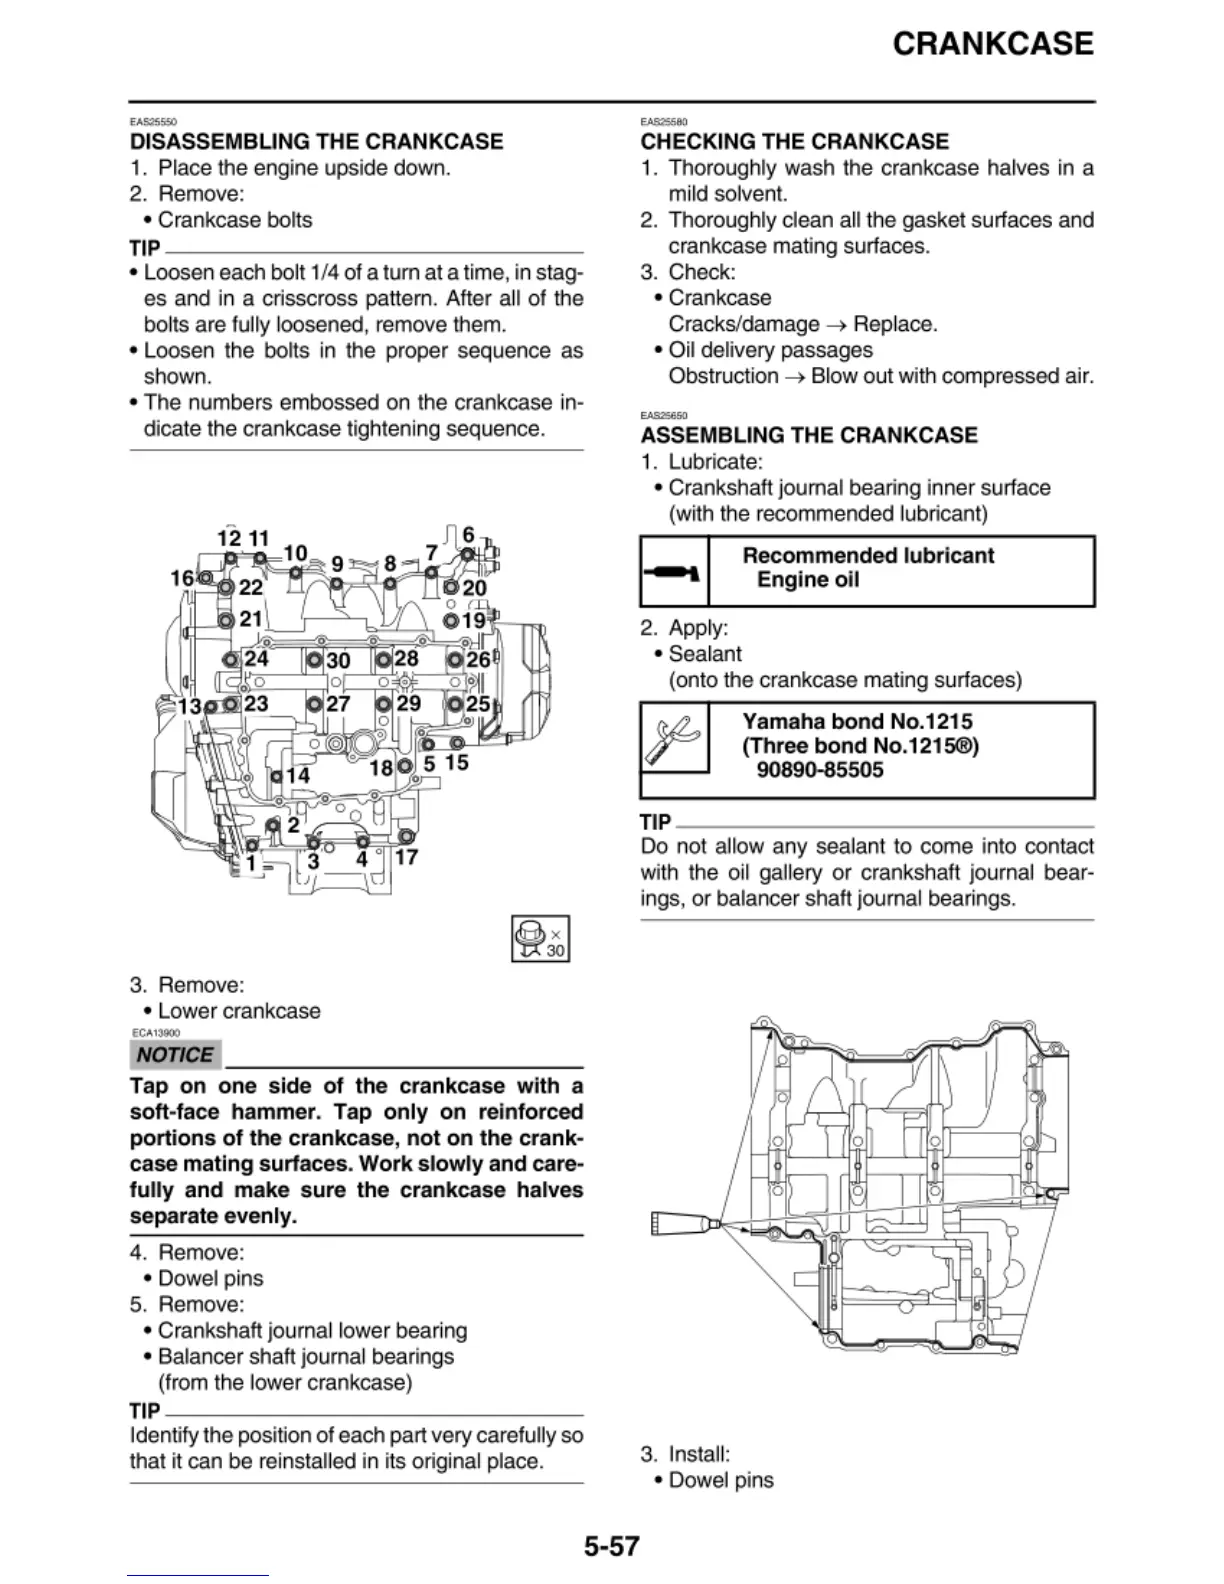
• The numbers embossed
on
the crankcase in-
dica
te
the crankcase tightening sequence.
3. Remove:
• Lower crankcase
NOTICE
~~~~~~~~~~~~~
Tap
on
one
side
of the crankcase with a
soft
-face hammer. Tap
only
on
reinforced
portion
s
of
the crankcase,
not
on
the
crank·
case mating surfaces. Work
slowly
and care-
fully
and make sure the crankcase halves
separate evenly.
4. Remove:
• Dowel pins
5. Remove:
• Crankshaft jou
rna
l lower bearing
• Balancer shaft journal bearings
(from the lower crankcase)
TIP
~~~~~~~~~~~~~~
ldentify the position of each part very carefully so
that it can be reinstalled in its original place.
CRANKCASE
.........
CHECKING THE CRANKCASE
1. Thoroughly wash the crankcase halves in a
m
il
d
so
lvent.
2. Thoroughly clean all the gasket surfaces and
crankcase mating surfaces.
3. Check:
• Crankcase
Cracks/damage
~
Rep
lace.
• Oil delivery passages
Obstructio
n~
Blow out with compressed air.
"""650
ASSEMBLING THE CRANKCASE
1. Lubricate:
• Crankshaft journal bearing inner surface
(wi
th
the recommended
lu
bricant)
Recommended lubricant
l-1911l
Engine
oil
2. Apply:
• Sealant
(onto the crankcase mating surfaces)
Yamaha
bond
No.1215
(Three
bond
No.1215®)
9089().85505
TIP
~~~~~~~~~~~~~~-
Do
not allow any seal
an
t to come in
to
contact
with the o
il
ga
ll
ery
or
crankshaft journal bear-
in
gs, or balan
ce
r shaft
jo
u
rna
l bearings.
3. Insta
ll
:
•Do
wel pins
5-57