EA
~
I
O
REMOVING
THE
DRIVE
CHAIN
1. Stand the vehicle on a level surface.
EWA
t3 1
20
AwARNING
Securely
support
the
veh
ic
le
so
that
t
here
is
no
danger
of
it
falling
over.
TIP
~~~~~~~~~~~~~~
Place the vehicle
on
a suitable stand so that t
he
rear wheel is elevated.
2. Strai
gh
ten the drive sprocket nut
ri
b "a".
a
3. Remove:
• Drive
cha
in
NOTICE
~------------~
Be
sure
to
put
on
safety
goggles
when
work
-
ing
.
TIP
~~~~~~~~~~~~~~~
Cut
the
dr
ive
cha
in with t
he
dr
i
ve
chain cut & riv-
et tool.
EAS23441
Drive
cha
in
cu
t &
rivet
tool
90890-01550
YM
-
01550
CHECKING
TH
E
DRIVE
CHAIN
1. Measure:
• 15-li
nk
section "a"
of
t
he
drive
cha
in
Out of
spec
ificat
io
n
~
Repl
ace
the
chain.
15-link
le
ngth
limi
t
239
.3
mm
(9
.42 In)
drive
TTTTTTTTTTTTTTTTTTTTTTTTTTTTTTTT
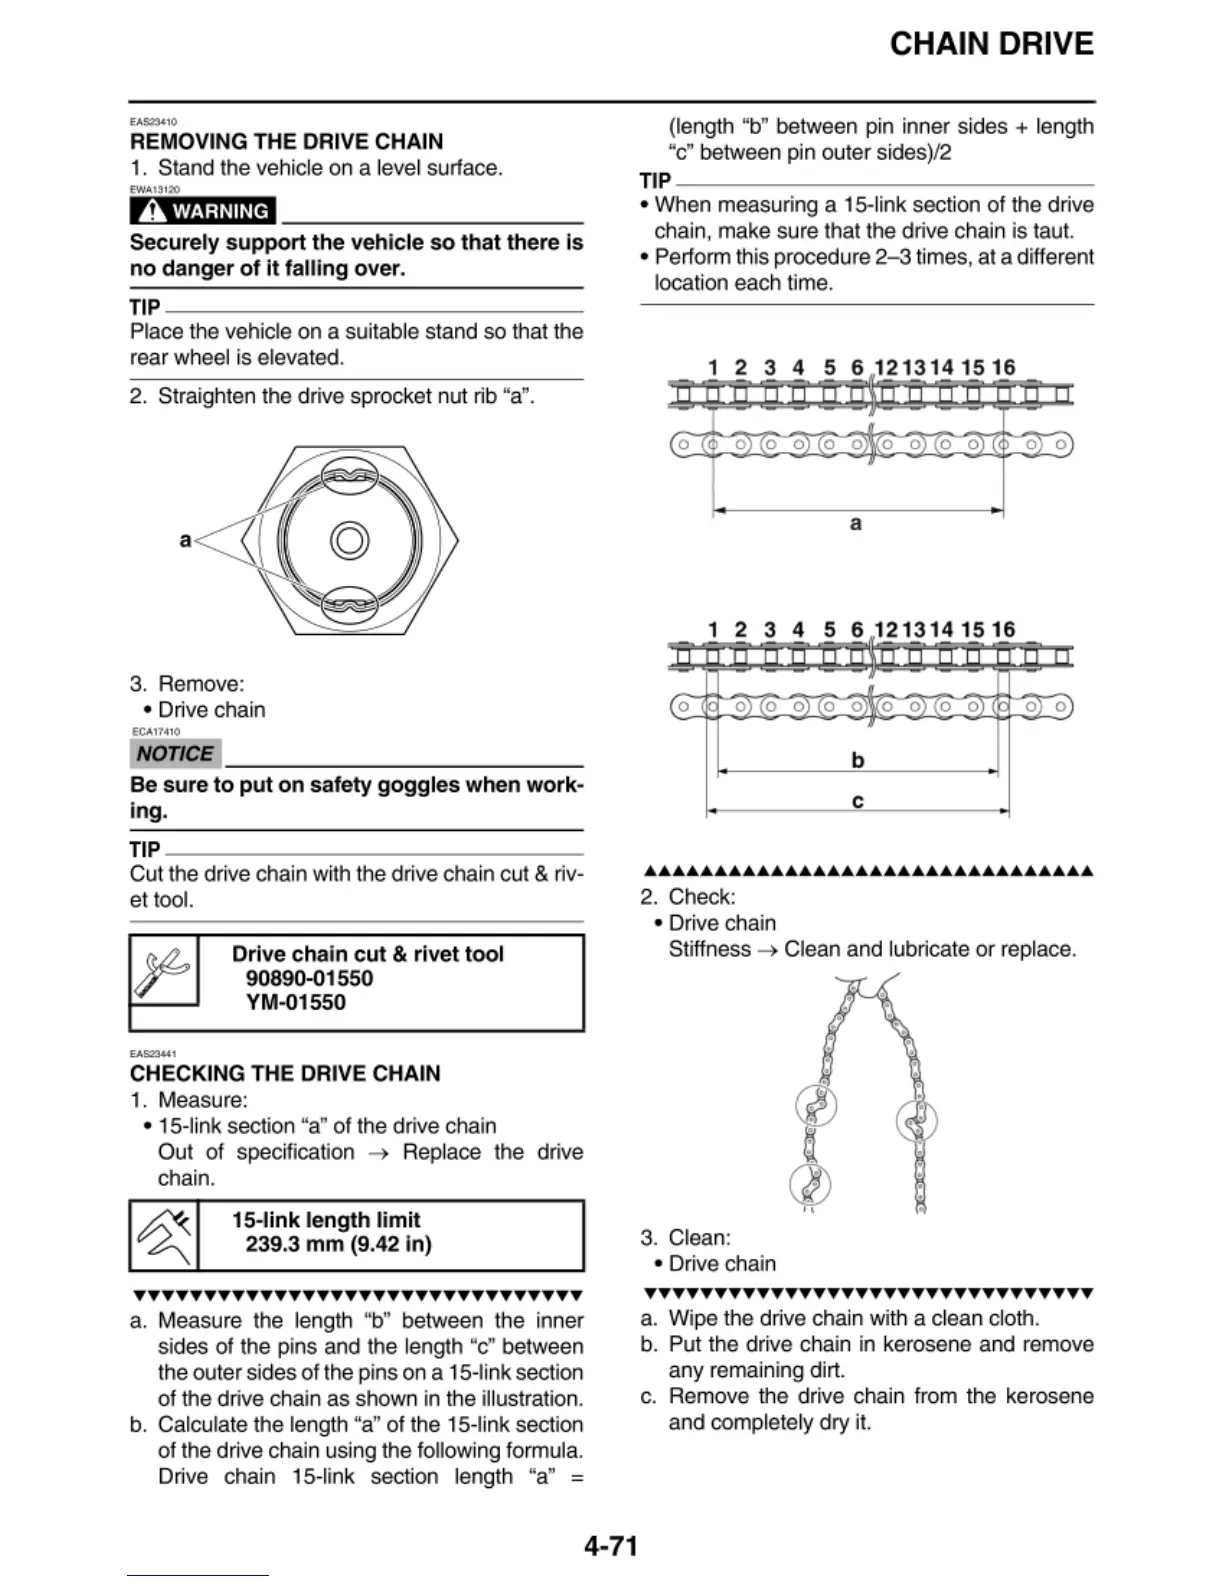
a.
Me
asure the length "b" between t
he
in
ne
r
sides of the p
ins
and the leng
th
"c" between
the ou
te
r si
des
of
the p
ins
on a 15-li
nk
section
of
t
he
d
ri
ve
c
ha
in
as
show
n in the i
ll
ustration.
b.
Ca
lcul
ate
the
length "a"
of
t
he
15-link section
of
the
dr
ive
cha
in using the followi
ng
formula.
Drive
cha
in
15
-link
sect
ion le
ngt
h "a" =
4-71
CHAIN DRIVE
(length "b"
be
t
ween
pin inner si
des
+ length
"c"
be
t
ween
pin outer sides)
/2
TIP
~~~~~~~~~~~~~~
• When measuring a 15-
li
nk
sect
ion
of
the drive
chain, make sure that the drive
cha
in is taut.
• Perform
th
is procedure 2-3 times, at a different
location each time.
1 2 3 4 5 6
1213141516
-
-
,-,
' .
' '
• • •
' '
' '
• •
(o
0)\0
OJ
lO
0 0
0)\0
OJ
r
OJ 0 )
a
1 2 3 4 5
61213141516
' '
• •
' ' ' '
•
' '
(o
OJ\0
OJ
lO
0 0
0)\0
OJ
OJ 0 )
b
c
&&&&&&&&&&&&&&&&&&&&&&&&&&&&&&&&
2. Check:
• Dri
ve
cha
in
Stiffness
~
Clean
and
l
ub
ri
cate
or
replace.
3. C
lea
n:
• Dri
ve
cha
in
•
•
•
•
••••••••••••••••••••••••••••••••
a. Wipe the drive
cha
in with a cl
ean
clot
h.
b. Put the dri
ve
cha
in in ker
ose
ne
and
r
em
ov
e
any remaining dirt.
c. Remove the dri
ve
cha
in
fr
om
the kerosene
and
comp
letely dry it.