3
EAS1
RC1
111
Throttle
position
sensor
screw
3.5 Nm (0.35 m·kgf, 2.5
ft
·lbf)
ADJUSTING THE ACCELERATOR POSITION
SENSOR
E
WA
I
RC1
7tlG
AwARNING
• Handle the accelerator
po
sition se
nsor
with
sp
ecial care.
• Never subject the accelerator
position
sen-
sor
to
strong
shocks. If the accelerator
po-
sition
sen
so
r is dropped, replace it.
1. Check:
• Accelerat
or
position
se
nsor
Refer to "CHECKING THE ACCELERATOR
POSITION SENSOR" on page
8
-1
07.
2.
Adjust:
• Accelerator position
se
nsor angle
TIP
---------------
Before adjusti
ng
the accelerator position senso
r,
the throttle bodi
es
must be removed.
••••••••••••••••••••••••••••••••
a. Temporary tighten the accelerator posit
io
n
se
nsor bol
ts.
b. Check that the throttle valves are
fu
ll
y closed.
c. Tum the main switch to "OFP'.
d. Connect the accelerat
or
position sensor to
the wire harness.
e. Connect the throttle cables to the th
ro
ttle bod-
ies.
f.
Simultaneously press and hold the "SE-
LECT' button "1" and
"R
ESET' button "2
",
tum the main switch to "
ON
",
and continue to
p
re
ss the buttons f
or
8 seconds
or
more.
0
,
'
THROTILE BODIES
c:llRC
TIP
--------------
"dlAG" appears on the di
sp
lay.
g. Simultaneously press the "SELECT' button
"1" and "RESET' button
''2" for 2 seconds
or
more to set the diagnostic mode.
di
I
1
TIP
---------------
The diagnostic code
nu
mber "
1"
appears on the
display.
h. Diagnostic code number "
14
" is
se
lected.
1.
Turn the throttle
gr
ip to the
fu
ll
y closed posi-
tion.
J.
Adjust the position of the accelerator position
sensor angle
so
that 12-22
ca
n appear in the
meter display.
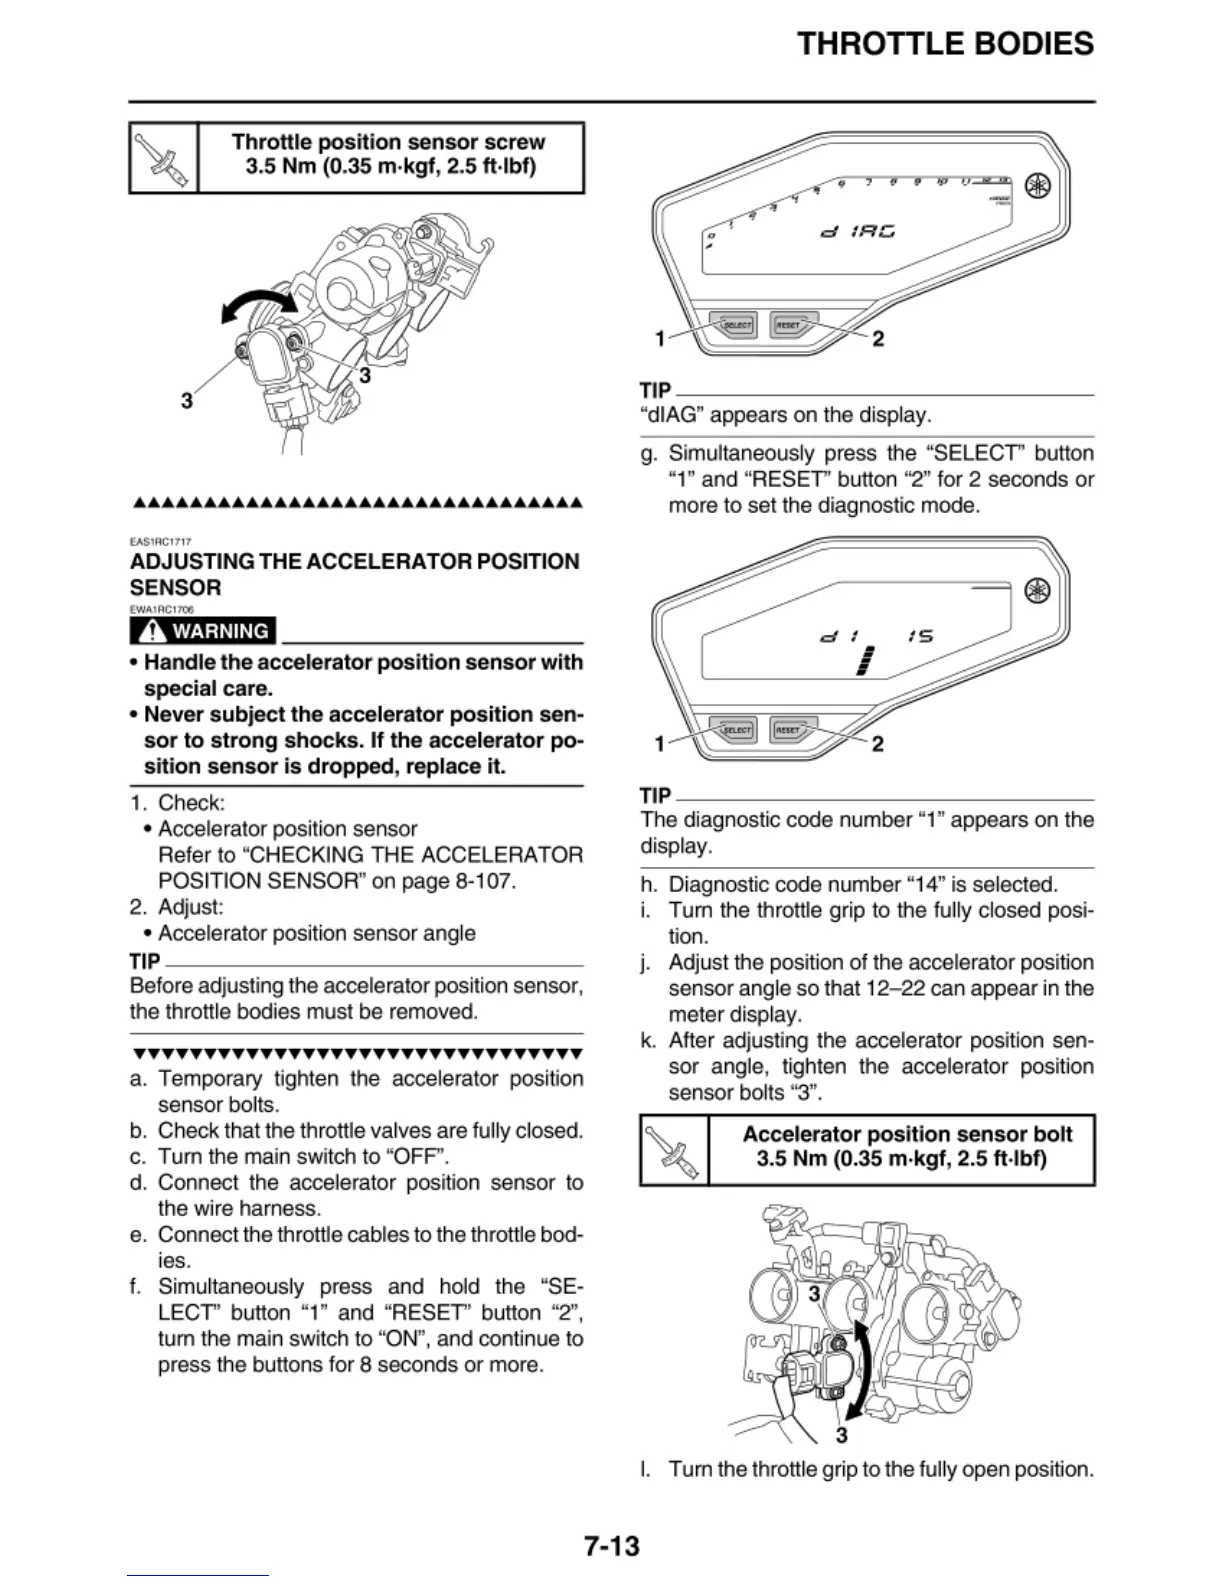
k.
After adjusti
ng
the accelerator position sen-
sor angl
e,
tighten the acce
le
rator position
sensor bol
ts
"3".
Accelerator
position
sensor
bolt
3.5 Nm
(0
.35 m·kgf, 2.5
ft
·lbf)
I. Turn the throttle
gr
ip to the
fu
ll
y open position.
7-13