,..,....
CHECKING
TH
E OIL COOLER
1. Check:
• O
il
cooler
Cr
ac
ks/damage
->
Replace.
2.
Check:
• O
il
coo
le
r inlet hose
• O
il
cooler outlet hose
Cracks/damage/wear-> R
ep
lace.
,......,
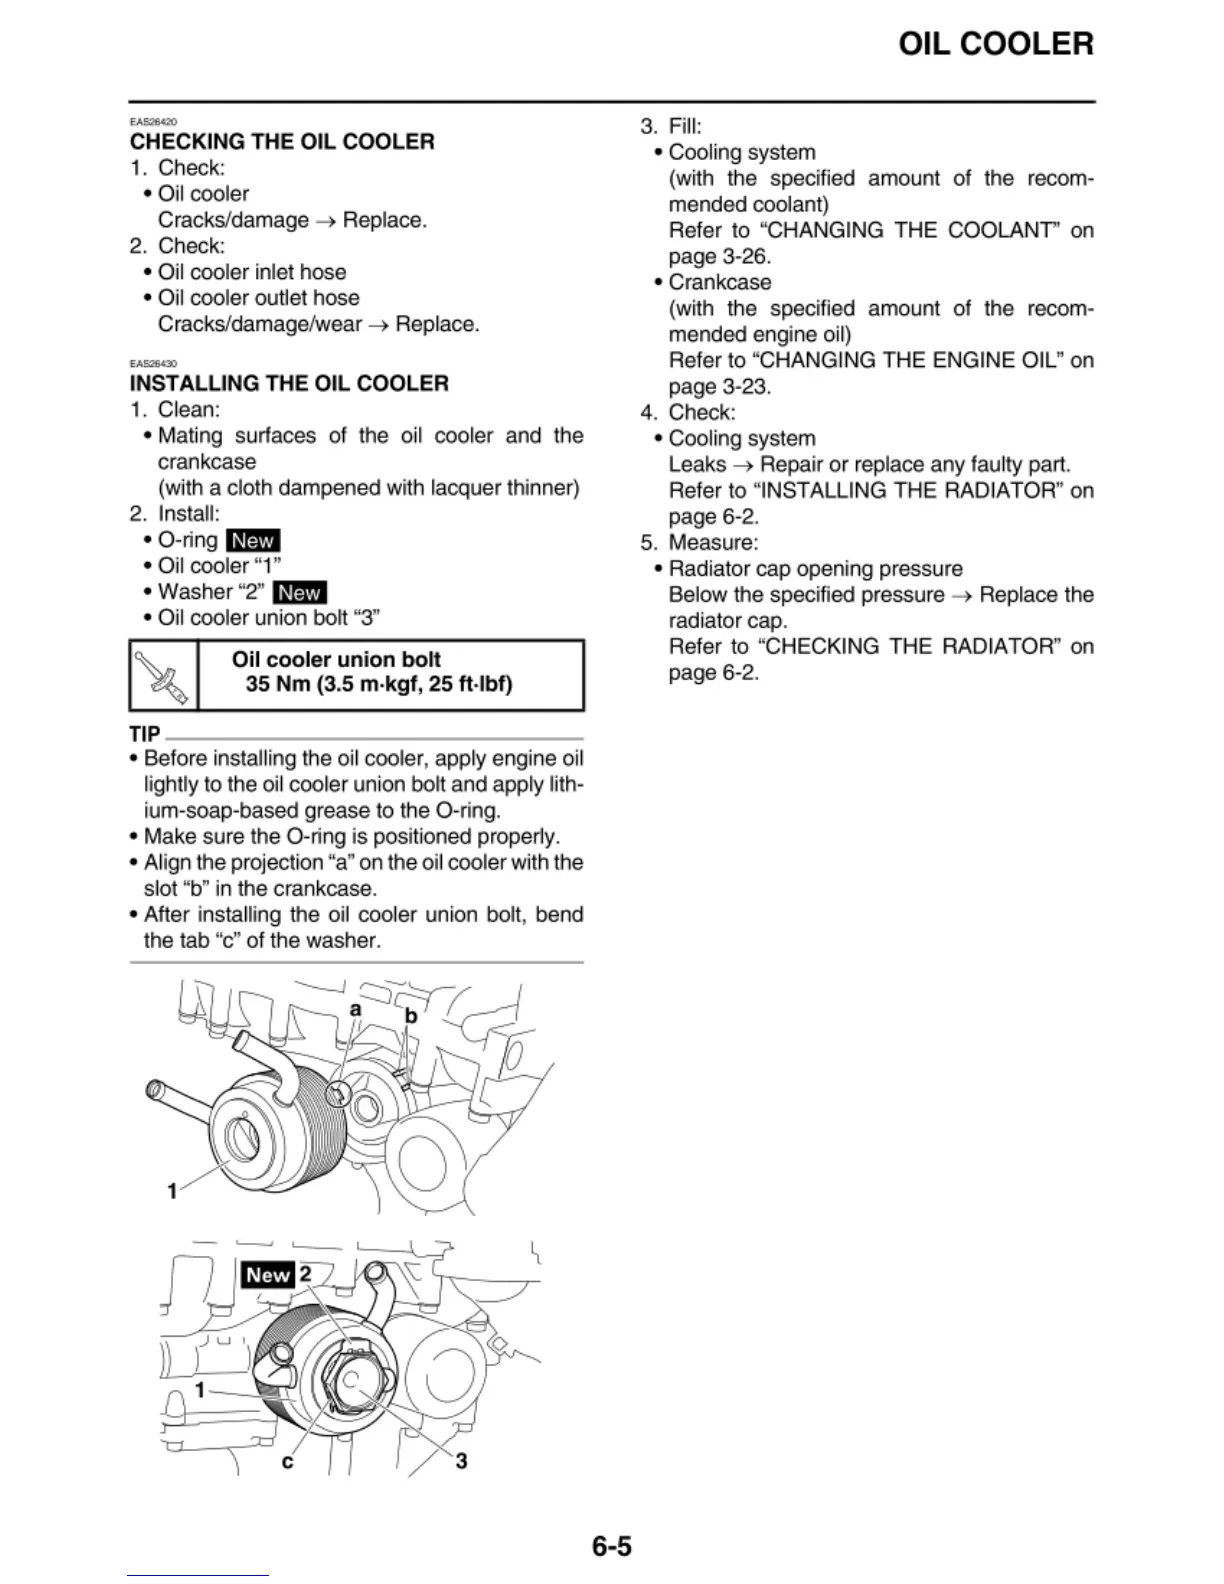
IN
STALLING
TH
E OIL
COOL
ER
1. Clean:
•
Mat
ing surfaces
of
the o
il
coo
l
er
and the
crankcase
(with a cloth dampened with lacquer thinn
er
)
2. Install:
• 0 -
ri
ng
l@@I
• O
il
cooler "1"
•
Washe
r "2"
llljll