CONNECTING RODS AND PISTONS
,..,,..,
REMOVING
THE
CONNECTING
RODS
AND
PISTONS
The
following proced
ur
e
app
li
es to all
of
the con-
necting rods and p
is
tons.
1. Remove:
•C
onnecting r
od
cap "1"
• Connecting r
od
• Big end
bea
rings
TIP
~~~~~~~~~~~~~~-
• Identi
fy
the
pos
i
ti
on
of
each big end beari
ng
so
that it can be reinstalled in its original place.
• After removing the connecting rods and con-
necting rod caps, care should be taken not to
damage the
ma
ting surf
aces
of the connecting
ro
ds
and connecting r
od
caps
.
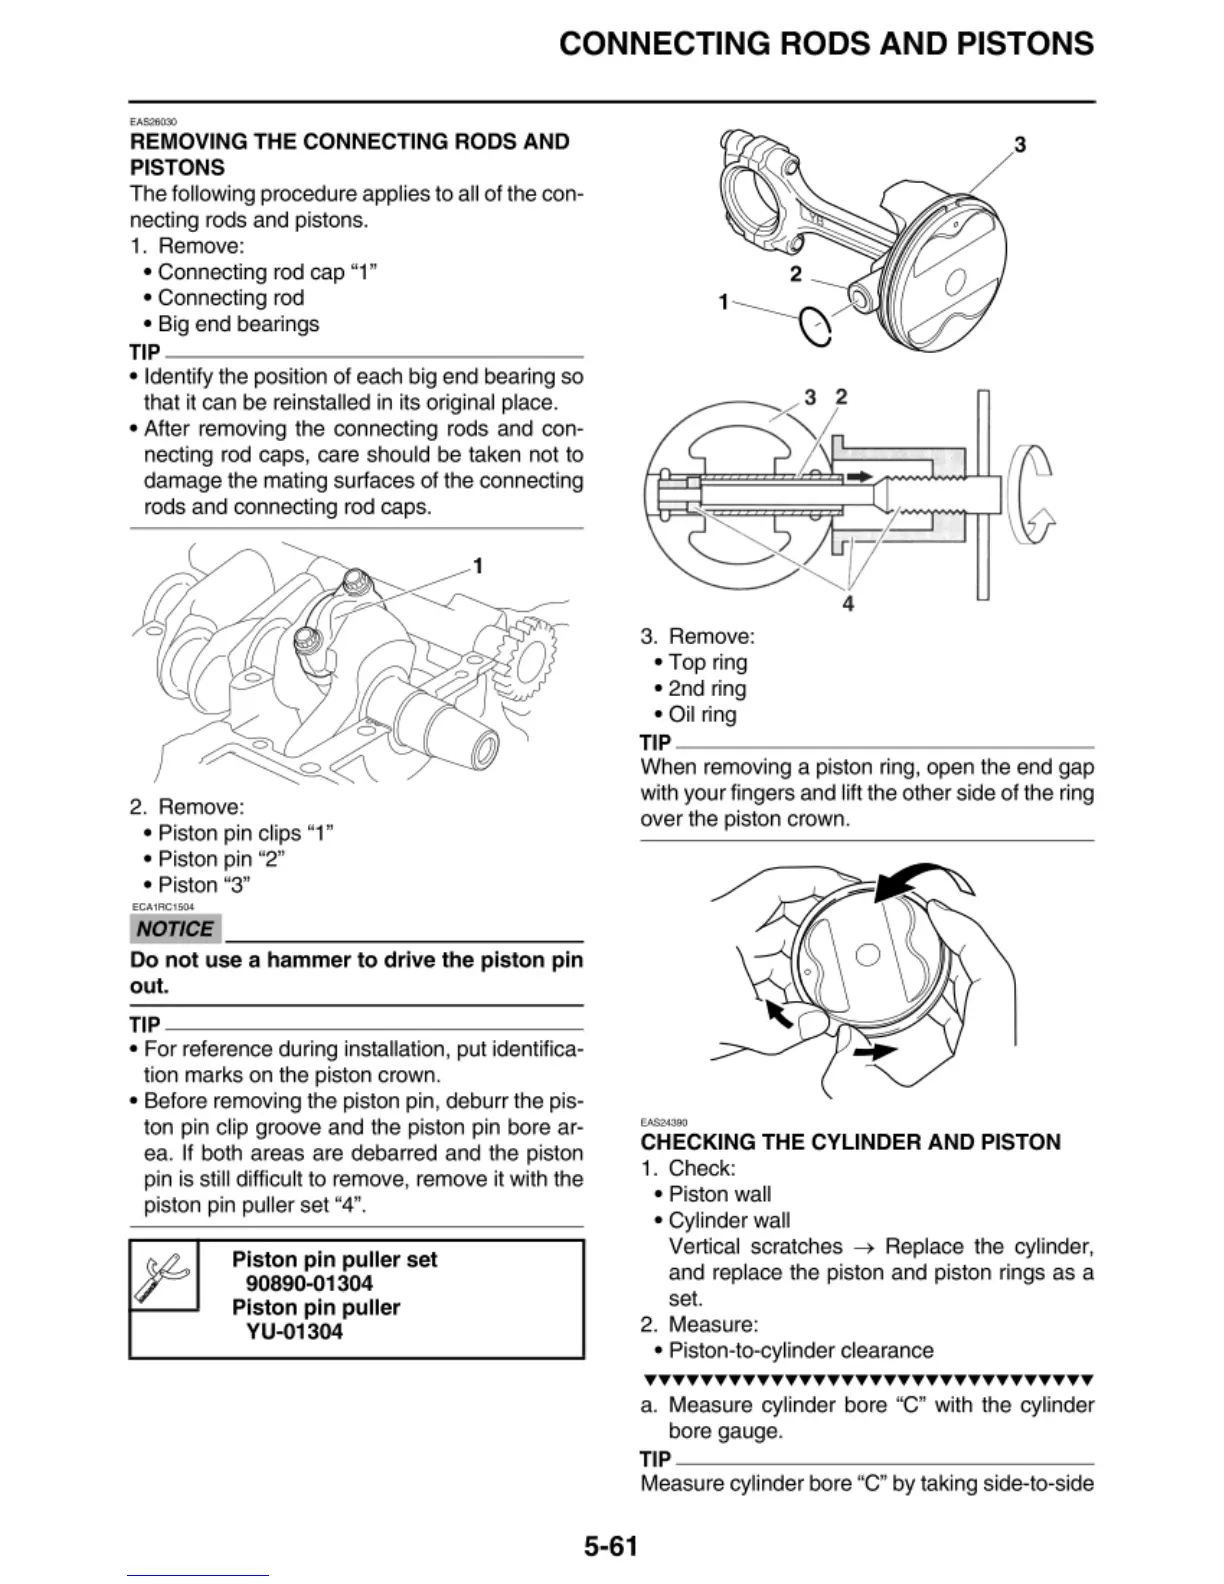
2. Remove:
• Piston pin cl
ips
"1"
• Piston pin "2"
• Piston "3"
ECA1
RC
I
SCM
NOTICE
~~~~~~~~~~~~~
Do
not
use
a
hammer
to
drive
the
piston
pin
out.
TIP
~~~~~~~~~~~~~~-
•
Fo
r reference duri
ng
installation, put identifica·
tion marks on
th
e piston crown.
•
Be
fore removing t
he
piston pi
n,
deburr the pis·
ton pin c
li
p groove and the piston pin bore ar-
ea.
If
both areas are debarred and t
he
piston
pin is sti
ll
difficult to remove, remove it with t
he
piston pin pu
ll
er
se
t "4".
Piston
pin
puller
set
90890-01304
Piston
pin
puller
YU-01304
5-61
3. Remove:
•
Top
ring
• 2nd ring
•
Oi
l
ri
ng
4
TIP
~~~~~~~~~~~~~~-
When removing a piston ring, open the end
gap
wi
th
your
fingers
and
li
ft t
he
other side
of
the ring
over the pist
on
crown.
,,_,..
CHECKING
THE
CYLINDER
AND
PISTON
1. Check:
• Piston wall
•
Cy
li
nder
wall
Vertical scratch
es
~
Replace the cylinder,
and repla
ce
the piston
and
pist
on
rings
as
a
set.
2. Measure:
• Piston-to-cylin
der
clearance
TTYTTTYYTTTYTTTYYTTTYTTTYTTTYYTT
a. Measure
cy
li
nder
bor
e "C" with t
he
cy
linder
bore gauge.
TIP
~~~~~~~~~~~~~~
Me
asu
re cylinder bore "C"
by
taki
ng
side-to-side



 To Next Page