EA$2:)810
REMOV
IN
G THE CAMSHAFTS
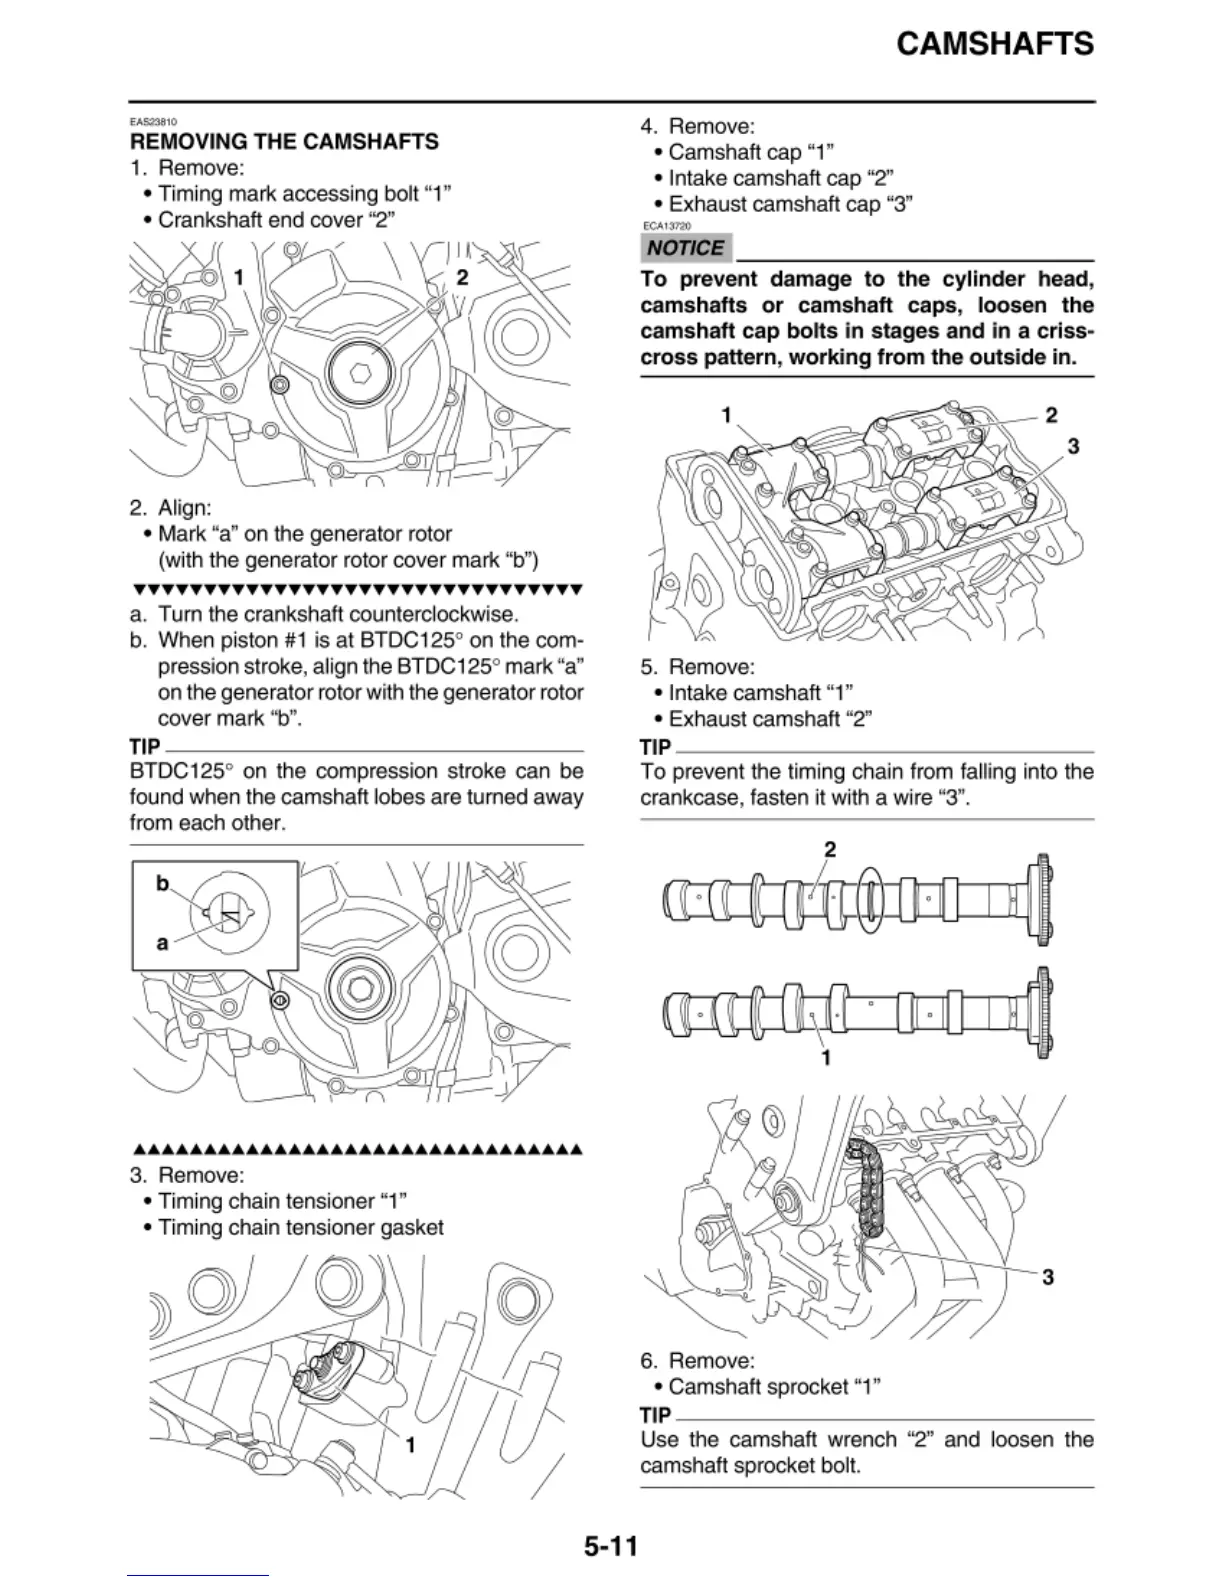
1. Remove:
• Timing mark accessing bolt "1"
• Crankshaft end cover "2"
2. Align:
• Mark "a"
on
the generator rotor
-.J
(with t
he
generator rotor cover mark "
b'
')
TTTTTTTTTTTTTTTTTTTTTTTTTTTTTTTT
a. Tum the crankshaft counterclockwise.
b. When pist
on
#1
is at BTDC125° on the com-
pression stroke, align the BTDC125° mark "a"
on the
ge
nerat
or
rotor with the generator rotor
cover mark "b
".
TIP
~~~~~~~~~~~~~~~
BTDC 125°
on
the compression
st
roke can be
found when the camshaft lobes a
re
tu
rn
ed away
from each other.
-.J
••••••••••••••••••••••••••••••••
3. Remove:
• Timing chain tensioner "1"
• Timing chain tensioner gasket
a
5-11
4. Remove:
• Camshaft cap "1"
• Intake camshaft cap "2"
CAMSHAFTS
• Exhaust camshaft cap "3"
N
OTI
CE
~~~~~~~~~~~~~
To
p
revent
damage
to
the
cy
li
nd
er
head,
cams
h
afts
or
camshaft
caps
,
loosen
the
camshaft
cap
bo
l
ts
in
stages
and
in
a c
ri
ss
-
cross
pattern, wo
rki
ng
fr
om
the o
ut
si
de
in.
5. Remove:
• In
ta
ke c
am
shaft "1"
• Exhaust camshaft "2"
TI
P
~~~~~~~~~~~~~~
To
prevent the timing chain from falling in
to
the
crankcase, fasten it with a wire "3".
2
~-
~
I
~
I H
•
•
>-
~ ~
-
•
•
1
6.
Remove:
• Camshaft sprocket "1"
T
I
P
~~~~~~~~~~~~~~~
Use the camshaft wrench "2" and loosen the
camshaft sprocket bol
t.