EA$22&e0
REMOVING THE HANDLEBAR
1. Stand the
veh
icle on a level surface.
EWA
t3 1
20
AwARNING
Securely
support
the vehicle
so
that
there
is
no
danger
of
it
falling over.
2. Remove:
• Handlebar grip "1"
TIP
~~~~~~~~~~~~~~
Blow compressed air between the left ha
nd
lebar
and the handlebar
gr
i
p,
and gradually push the
grip off the handlebar.
1
3. Remove:
• Throttle cable
ho
usings "1"
• Throttle grip "2"
TIP
~~~~~~~~~~~~~~~
Wh
il
e removing the throttle cable housing, pu
ll
back the rubber cover "3".
EAS22890
CHECKING THE HANDLEBAR
1. Chec
k:
• Handlebar
Bends/cracks/damage
--+
Rep
lace.
EW
Al
lfi90
A WARNING
Do
not
attempt
to
straighten a bent handle-
bar
as
this
may
dangerously weaken it.
HANDLEBAR
....,,..,
,
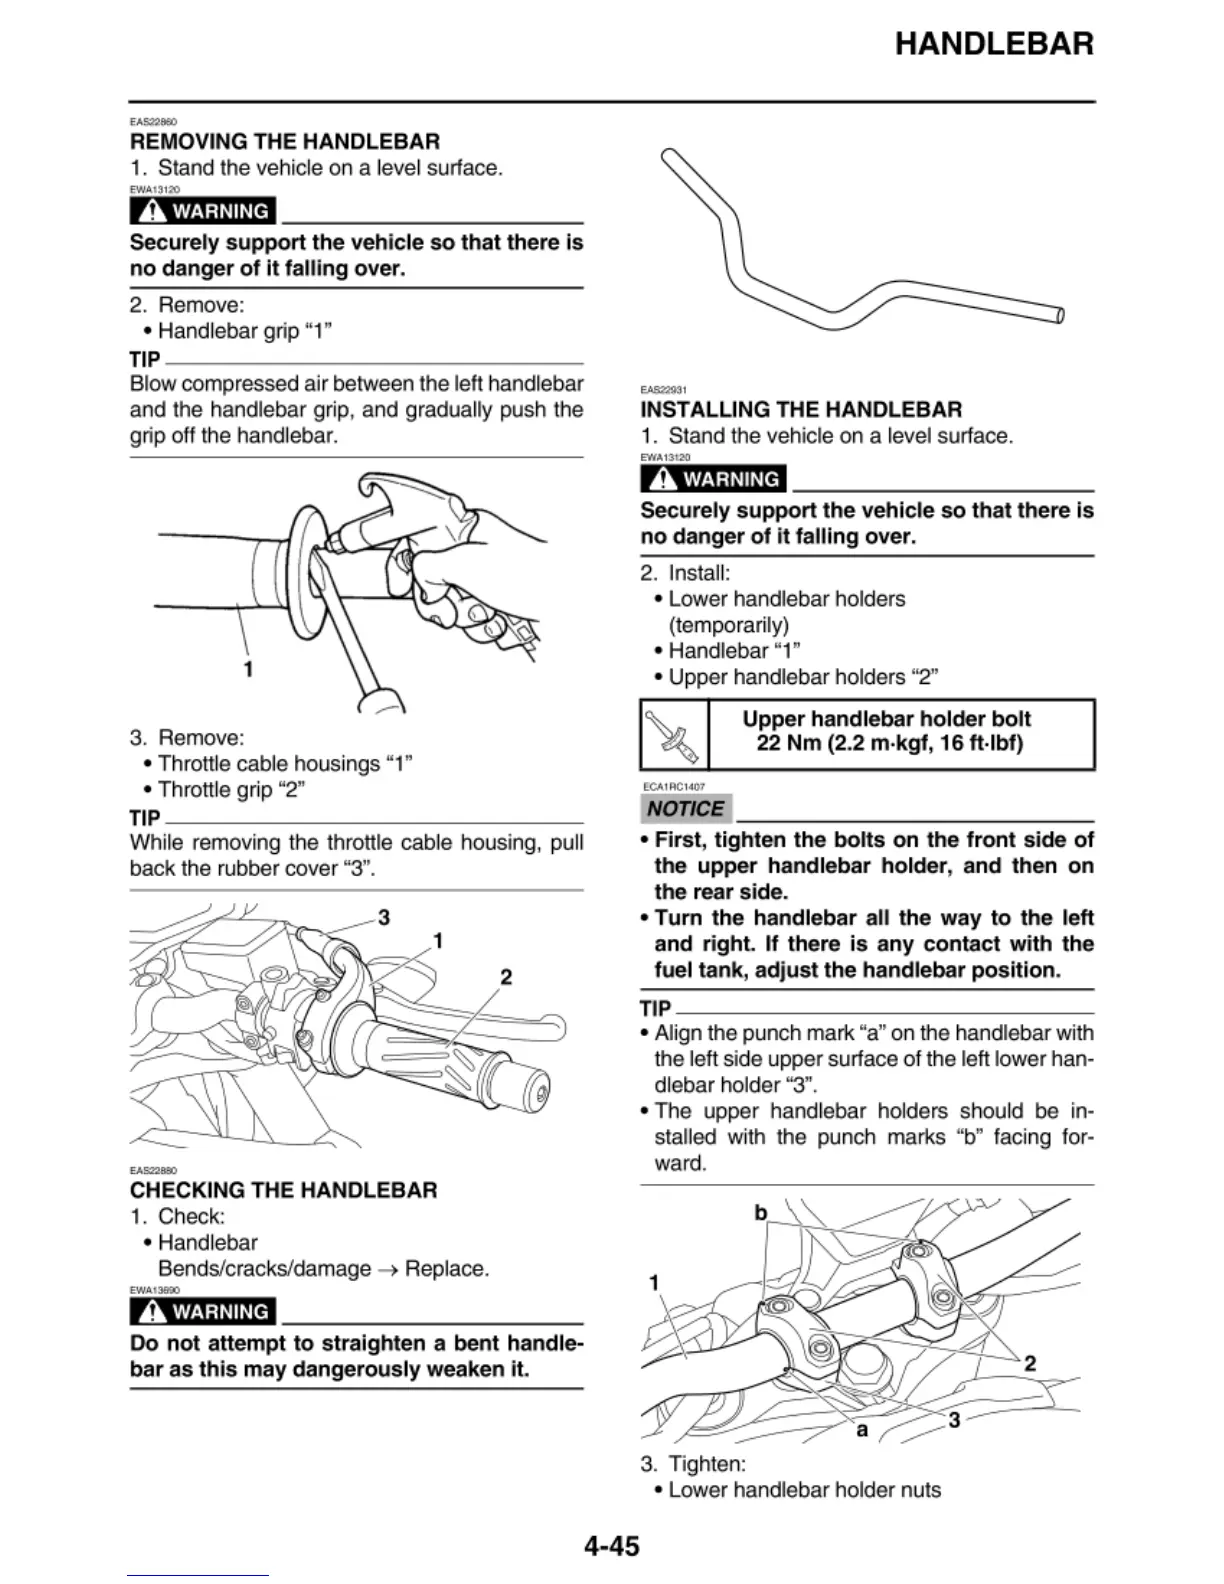
INSTALLING THE HANDLEBAR
1. Stand the vehicle on a level surface.
AwARNING
Securely
support
the vehicle
so
that
there
is
no
danger
of
it
falling over.
2. Insta
ll
:
• Lower handlebar holders
(temporarily)
• Handlebar "1"
• Upper handlebar holders "2"
ECAIRC1407
NOTICE
Upper handlebar holder
bolt
22
Nm
(2.2 m·kgf, 16 fl·lbf)
•
First
, tighten the
bolts
on the
front
side
of
the
upper
handlebar holder, and then
on
the rear side.
• Turn the handlebar all the way to the left
and right. If there
is
any
contact
with the
fuel tank,
adjust
the handlebar
position
.
TIP
~~~~~~~~~~~~~~~
• Align the punch mark "a" on the handlebar with
t
he
left side upper surface of the left lower han-
dlebar ho
ld
er
"3".
• The upper handlebar
ho
lders should be in-
stalled with the punch marks "b"
fac
ing
fo
r-
ward.
3. Tighten:
• Lower handlebar holder nuts
4-45