b. Keep pressing the timing cha
in
tensio
ner
r
od
by hand, remove the hexagon wre
nc
h and
slowly release the timing chain tensioner rod.
c. Make sure t
hat
t
he
timing chain tensioner rod
comes out
of
the timing chain tensi
oner
hous-
ing smoothly. If there is rough movement, re-
place
th
e timing chain tensioner.
INSTALLING THE CAMSHAFTS
1. Remove:
• Timing mark accessing bolt "1"
•
Cr
ankshaft end
cov
er ''2"
-_J
2.
Al
ign:
• Mark "a"
on
the generator rot
or
(with t
he
generator rotor cover mark "b")
••••••••••••••••••••••••••••••••
a. Turn the crankshaft counterclockw
is
e.
b. Wh
en
piston #1 is at BTDC125° on the com-
pressi
on
st
roke, a
li
gn the BTDC1 25° mark "a"
on the
ge
n
era
t
or
rotor with the
ge
nerat
or
rotor
cov
er
ma
rk "b
".
CAMSHAFTS
&&&&&&&&&&&&&&&&&&&&&&&&&&&&&&&&
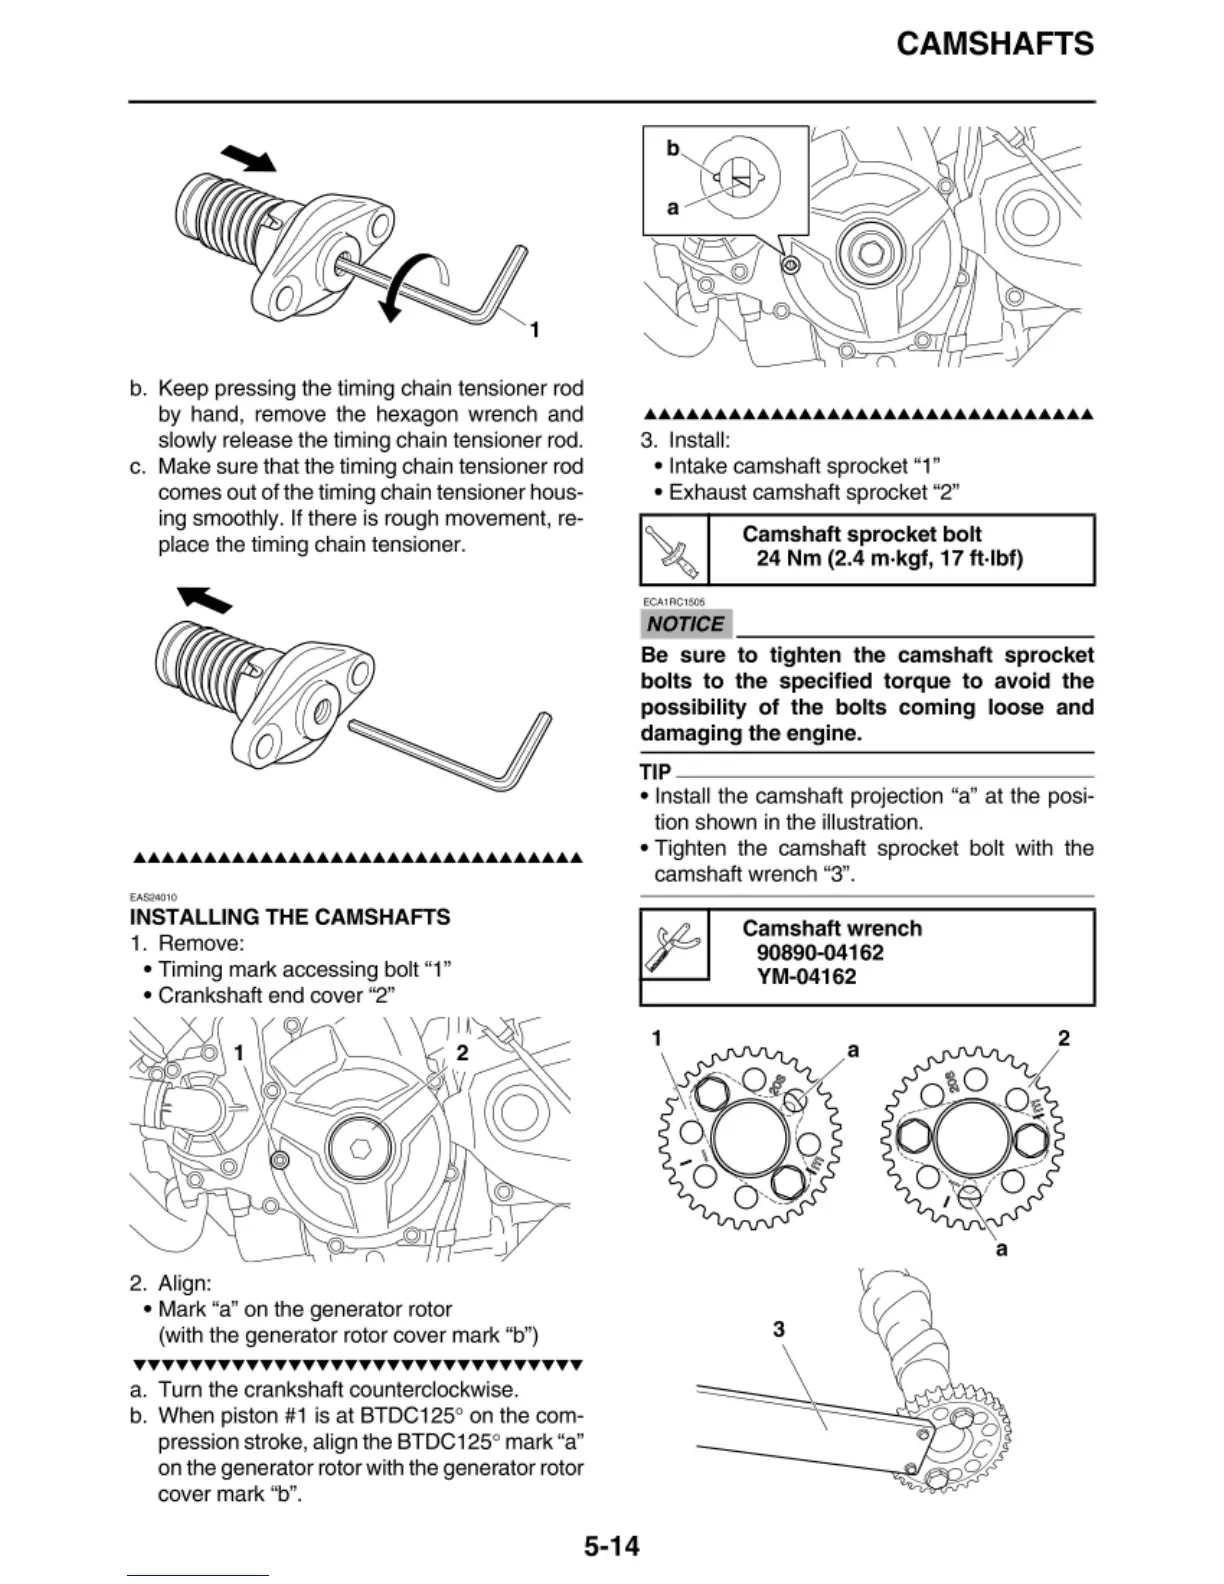
3. Insta
ll
:
• Intake camshaft spro
ck
et
"1"
• Exhaust camshaft sprocket "2"
Camshaft sprocket bolt
24 Nm (2.4
m·kg
f, 17
ft·
lbf)
NOTICE
~~~~~~~~~~~~~
Be
sure to tighten the camshaft sprocket
bolts to the specified torque to avoid the
possibility of the bolts coming loose and
damaging the eng
in
e.
TIP
~~~~~~~~~~~~~~~
• Insta
ll
the camshaft
pr
o
jec
ti
on "a"
at
the posi-
tion shown in the i
ll
ustration.
• Tighten the camshaft sprocket bolt with the
camshaft wrench "3".
5-14
Camshaft wrench
90890-04162
YM-04162
a
3
a