4. Ins
ta
ll:
• Exhaust camshaft "1"
• Intake camshaft "2"
TIP
~~~~~~~~~~~~~~-
• Make sure the punch mark "a"
on
each cam-
shaft faces up.
• When installing the camshaft, no need
to
align
the mark "b" on the camshaft sprocke
t.
5. Install:
• Camshaft cap
• Intake camshaft cap
• Exhaust camshaft cap
TIP
~~~~~~~~~~~~~~~
• Make sure each camshaft cap is
in
stalled in its
original place. Refer to the identificati
on
marks
as
follows:
"IL":
Intake left side camshaft cap mark
"EL": Exhaust left side camsha
ft
cap mark
• Make sure
th
e arrow mark "a"
on
each cam-
shaft points toward the right side of the engine.
CAMSHAFTS
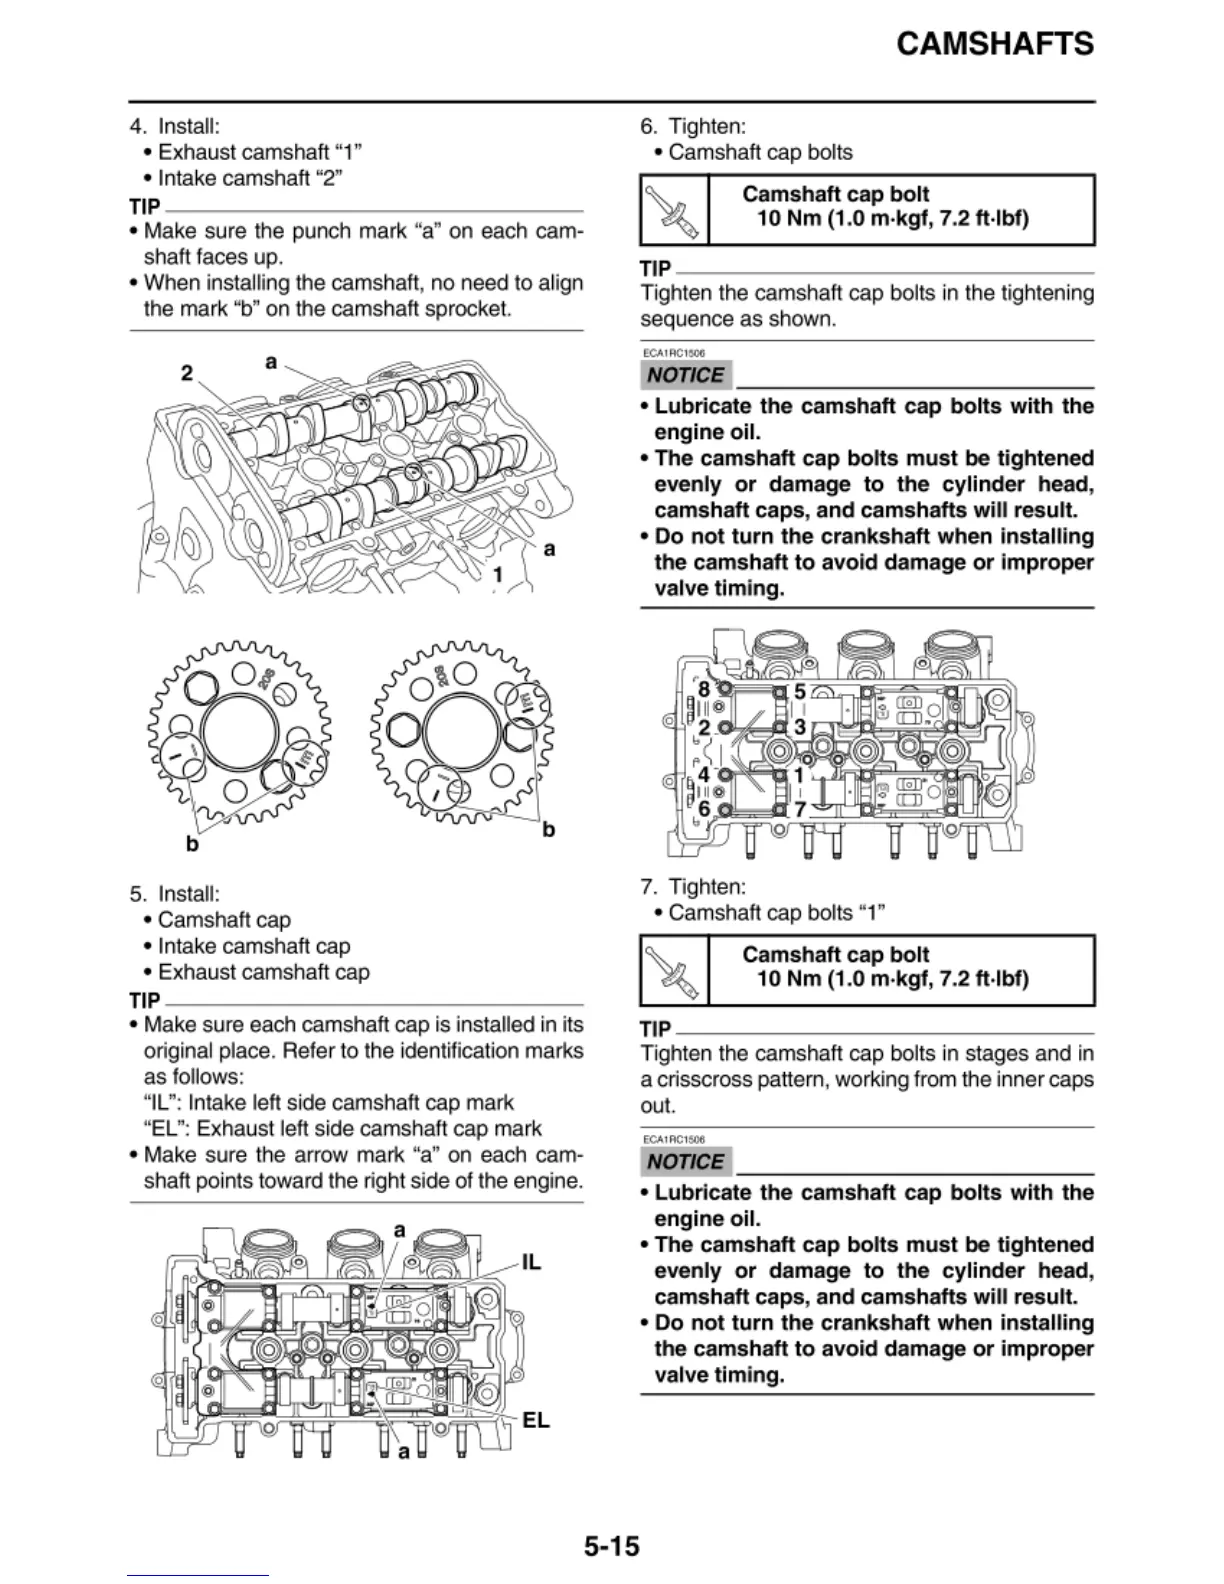
6.
Tighten:
• Camshaft cap bolts
Camshaft cap
bolt
10
Nm
(1
.0 m·kgf, 7.2 ft·lbf)
TIP
~~~~~~~~~~~~~~
Tight
en
the camshaft cap bol
ts
in the tightening
sequence as shown.
ECA.
1RC1
1Wt1
NOTICE
• Lubricate
the
camshaft cap
bolts
with the
engine oil.
• The camshaft
cap
bolts
must
be
tightened
evenly
or
damage
to
the
cylinder head,
camshaft caps, and camshafts
will
result.
• Do
no
t t
urn
the crankshaft when installing
the camshaft
to
avo
id damage
or
improper
valve timing.
7.
Tighten:
• Camshaft cap bolts "1"
Camshaft cap
bolt
10
Nm
(1.0 m·kgf, 7.2
ft
·
lbf
)
TIP
~~~~~~~~~~~~~~
Tight
en
the camshaft cap bol
ts
in stages and in
a crisscross patte
rn
, worki
ng
from
th
e
in
ner
ca
ps
out.
NOTICE
• Lubricate
the
camshaft cap
bolts
with the
engine oil.
• The camshaft
cap
bolts
must
be
tight
ened
evenly
or
damage
to
the
cylinder head,
camshaft caps, and camshafts
will
result.
• Do
not
turn the crankshaft when installing
the camshaft
to
avoid damage
or
improper
valve timing.
5-15