8. Check:
• Camshaft punch
ma
rk "a"
Make sure the punch mark "a" on the cam-
shaft is aligned with the camshaft cap align-
ment mark "b".
9. Install:
• Timing
cha
in tensioner
• Timing
cha
in tensioner gasket IHM
••••••••••••••••••••••••••••••••
a. Apply a few drops of eng
in
e o
il
to the insi
de
"a" of the timing cha
in
tensioner.
~-"'7:S?
<
a
b. While lightly pressing the timing chain ten-
sioner rod
by
hand, turn the timing chain ten-
sioner rod fu
ll
y counterclockwi
se
with a
hexagon wrench "1 ".
CAMSHAFTS
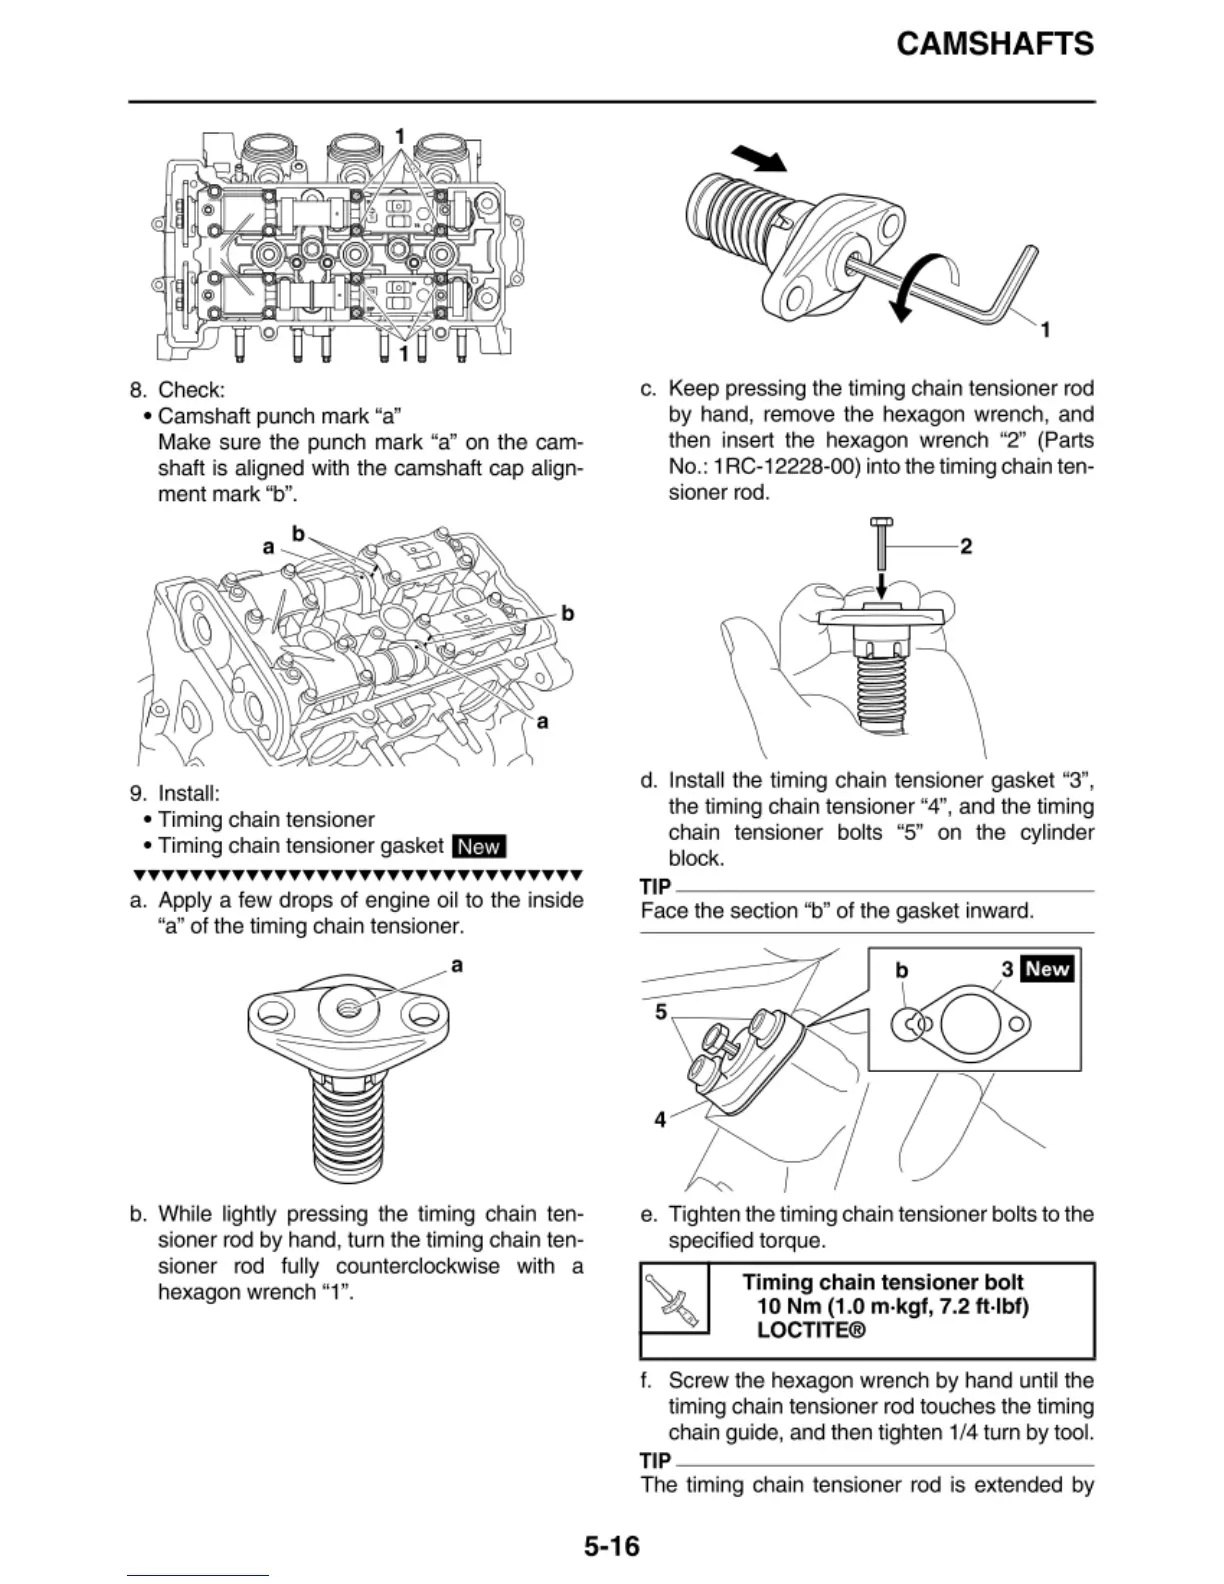
c. Keep pressing the timing chain tensioner rod
by
hand, remove the hexagon wre
nc
h,
and
then inse
rt
the hexagon wre
nc
h "2" (Parts
No.: 1
RC
-1
2228-00) into the timing chain ten-
sioner rod.
d. Insta
ll
the timing chain tensioner gasket "3",
the timing chain tensioner "4", and the tim
in
g
chain tensioner
bo
lts "5"
on
t
he
cylinder
block .
TIP
~~~~~~~~~~~~~~
Face the section "b"
of
the gasket inward.
4
I
e. Tighten the timing chain tensioner
bo
lts to the
specified torque.
Timi
ng
ch
ai
n
ten
si
oner
bolt
10
Nm
(1.0 m-kgt, 7
.2
fl·lbt)
L
OCTIT
E®
f. Screw the hexagon wrench
by
hand until the
timing chain tensioner rod t
ouc
h
es
the timing
chain
gu
ide, and then tighten 1/4 turn
by
too
l.
TI
P
~~~~~~~~~~~~~~~
The timing chain tensioner rod is
ex
tended by
5-16