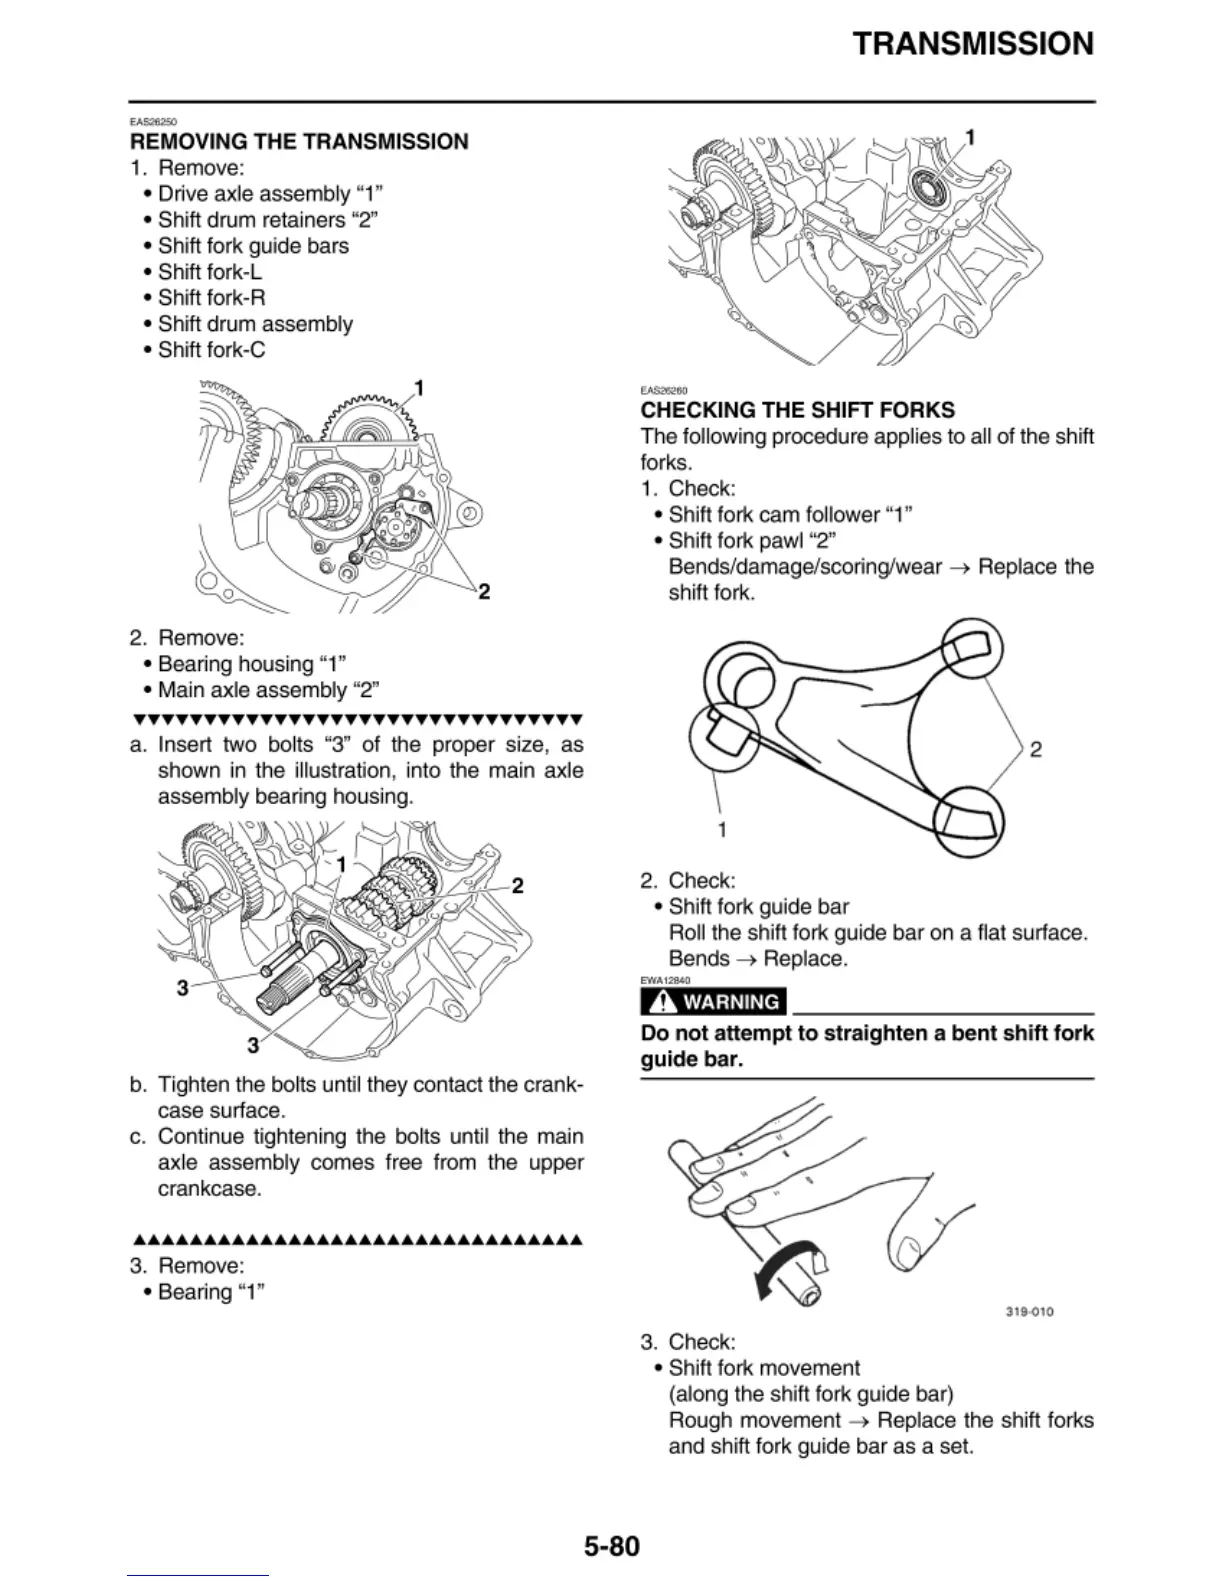
REMOVING THE TRANSMISSION
1. Remove:
• Drive axle assembly "1"
• Shi
ft
drum retainers "2"
• Shi
ft
fork gui
de
bars
• Shi
ft
fork-L
• Shi
ft
fork-R
• Shi
ft
drum assembly
• Shi
ft
fork-C
2. Remove:
• Bea
rin
g housing "1"
•
Ma
in
ax
le
assembly "2"
••••••••••••••••••••••••••••••••
a. Insert two bolts "3"
of
the proper size,
as
shown
in
t
he
ill
ustrati
on,
into the main axle
assembly bearing hous
in
g.
b. Tighten the
bo
lts until they contact the crank-
case
su
rf
ace.
c. Continue tighte
ni
ng the
bo
lts until the main
axle assembly comes
fr
ee from the upper
crankcase .
••••••••••••••••••••••••••••••••
3. Remove:
• Bea
rin
g "1"
TRANSMISSION
CHECKING THE SHIFT FORKS
The following procedure app
li
es to a
ll
of the shift
forks.
1.
Check:
• Shift fork cam follower "1"
• Shift fork pawl "2"
Bends/damage/scoring/wear
~
Replace the
s
hi
ft fork.
2
2.
Check:
• Shift fork guide bar
Roll the shift fork guide bar on a flat surface.
Bends
~
Replace.
EWA1
28«1
A WARNING
Do not attempt to straighten a bent shift fork
guide ba
r.
3. Check:
5-80
• Shift fork movement
(along the shi
ft
fork guide bar)
Rough movement
~
Replace the shift forks
and shift fork gui
de
ba
r as a set.



 To Next Page