7. Check:
• Bearing
•Oil
seal
Damage/wear
4 Repla
ce
the
st
arter motor.
"
""""
ASSEMBLING THE STARTER MOTOR
1 . Install:
• Brush holder
se
t
• Insulator "1"
TIP
---------------
lnsta
ll
the insulator
as
shown in t
he
illustration.
1
D
RI
JR
\
\.'-
-'
u
L---f'
/
2. Install:
• Rear cover "1"
• Start
er
mot
or
yoke "2"
• Front cover "3"
TIP
---------------
Align the m
at
ch marks "a" on the starter
mo
tor
yoke with the ma
tc
h marks "b" on the front and
rear cover.
b a b
0
0
1 2
3
INSTALLING THE STARTER MOTOR
1 . Install:
• Starter mot
or
"1"
• Negative batte
ry
lead "2"
• Starter mot
or
bolts "3"
TIP
---------------
lnsta
ll
the negative battery lead as shown
in
the
illustratio
n.
Starter motor bolt
12
Nm (1.2 m·kgf, 8.7 ft·lbf)
ELECTRIC STARTER
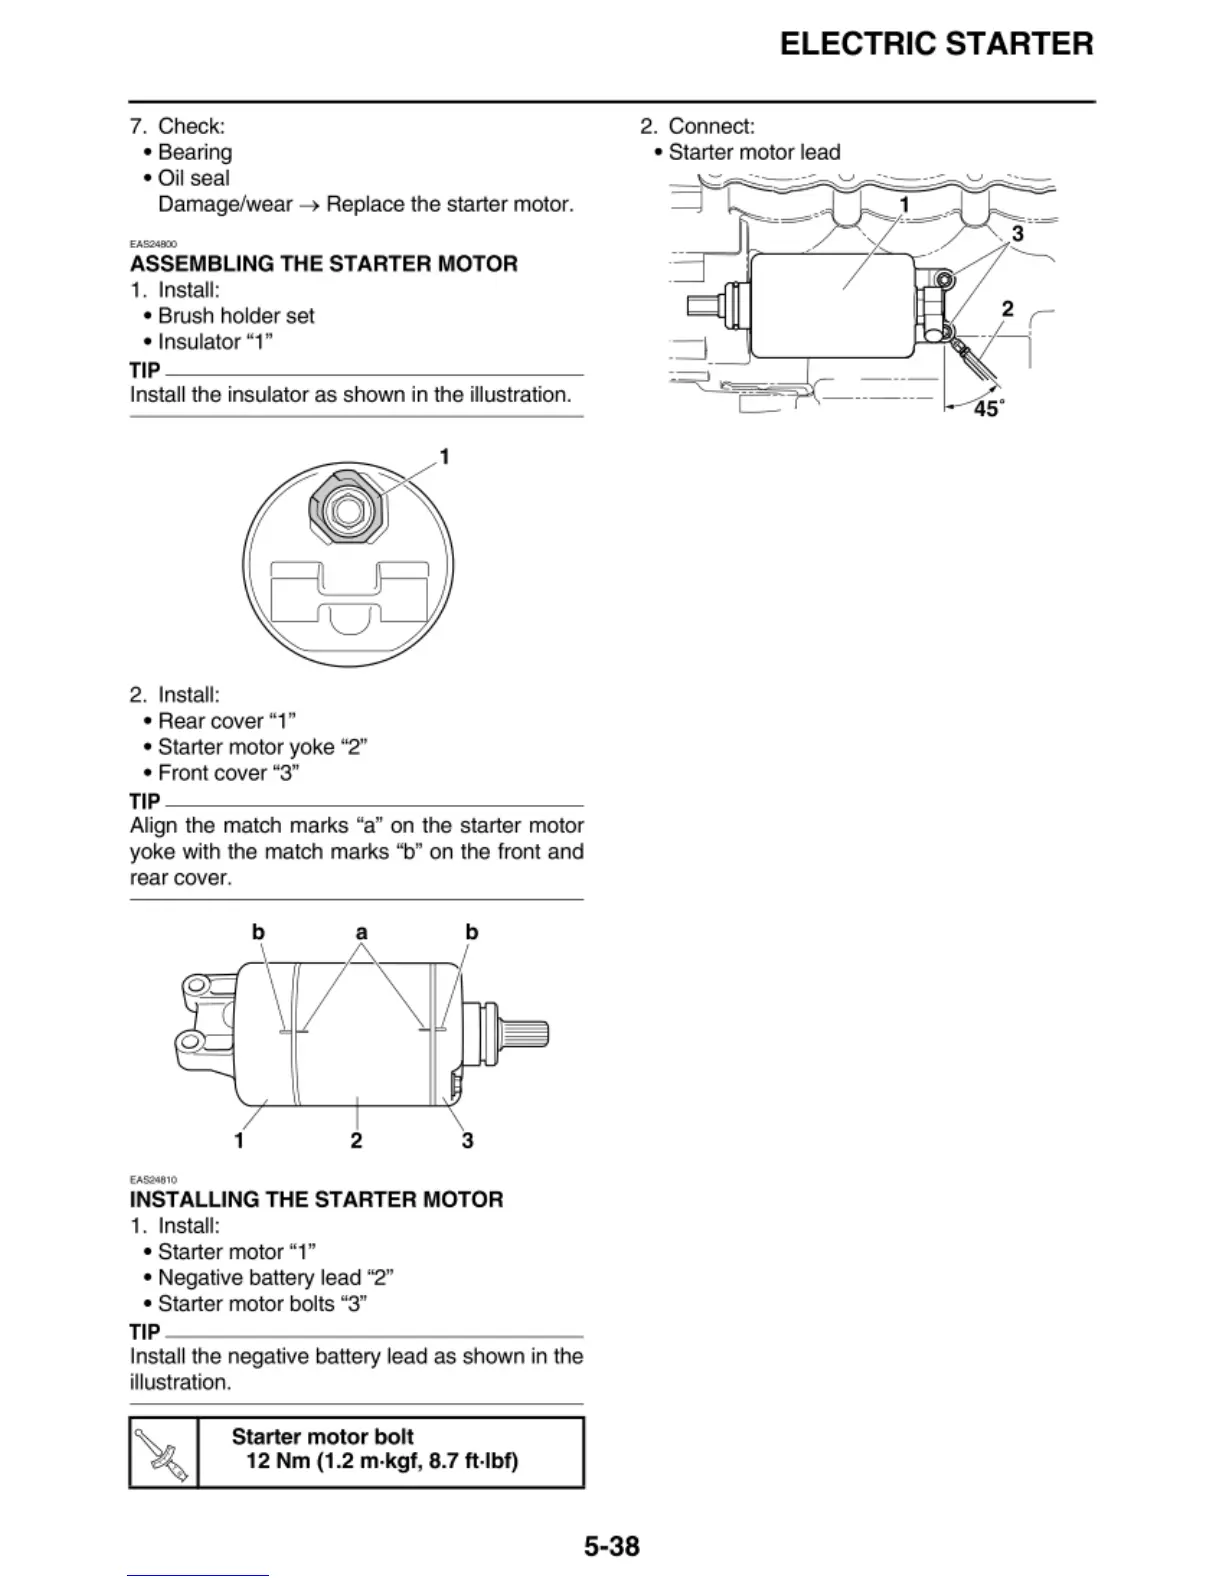
2.
Co
nnect:
• Starter motor lead
.:=!
_
]
'---~---'
~~~,--
-
-
-
--
-~--
-
45
•
5-38