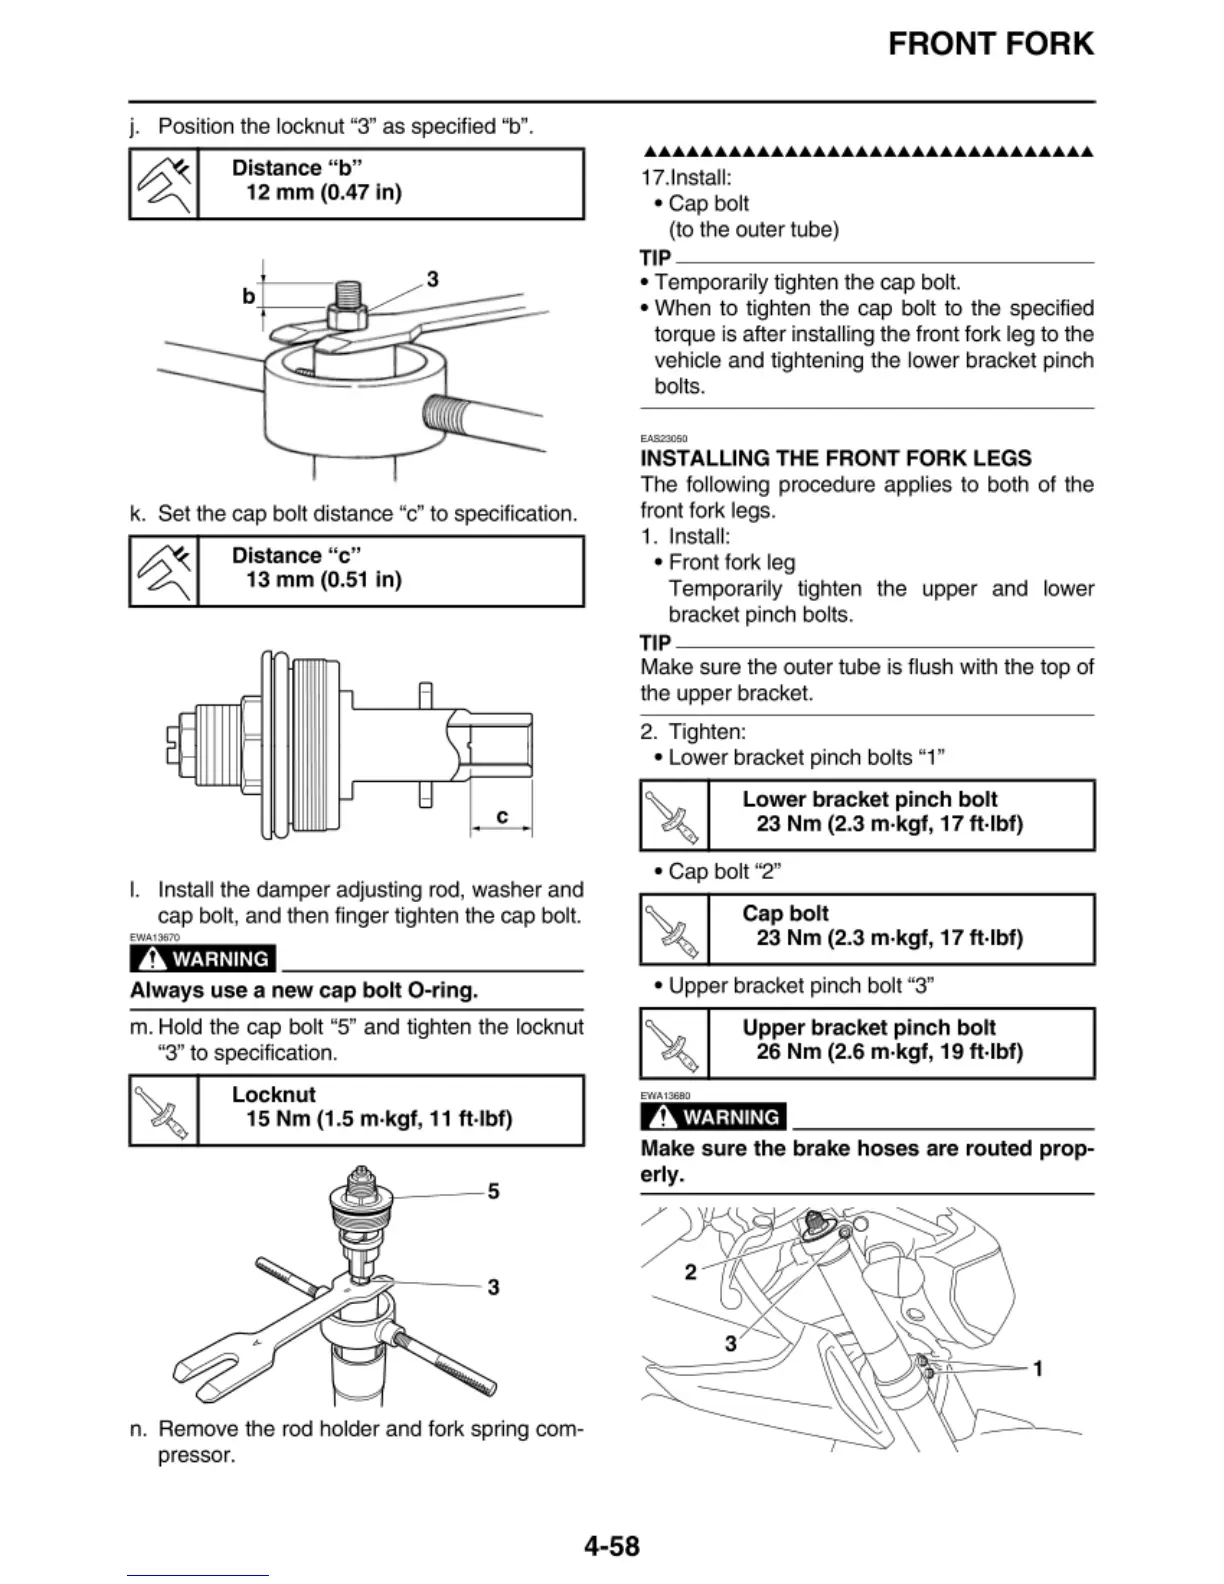
j. Position the locknut "3" as specified "b".
Distance "b"
12
mm
(0
.47 In)
3
k. Set t
he
cap bolt distance "c" to specification.
Distance
"c"
13
mm
(0.51
in)
c
-
I. Install the damper adjusting
rod,
washer and
cap bol
t,
and then finger tighten the cap bo
lt.
EWA
t3610
AwARNING
Always
use
a new cap
bolt
0-ring.
m. Hold the cap bolt "5" and tighten the locknut
"3'' to speci
fi
ca
tion.
Locknut
15 Nm
(1
.5 m·
k,gf
,
11
ft
·lbf)
n. Remove t
he
rod ho
ld
er and fork
sp
rin
g com-
pressor.
FRONT FORK
• •••••••••••••••••••••••••••••••
17.lnstall:
• Cap bolt
(to the outer
tu
be)
TIP
~~~~~~~~~~~~~~-
• Temporarily tighten the cap bol
t.
• When to tighten the cap bolt to the speci
fi
ed
torque is after insta
ll
in
g the front fork
le
g to the
vehicle and tighte
ni
ng the lower bracket pin
ch
bolts.
"""""
INSTALLING THE FRONT FORK LEGS
The follow
in
g procedure app
li
es
to both of the
front fork legs.
1.
Insta
ll
:
• Front fork leg
Temporarily tighten the upper and lower
bracket p
in
ch
bolts.
TIP
~~~~~~~~~~~~~~~
Make sure the outer tube is flush with the top of
the upper bracket.
2. Tighten:
• Lower bracket pinch bol
ts
"1"
Lower
bracket
pinch
bolt
23
Nm
(2.3 m·kgf, 17 ft·lbf)
• Cap bolt
''2"
Cap
bolt
23
Nm
(2.3 m·kgf, 17 ft·lbf)
• Upper bracket pinch bolt "3"
Upper bracket
pinch
bolt
26
Nm
(2.6 m·kgf, 19 ft·lbf)
AwARN
I
NG
Make sure the brake
hoses
are routed prop-
erly.
4-58


 To Next Page