Installation and Communication
29
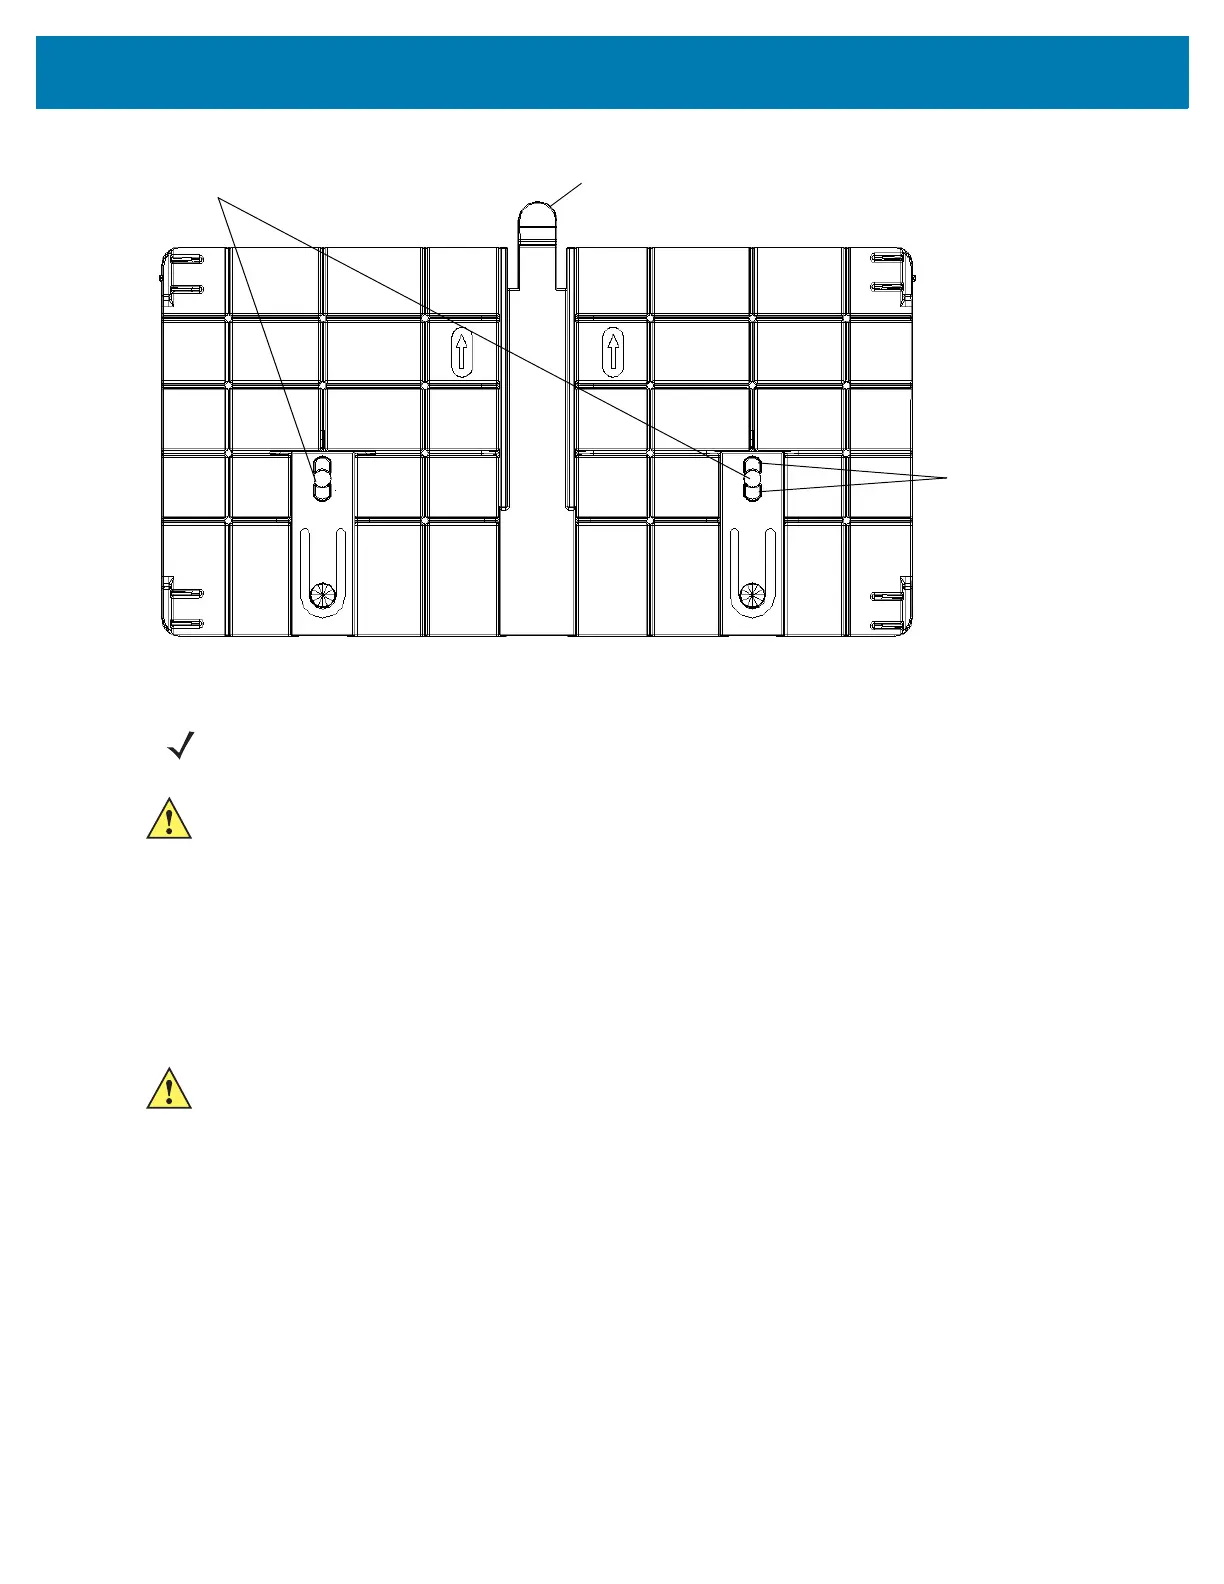
Figure 15 Mounting Plate, Front
3. Reposition the mounting plate over the mounting holes and secure using the supplied fasteners (as
appropriate for the surface material).
4. Position the reader by aligning the markers on the metal base plate and the wall bracket, with the
key-slot holes over the mounting screws. Gently slide the reader down to lock into place.
5. To remove the reader, press the release tab and slide the reader up while gently pulling out.
FX7500 Direct Mounting
To mount the unit without using the mounting plate:
1. Use the mounting bracket as a template to locate the holes, or locate and mark the holes on 4 3/16”
centers, +/- 1/32”.
2. For wood surfaces, drill two 1/8" diameter by 7/8" deep holes on 4.192" centers. For drywall/masonry
surfaces, drill two 3/16" diameter by 7/8" deep (min) holes on 4.192" centers and install using the
provided anchors.
3. Position the reader with the key-slot holes over the mounting screws and gently slide the reader down
to lock into place.
4. Adjust the screw head height to assure a snug fit. Or if the screws are accessible from the back, use
machine screws with a lock washer/nut and tighten the nut (from the back) to secure the reader.
Screw Head Stops
(4 typical)
Release Tab
Mounting Holes
NOTE: Mount the reader with the cable connections up or down, depending on the installation
requirements.
CAUTION:Use a hand screw driver to install the mounting plate (do not use a power driver). Do not use
excessive torque, and tighten the screws so that they are just snug on the screw head stops
(see Figure 15). If the reader does not engage the mounting plate, loosen the screw(s) 1/8 to 1/4
turn and try again.
CAUTION:Not using the mounting plate for the FX7500 reader can affect read performance at elevated
temperatures. Also, if not using the mounting plate, secure the reader to prevent it from
coming off of the mounting screws.
 Loading...


