R29X Door Phone Administrator Guide
AKUVOX SMART INTERCOM www.akuvox.com
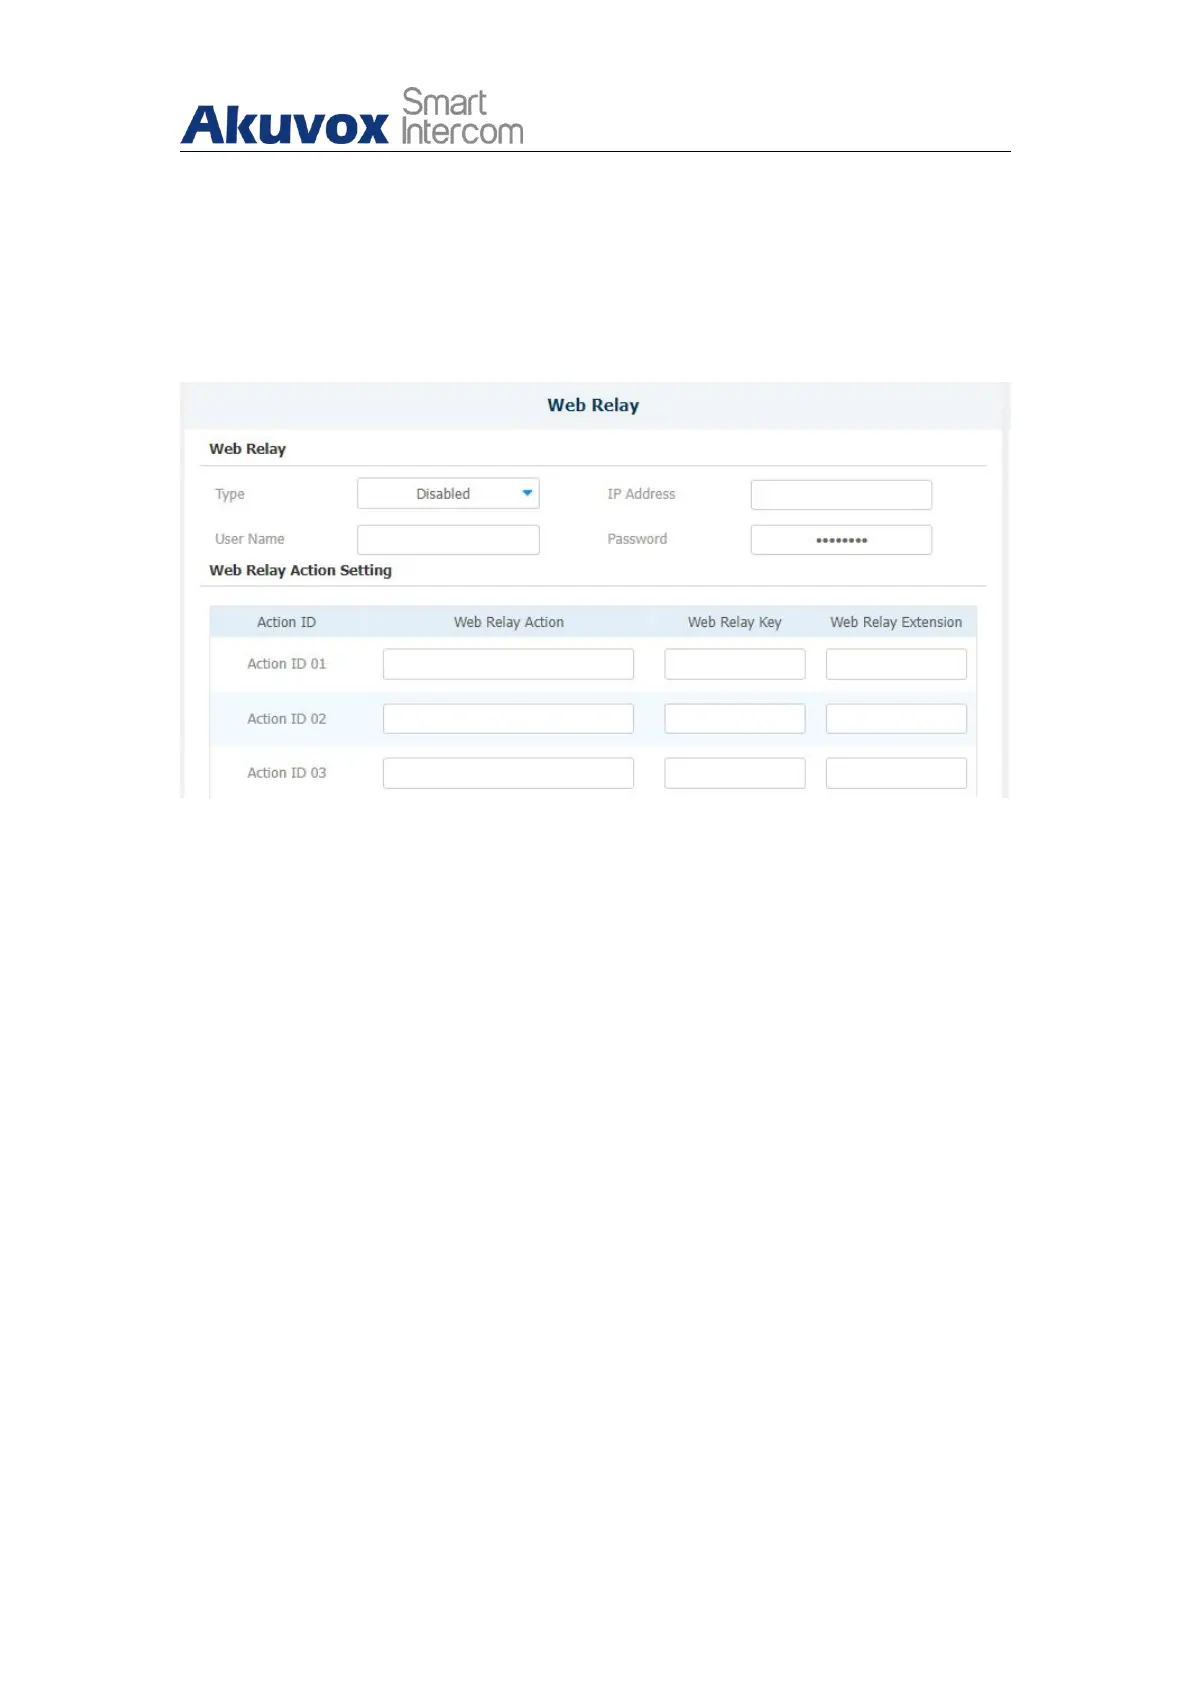
12.2.Web Relay Setting
In addition to the relay that is connected to the door phone, you can also
control the door access using the network-based web relay. To do the
configuration on device web Phone > Web Relay interface.
Parameter Set-up:
Type: select among three options Disabled, WebRelay and Both. Select
Webrelay to enable the web relay. Select Disable to disable the web relay.
Select Both to enable both local relay and web relay.
IP Address: enter the web relay IP address provided by the web relay
manufacturer.
User Name: enter the User name provided by the web relay manufacturer.
Password: enter the password provided by the web relay manufacturer.
The passwords are authenticated via HTTP and you can define the
passwords using http get in Action.
Web Relay Action: enter the specific web relay action command provided
by the web relay manufacturer for different actions.
Web Relay Key: enter the configured DTMF code, which when the door is
unlocked via DTMF code, the action command will be sent to the web
relay automatically.
 Loading...