Printed in USA 08/07 P/N 133487
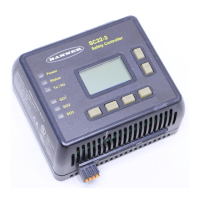
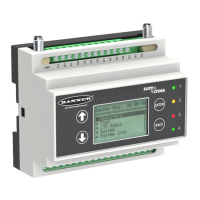
SC22-3 Safety Controller
Instruction Manual
Section Contents
Section 1 Overview . . . . . . . . . . . . . . . . . . . . . . . . . . . . . . . . . . . . . Page 1
Section 2 Components and Specifications . . . . . . . . . . . . . . . . . . Page 12
Section 3 System Installation. . . . . . . . . . . . . . . . . . . . . . . . . . . . . Page 16
Section 4 Configuration — PC Interface . . . . . . . . . . . . . . . . . . . . Page 34
Section 5 Configuration — Onboard Interface . . . . . . . . . . . . . . . . Page 43
Section 6 Operating Instructions . . . . . . . . . . . . . . . . . . . . . . . . . . Page 55
Section 7 System Checkout. . . . . . . . . . . . . . . . . . . . . . . . . . . . . . Page 60
Section 8 Troubleshooting and Maintenance. . . . . . . . . . . . . . . . . Page 67
Appendix A Input Device and Safety Category Reference . . . . . . . . Page 73
Appendix B
Configuration Tutorial — PC Interface
. . . . . . . . . . . . . . Page 101
Appendix C
Configuration Tutorial — Onboard Interface . . . . . . . . Page 113
Glossary . . . . . . . . . . . . . . . . . . . . . . . . . . . . . . . . . . . Page 122
Features
• Easy-to-use Controller with fully configurable inputs
and outputs
• ISO 13849-1 Category 2, 3, or 4 and OSHA/ANSI
Control Reliability Input device hookup
• Manages several safety related functions
• 22 Inputs for safety and non-safety input devices
• 3 dual channel Safety outputs with selectable ON- and
OFF-delay
• 10 Status outputs track input and output status, mute
status, lockout, fault conditions and reset needed
• Simple configuration procedure using PC interface
(PCI) or on-board controller interface (OBI) maps each
input device to any of 3 safety outputs
• Configurations are password protected and confirmed
before use, for assurance of safety integrity
• Configurations are transferable to multiple SC22-3
Controllers and can be e-mailed as attachments
• 24V dc operation
• Complies with Safety Integrity Level (SIL) 3 per
IEC 62061 and IEC 61508, and Category 4
Performance Level “e” per ISO 13849-1.
• Live display and fault log provide “real-time” status
information andd historically track faults
• Wiring diagram, Ladder Logic diagram, and
Configuration Summary can be printed or exported as
.pdf or .dxf files