DISASSEMBLY/ASSEMBLY PROCEDURES Chapter 7
7 - 11
7.2.6 Cover Assembly
1. Remove the End Caps, Pole Clamp, Battery Stack, and Barrel Clamp by following the
procedures in sections 7.2.1 through 7.2.4.
Separate the Cover Assembly from the Case Assembly by following the procedure in
section 7.2.5.
NOTE
When properly engaged, six small tabs protruding out from the cover, lock
and hold the keypad and PCB assemblies (including retainers and
electronic chassis) in place against the cover. Only two of these tabs are
visible and can be easily accessed. The remaining four tabs are hidden
from view.
While removing the PCB assemblies, do not allow the keypad to separate
from the Digital/LCD Assembly. If it does, the lamp/LED covers may fall
out and have to be reinserted. Also, because of the small size of these
parts, they are easy to lose.
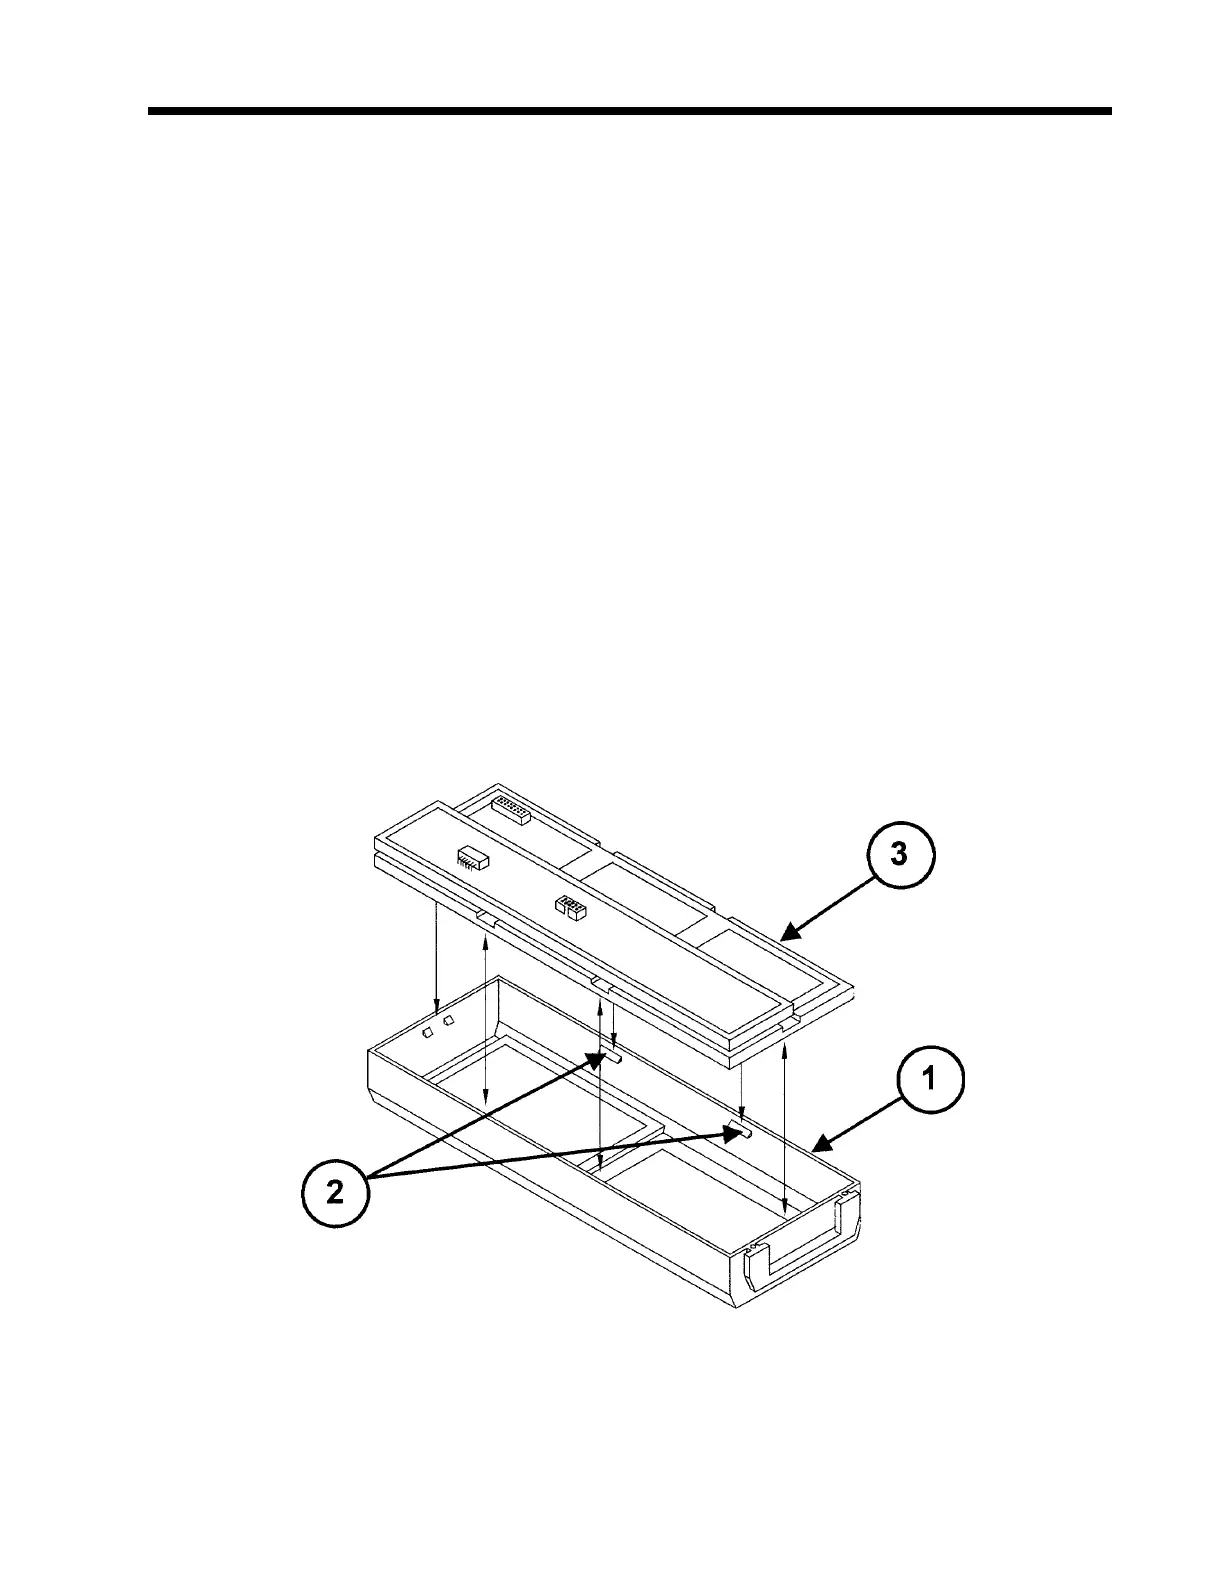
2. With the keypad and window of the Cover/Window Assembly (1) placed on a smooth
surface (grounding mat, etc.) that will not scratch the window, start by releasing the two
visible tabs (2) - pushing them away from and under the retainer (3) holding the digital
board.
Figure 7-10 Cover Assemblies

 Loading...

