Appendix B: Depot Repair Procedures 161
This allows you better access to the connections on the back of the unit.
10 Disconnect the sheath and waste lines from the cytometer.
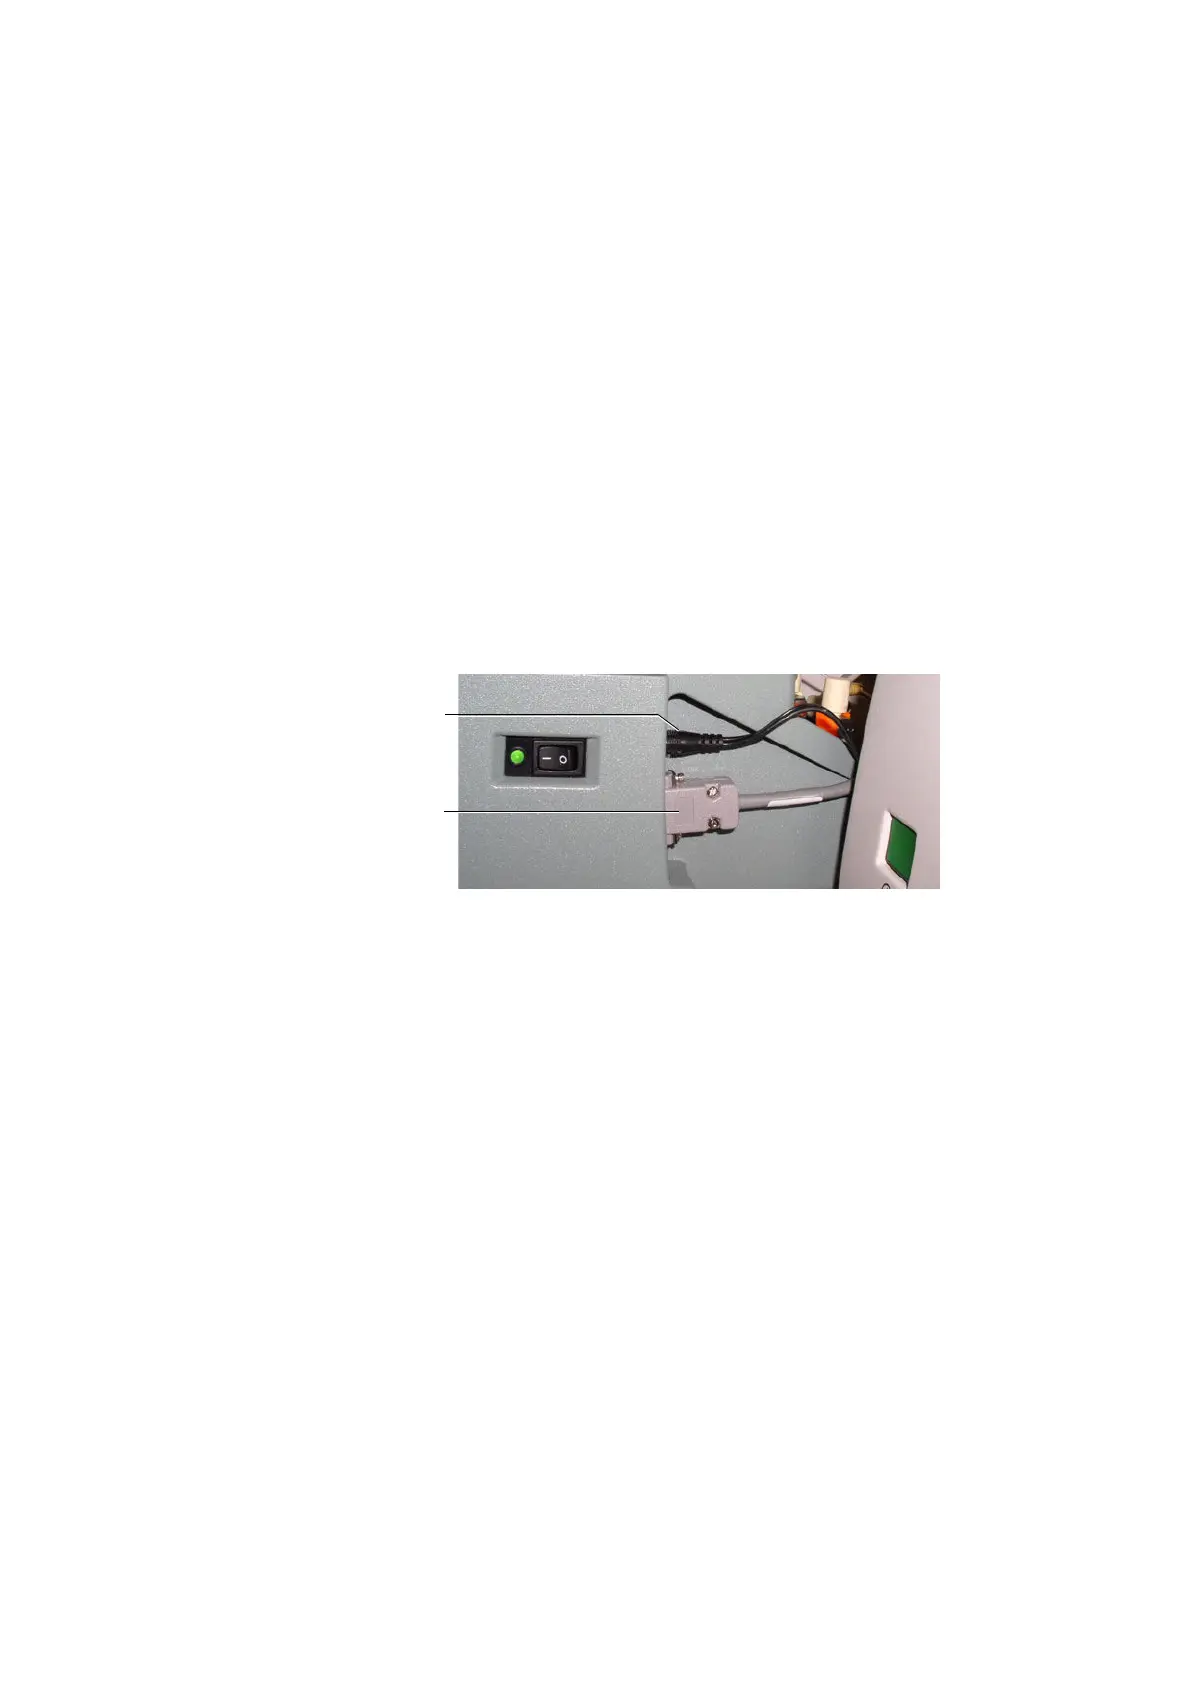
11 [BD LSR II and BD FACSCanto] Disconnect the power and communication
cables from the rear right side of the unit.
[BD FACSCanto II] Disconnect the interface/communication cable from the
cytometer. If necessary, pull the HTS out slightly to access the cable, which
is attached to the cytometer at the back-left corner of the unit.
To detach the communication cable, unscrew the two connector screws and
pull out the cable.
12 [BD FACSCanto II] Lift the front feet of the HTS unit just over the front
edge of the enclosure and tilt the unit at a 45° angle towards you to allow
you access to the door sensor cable on the right side of the HTS. Unplug the
door sensor cable by pulling back on the ferrule. Place the cable over the
right side of the enclosure/carrier.
13 Carefully lift the unit and place it on the benchtop next to the cytometer.
14 [BD LSR II and BD FACSCanto only] Remove the absorbent pad from the
drip reservoir and discard it as biohazardous waste (Figure B-2).
power cable
communication
cable