Chapter 3: Running Samples 67
The selected plate type is added to the experiment.
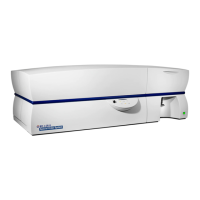
9 If necessary, click the Plate button ( ) in the Workspace toolbar to view
the Plate window.
Setting Up the Plate
In this section, you will add setup controls, compensation controls, and samples
to the plate to run a 6-color experiment. As an example, you will be recording
and analyzing human peripheral blood stained with the following reagents:
CD14 FITC/CD16+CD56 PE/CD 8 PerCP-Cy™5.5/CD19 PE-Cy™7/CD3 APC/
CD4 APC-Cy7. You will need seven compensation control wells to accommodate
the unstained control and the six fluorochromes you are using in your experiment.
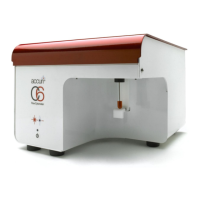
1 If necessary, double-click the Inspector button in the Workspace toolbar to
view the Plate Inspector; select High Throughput Mode.
Make sure you choose the plate type that corresponds to the plate you will
be using. BD FACSDiva software cannot verify that the chosen plate
matches the plate on the HTS unit. If you choose the wrong plate, the probe
could hit the plate between wells or strike the bottom of a well, resulting in
damage to the cytometer.
Plate button
Workspace toolbar