96 | Chapter 3: Operation
3. Hold the jig level on top of
the microplate and raise or
lower the stop screw so its
head touches the bottom of
the notch.
4. Set the jig aside. Using your
fingers, hold the stop screw
in place and screw the
bottom nut down until it
touches the microplate
carrier.
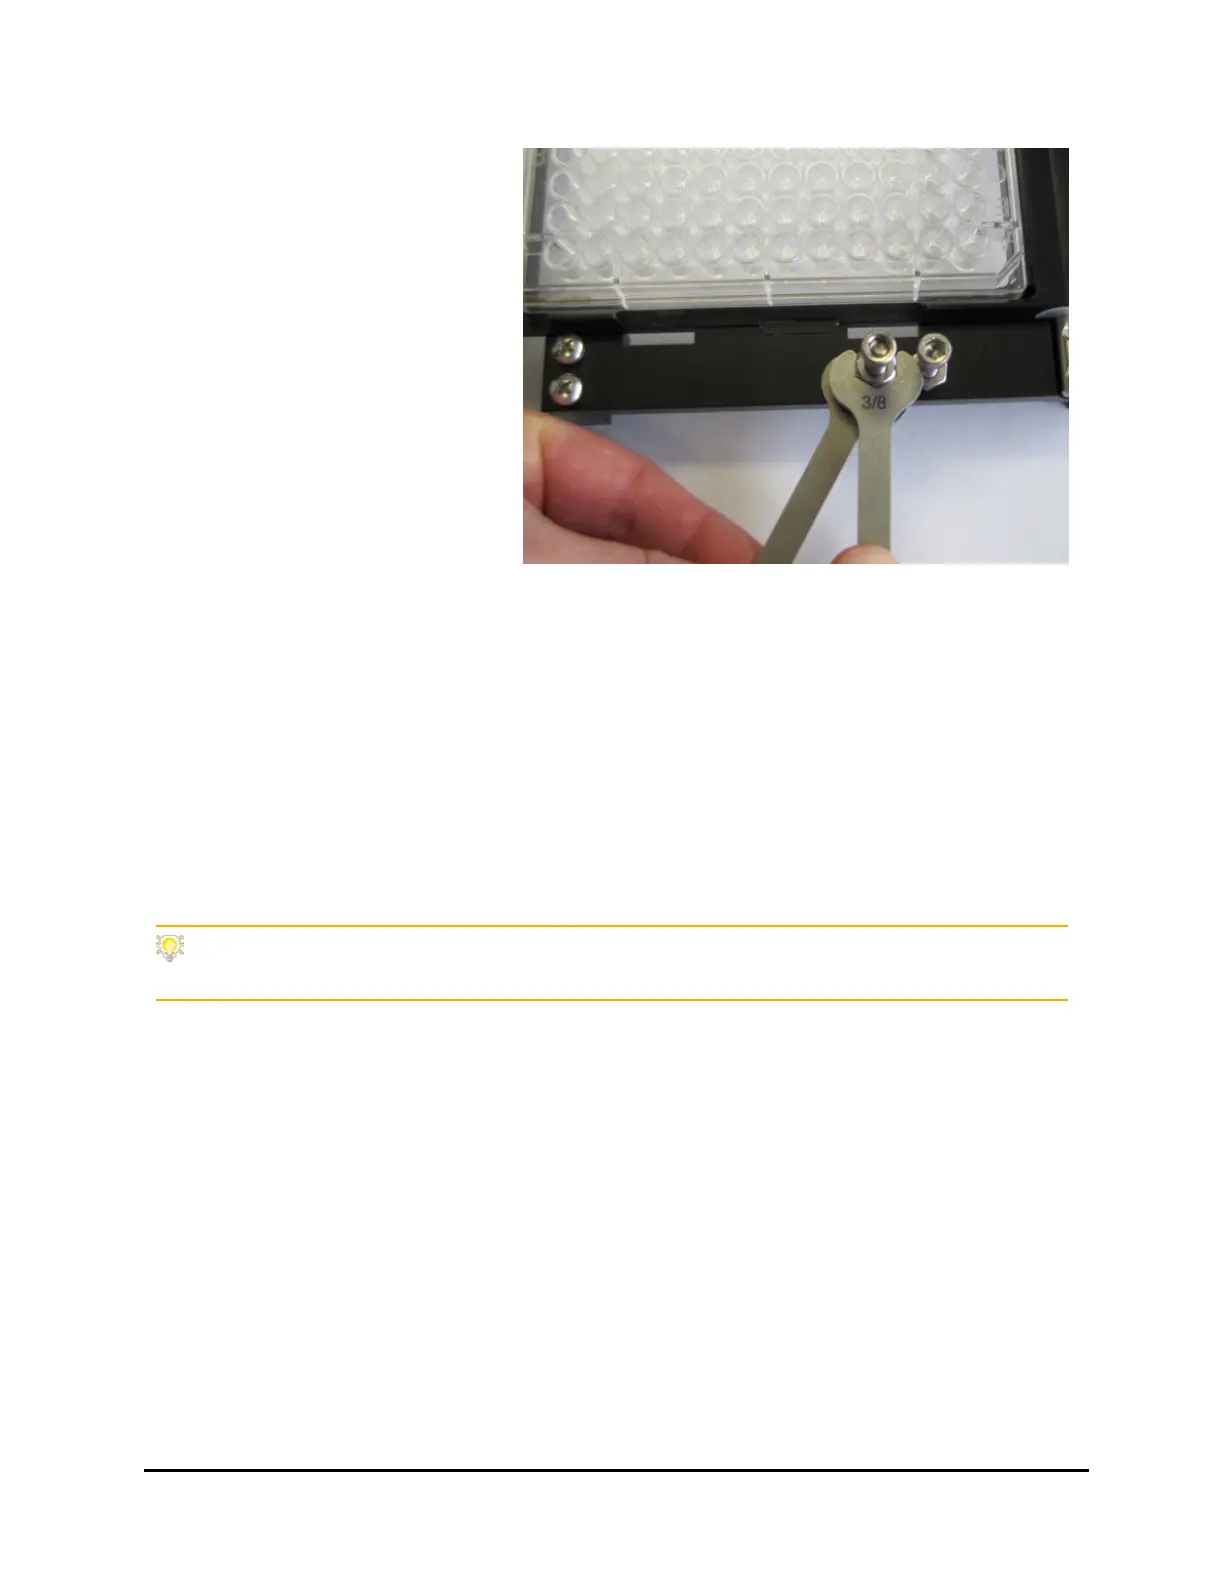
5. Using the two supplied
wrenches, tighten the
bottom nut to secure the
screw, then tighten the top
nut to fully compress the
washer between them. This
will lock the nuts in place
and allow you to easily
remove/replace the screw
without affecting its height
setting.
6. Verify the height with the jig and repeat steps 3-6 if necessary.
Instrument Settings: Try applying different Plate Clearance and Magnet Height Offset
settings to optimize performance with special plates, like 384-PCR.
405™ Microplate Washer LS
 Loading...