16 | Chapter 2: Installation
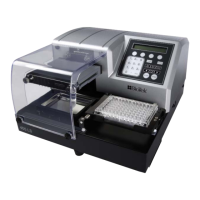
1. Use the 9/64” hex wrench to unscrew
the cap screws and remove the bracket
on the side of the wash manifold that
holds the Verify sensor in place.
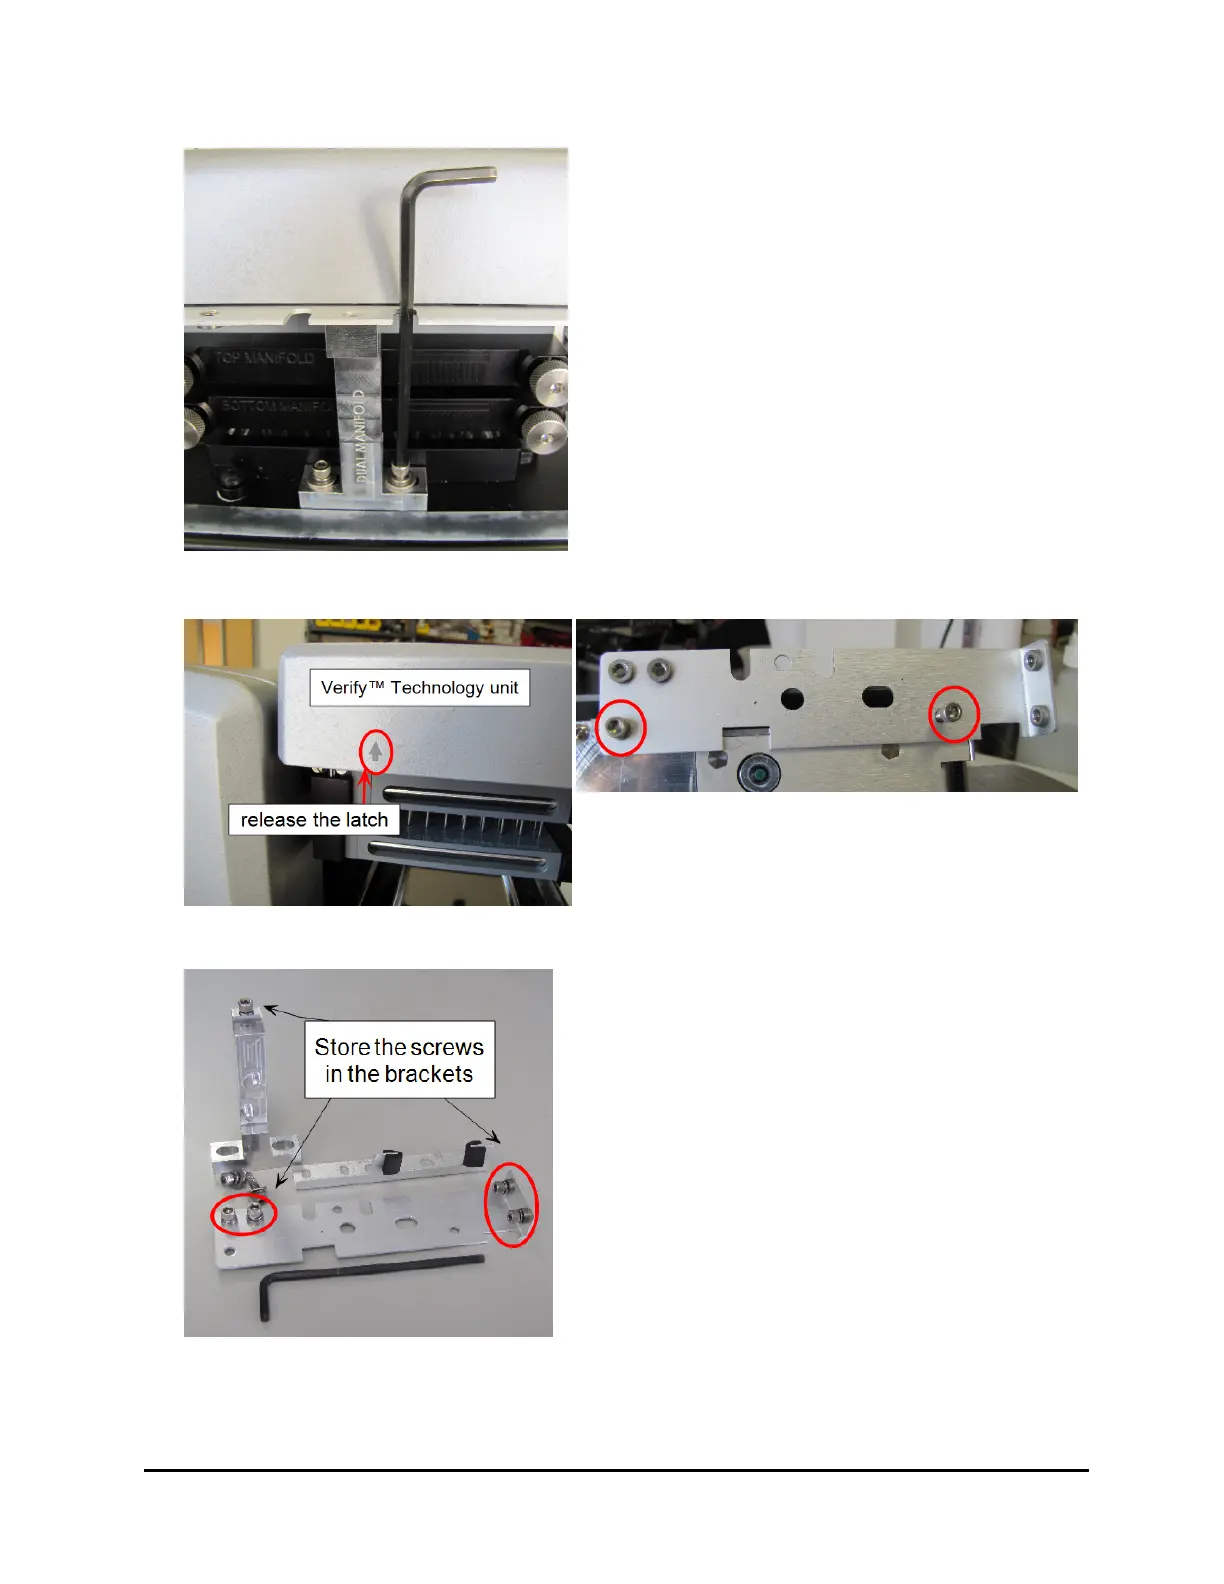
2. Remove the large bracket in front
holding the wash manifold: Remove the
three screws. Slightly lift the manifold(s)
to release the bracket from the base, and
pull it away from the manifold(s).
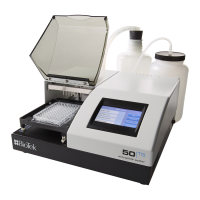
3. Set the brackets, screws and washers
aside.
Follow instructions to set up the washer, e.g.
install the vacuum pump and tubing. Then,
perform Step 4, below.
4. When you're ready to power up the
instrument, plug it in and turn it on.
Release the latch on the left side of the
Verify™ sensor unit, and to lift it up to
remove the third shipping bracket.
5. For safe keeping, put the cap screws
and washers for the two thin brackets in
the studs provided on the longest, last-
removed bracket.
6. Put the manifold bracket's top screw
back in its hole. Save the two longer
screws for storing all the brackets on the
back of the instrument.
405™ Microplate Washer LS