— Secure the Börger machine against unauthorized or uncon-
trolled reactivation as described in
Ä
Chapter 2.7 “Securing the
machine against restart” on page 26
— To the extent necessary, amply secure the surrounding area
when performing maintenance. Cordon off the working area
with a red and white safety chain and a warning sign.
— Relieve the pressure in the Börger machine according to
Ä
Chapter 6.1.2 “Pressure relief” on page 114.
— Clean the interior of the Börger machine as described in
Ä
Chapter 6.1.3 “Internal cleaning” on page 116.
1. Remove the four hexagon head screws (4) at the covering
plate (5) that are connected to the collar of the tension spring
cover and lift off the covering plate (5).
2. Remove the clamping screw (6).
3. Remove the roll pin (7) and the tension spring (8).
4. Fit the new tension spring (8) with roll pin (7).
5. Install the clamping screw (6).
6. Tighten the clamping screw (6) until a sufficiently high pre-
tension on the Multi Disc has been achieved.
— If necessary, correct the pre-tension as described in
Ä
Chapter 5.1 “Commissioning” on page 95.
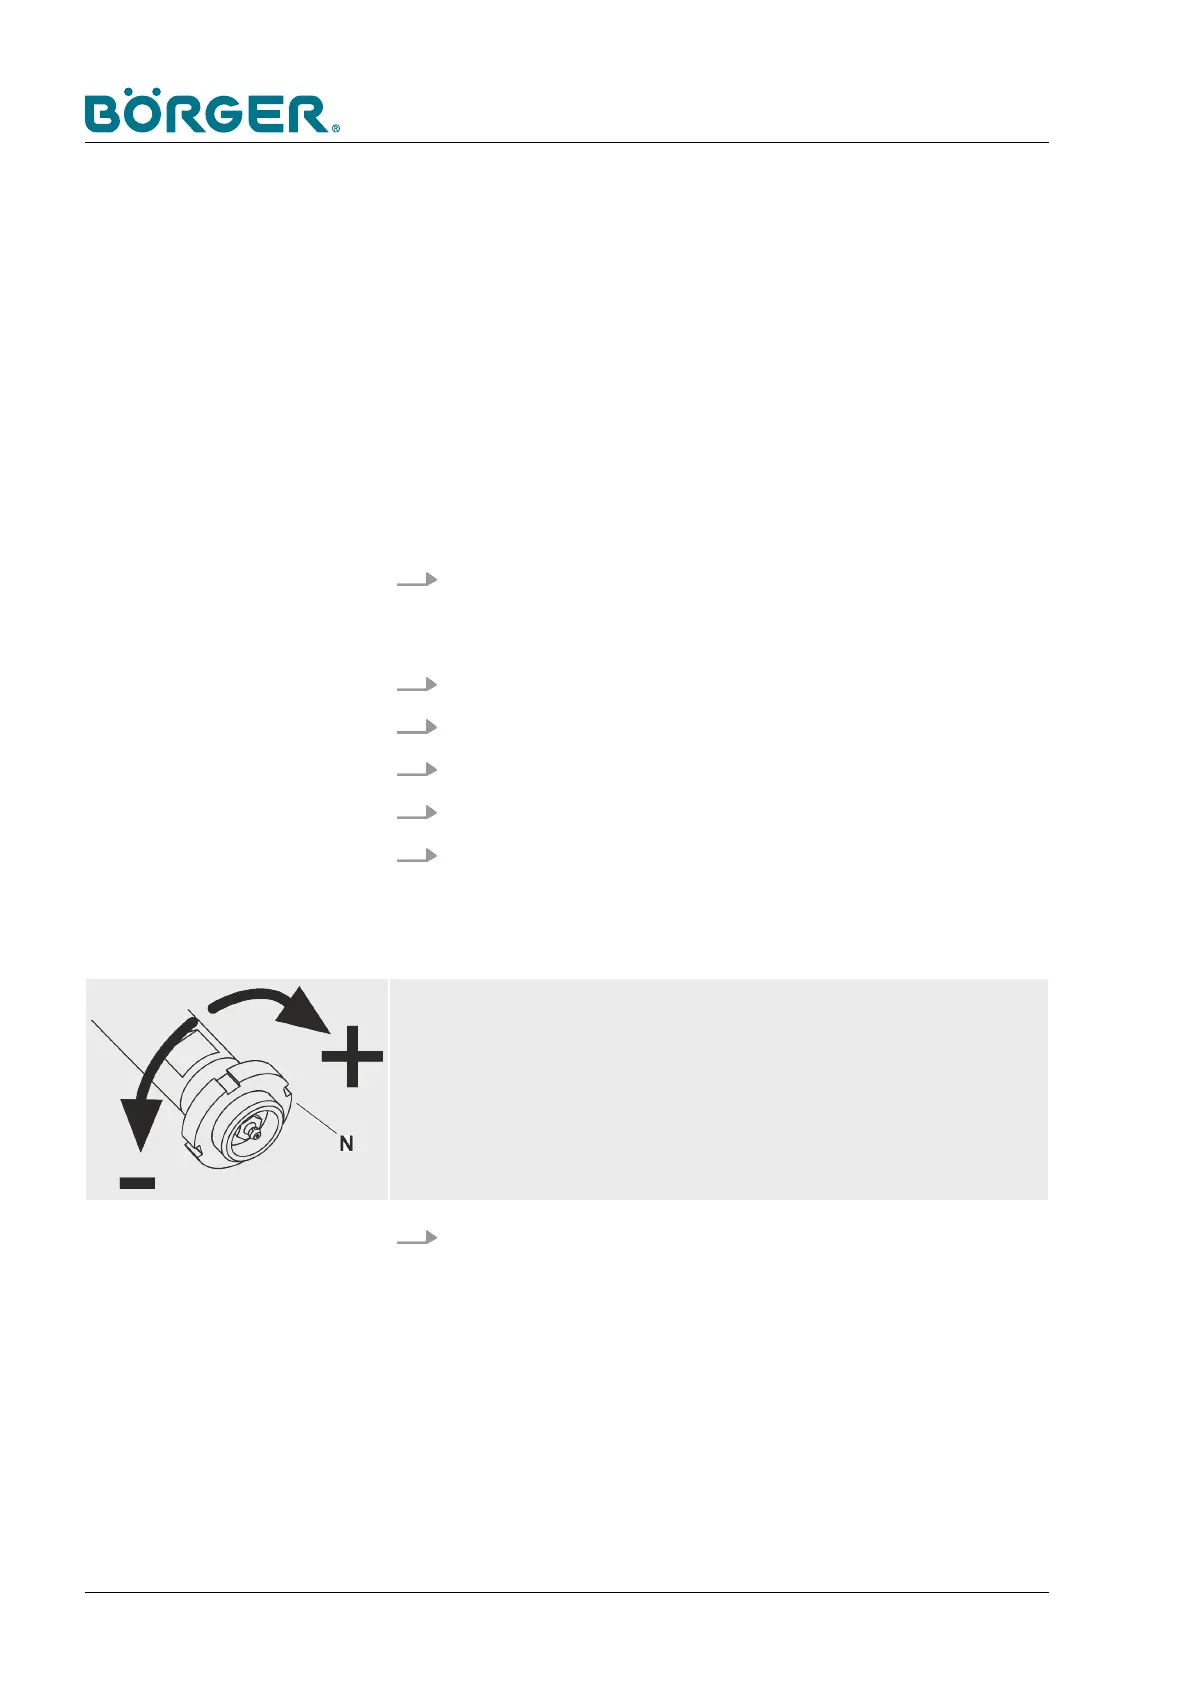
Adjust the clearance!
— Adjust the slotted nut [N] in such a way that the distance between the Multi
Disc and the press channel (or filter press channel in the case of the HP ver-
sion) is very small but the plates do not rub against each other.
7. Install the cover plate (5) with the hexagon head screws (4).
Maintenance and repairs
BA-RC40_EN, 17.01.2024www.boerger.de / www.boerger.com132
 Loading...