12. Lubricate the adjustment mechanism as detailed in
Ä
Chapter 6.2.3 “Lubricating the adjustment mechanism and
the bearing” on page 127.
13. Place the counter bearing plate (7) properly.
14. Insert the hexagon head screws (6) with the washers and
tighten them.
15. Tighten the two grub screws (4) at the inner ring (5) of the
counter bearing.
16. Tighten the clamping screw (10) until a sufficiently high pre-
tension on the Multi Disc (3a, 3b) has been achieved or pres-
surize the clamping unit in the version with pneumatic adjust-
ment.
— If necessary, correct the pre-tension as described in
Ä
Chapter 5.1 “Commissioning” on page 95.
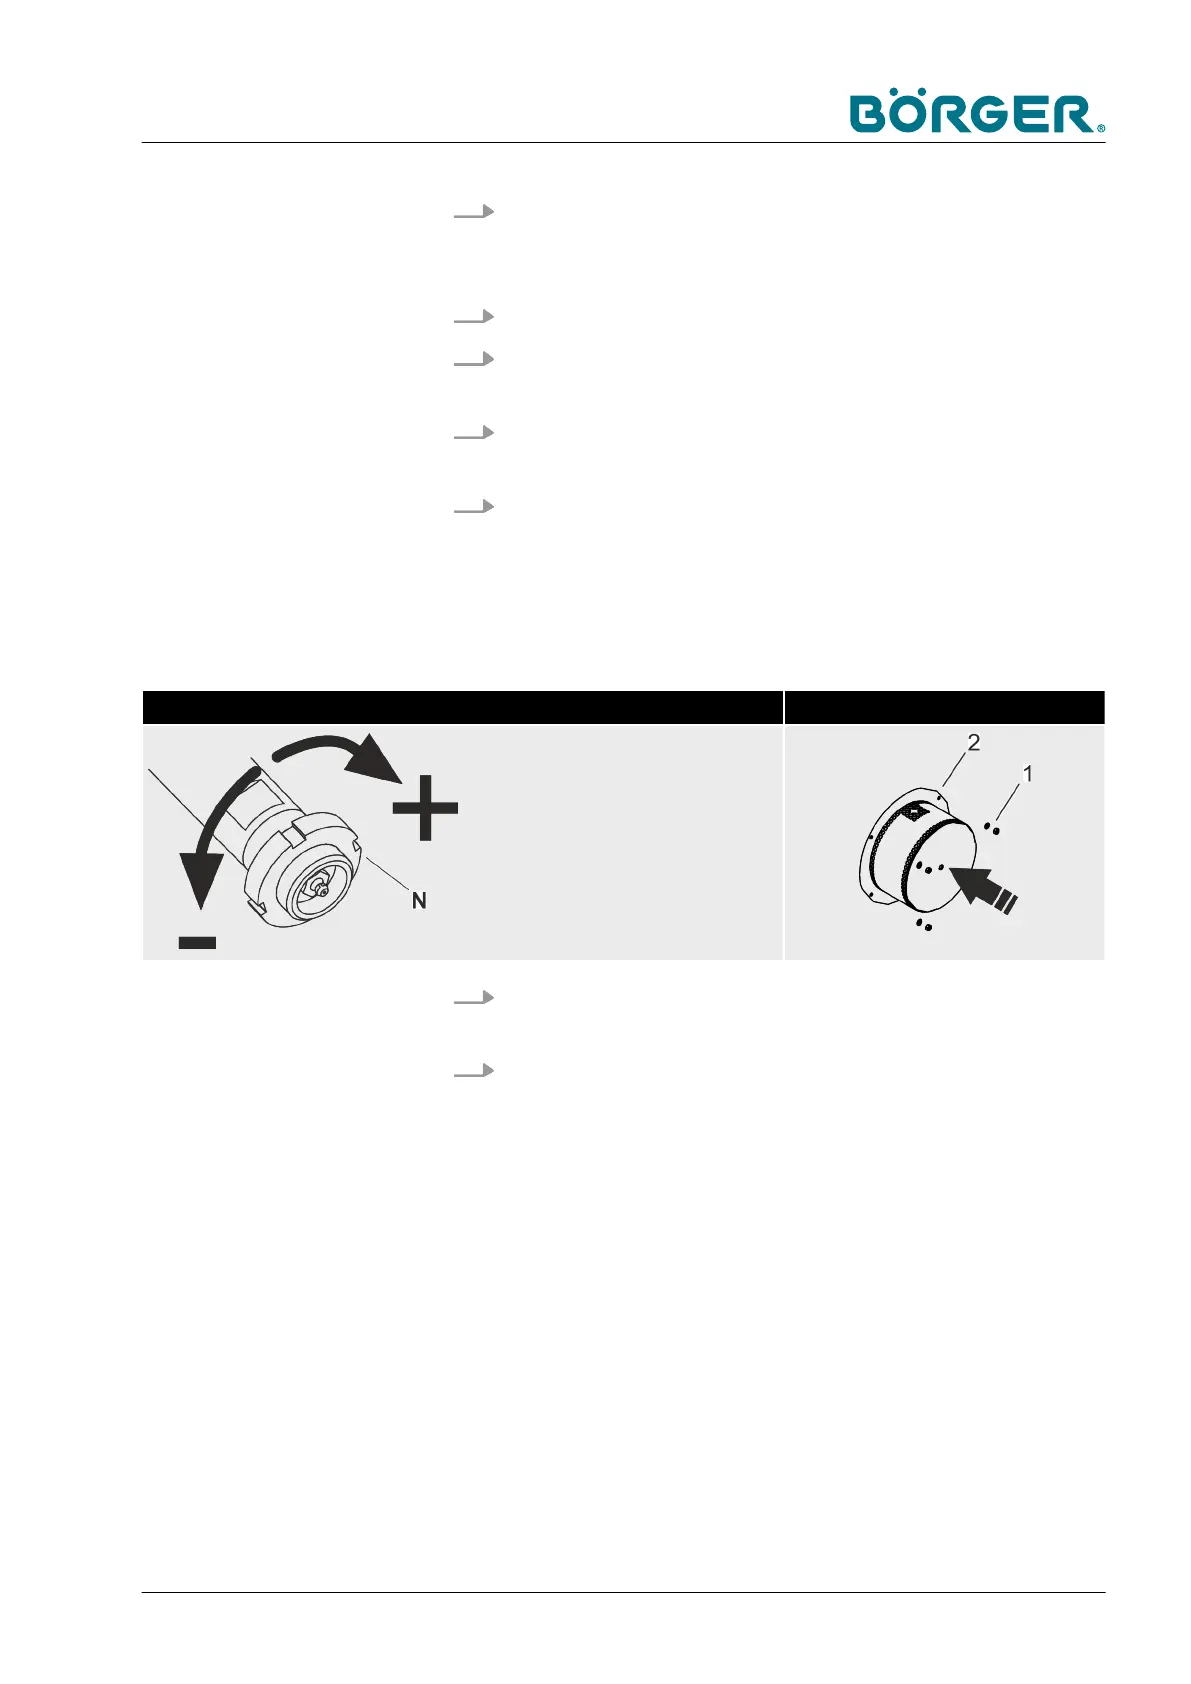
Adjust the clearance! Install the counter bearing cover
— Adjust the slotted nut [N] in such a
way that the distance between the
Multi Disc and the press channel
(or filter press channel in the case
of the HP version) is very small
but the plates do not rub against
each other.
17. Install the cover (2) of the counter bearing and tighten the
hexagon nuts (1).
18. Install the covering plate (9) and tighten the four hexagon
head screws (8) in the version with mechanical adjustment.
Maintenance and repairs
BA-RC40_EN, 17.01.2024 www.boerger.de / www.boerger.com 149