Brooks Automation 7. Service Procedures
Part Number: PF40-DI-00010 Rev. A Replacing the J3 (Elbow) Axis Motor or Timing Belt
Step Action
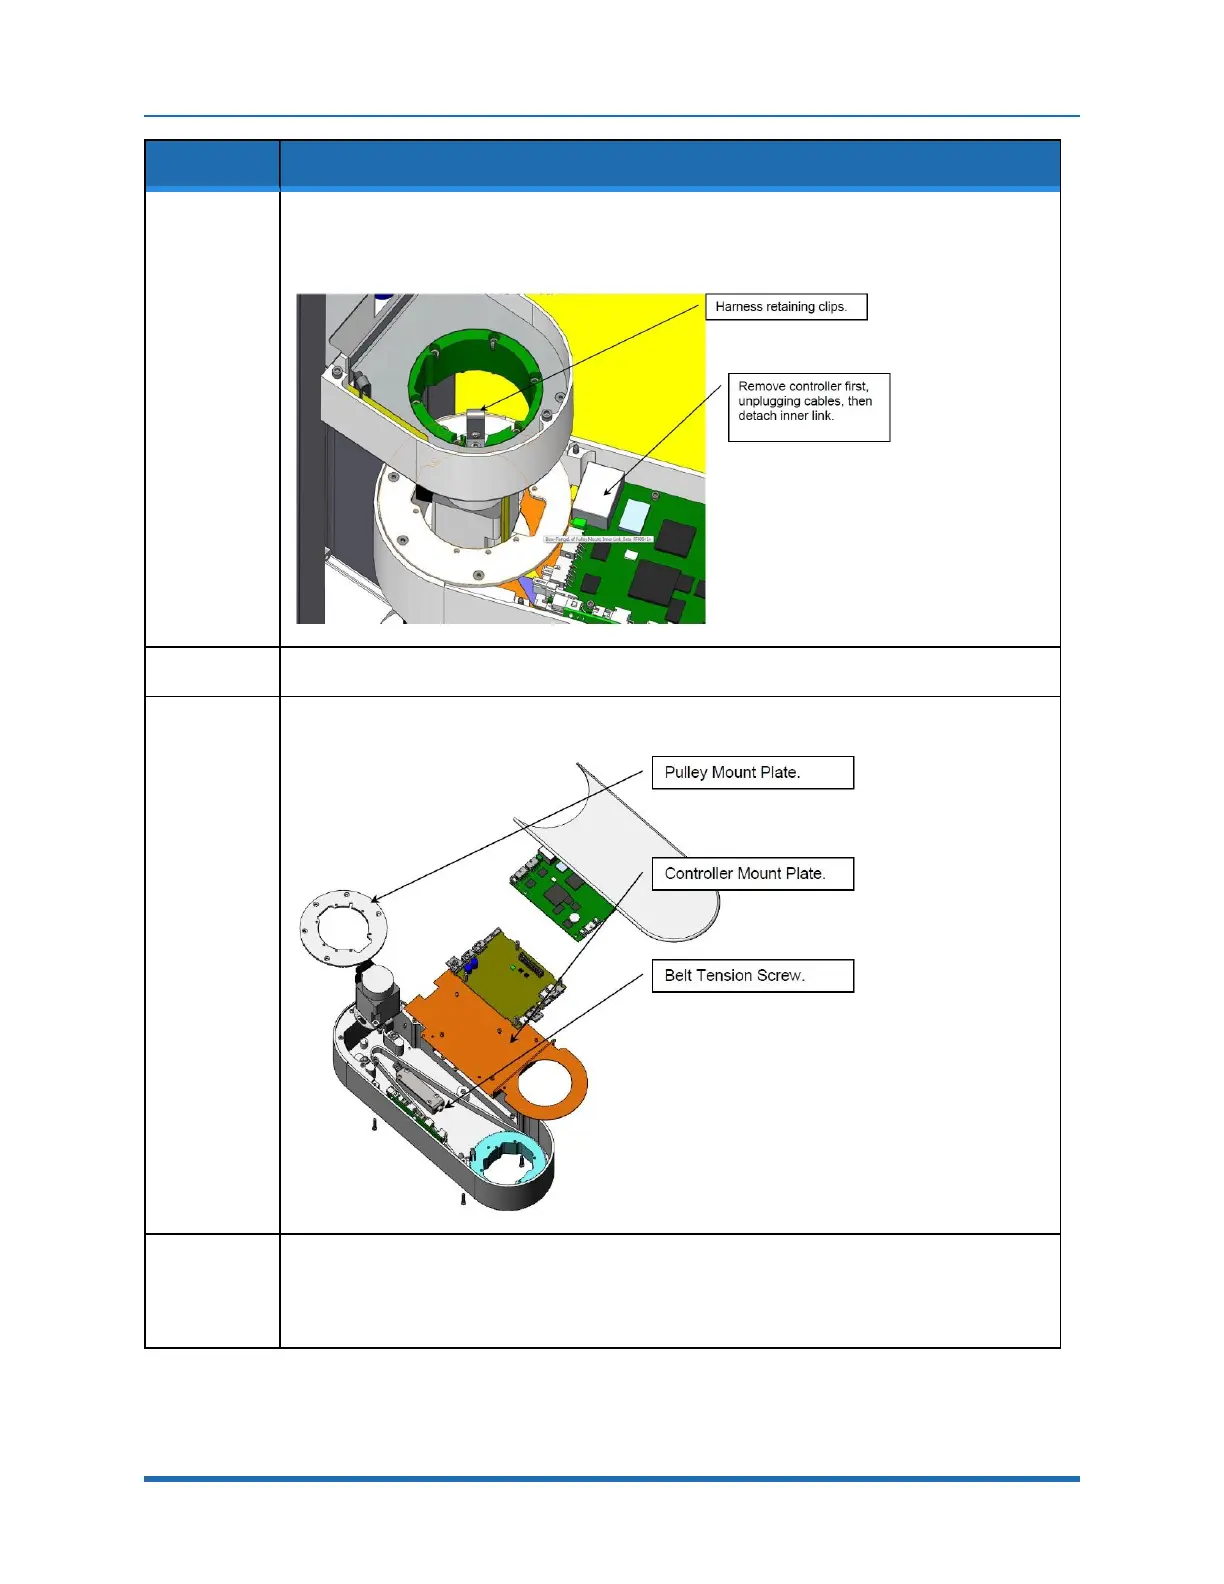
9.
Detach the inner link from the Z carriage by removing the (6) M3 X 35 mm SHCS and lock
washers.
10.
Remove round Pulley Mount Plate from the Inner Link by removing the (5) M3 FHCS.
11.
Remove the J3 Controller Mount Plate from the Inner link by removing the (4) M3 X 5 mm SHCS.
12.
Remove the J3 motor by removing the (2) M4 screws that attach the motor to the motor mount
plate, and rotate the motor up and out of the motor mount plate.
This procedure will preserve the belt tension and avoid having to use a tension meter to reset the
belt tension, as it preserves the position of the motor mount plate.
Copyright © 2023, Brooks Automation
142