2007 Buell Lightning: Chassis 2-87
HOME
PASSENGER
Remove Footpeg
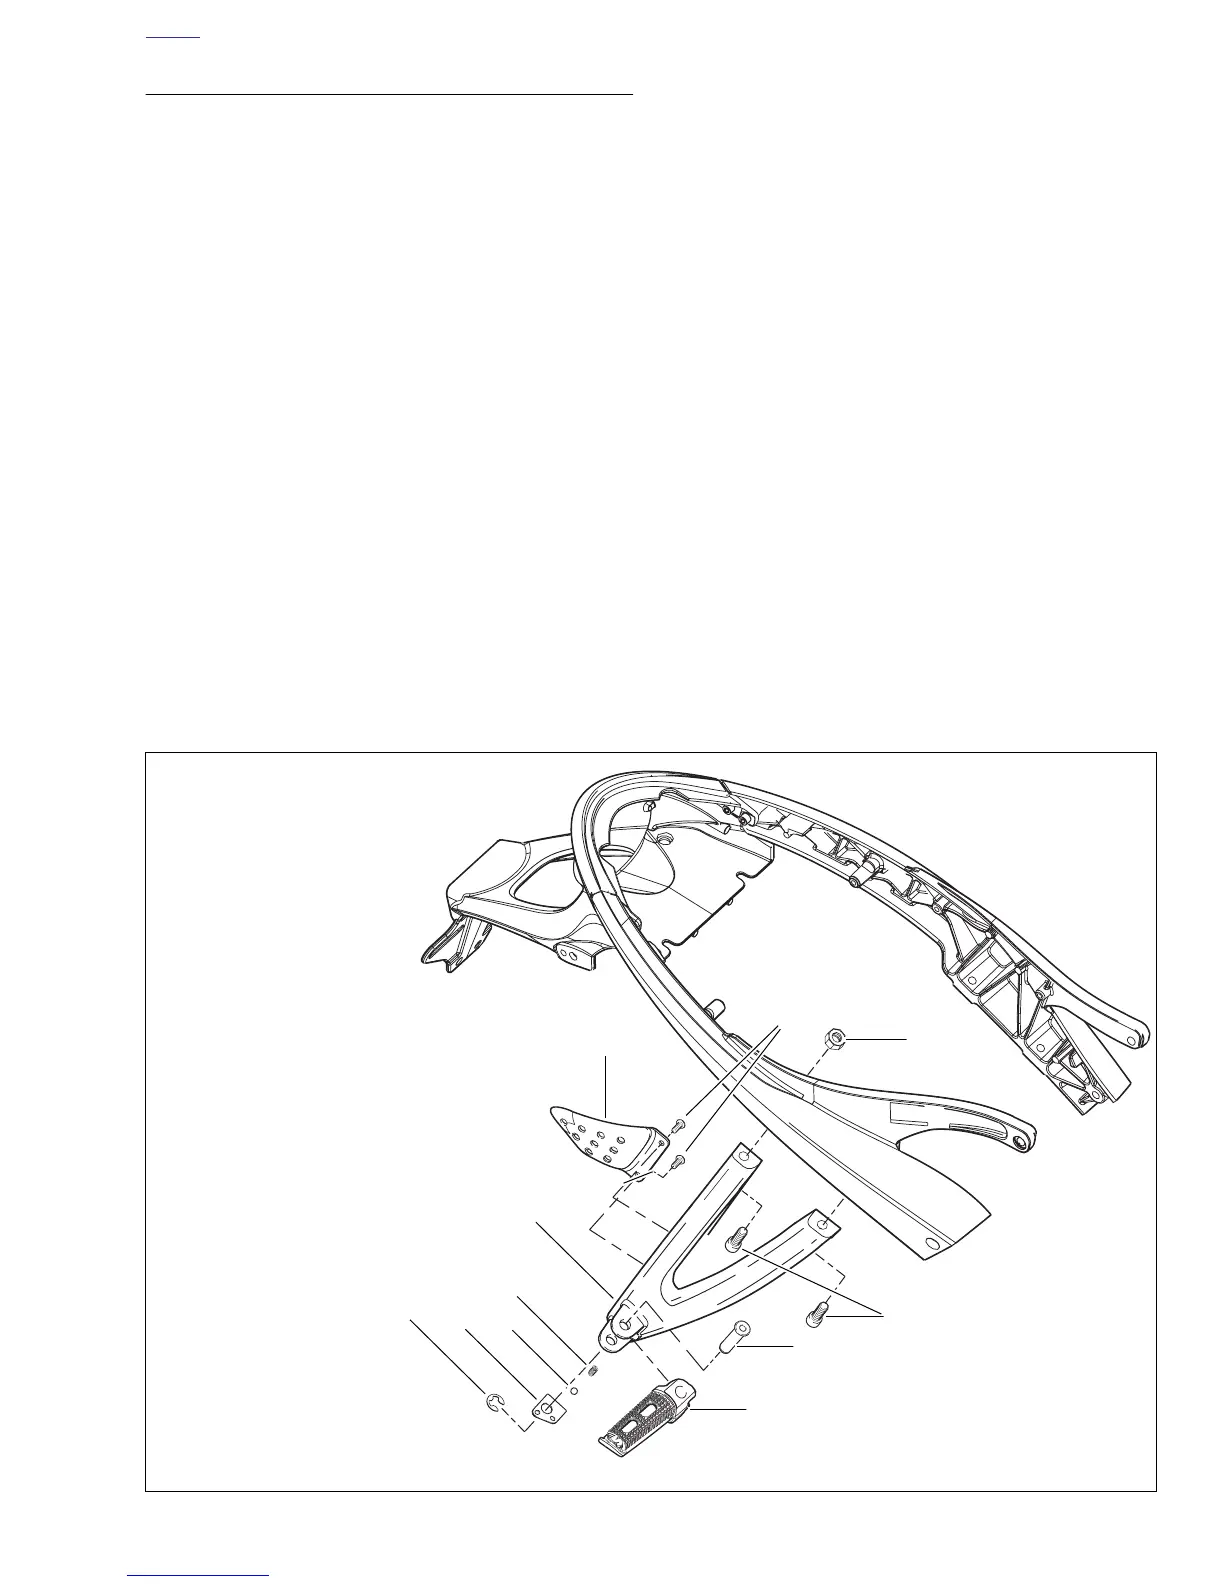
1. See Figure 2-117. Remove clip (7).
2. Remove footpeg pin (9).
3. Remove footpeg (8), detent plate (6), ball (5) and
spring (4).
Remove Heel Guard
1. See Figure 2-117. Remove heel guard fasteners (1).
2. Remove heel guard (2).
Remove Mount
NOTE
The portion of the right and left tail sections where the pas-
senger footpeg supports attach is threaded at both locations.
A jam nut is utilized on one of the fasteners on each side in
order to help secure battery pan.
1. See Figure 2-117. Remove jam nuts (11).
2. Remove footpeg mount fasteners (10).
3. Remove footpeg mount (3).
Install Mount
1. See Figure 2-117. Position footpeg mount (3) onto tail
section.
2. Apply LOCTITE 271 (Red) to footpeg mount fasteners
(10), install and tighten to 25-28 ft-lbs (33.8-37.9 Nm).
3. Install jam nut (11) and tighten to 48-72 in-lbs (5.4-8.1
Nm).
Install Heel Guard
1. See Figure 2-117. Position heel guard (2) onto footpeg
mounts (3).
2. Install heel guard (2).
3. Tighten heel guard fasteners to 48-72 in-lbs (5.4-8 Nm).
Install Footpeg
1. See Figure 2-117. Position footpeg (8), detent plate (6),
ball (5), and spring (4) on to footpeg mount (3).
2. Install footpeg pin (9).
3. Install clip (7).
4. Check that footpeg clicks in the up and down position.
Figure 2-117. Passenger Footpeg, Mount and Heel Guard Assembly
1. Heel guard fasteners
2. Heel guard
3. Footpeg mount
4. Spring
5. Ball
6. Detent plate
7. Clip
8. Footpeg
9. Pin
10. Footpeg mount fastener
11. Jam nut
b0933a2x
2
3
5
1
4
6
7
8
9
10
11