2-16 2007 Buell P3: Chassis
HOME
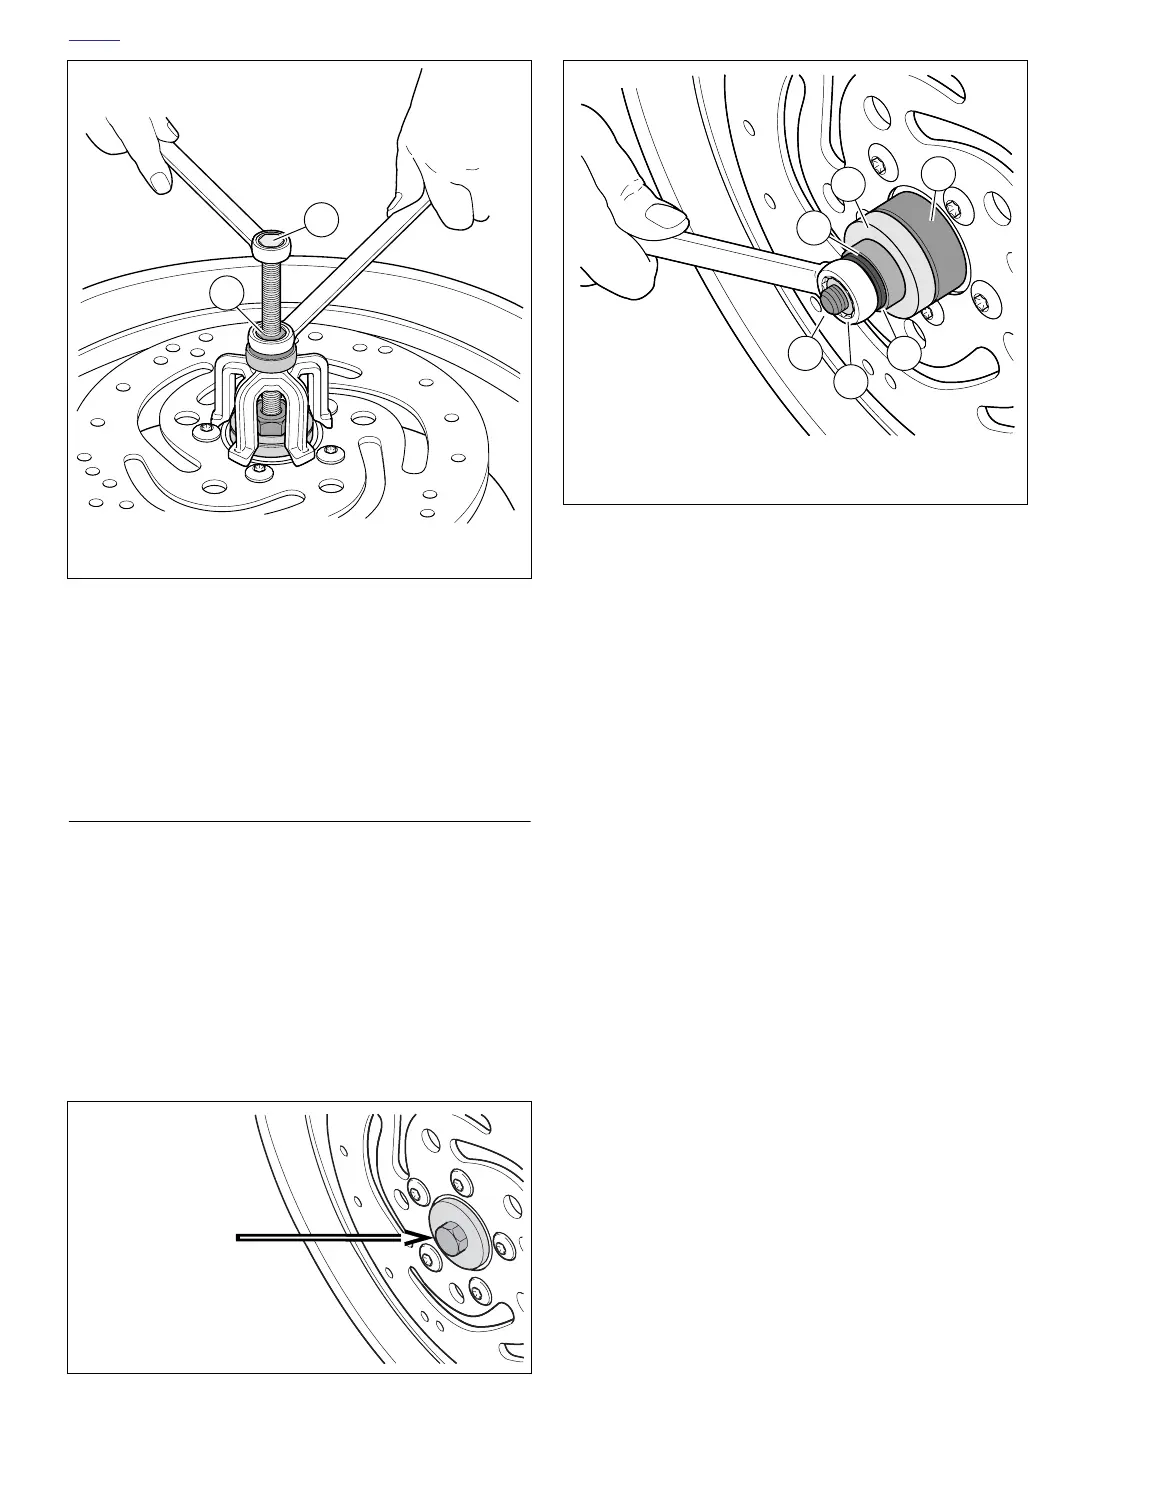
4. See Figure 2-14. When expanded collet has gripped
bearing edges, hold end of forcing screw (1) and turn the
nut (2) to remove bearing from wheel.
5. Remove spacer from inside wheel hub.
6. Repeat procedure for opposite side bearing. Discard all
bearings upon removal.
INSTALLATION
NOTE
Always install first bearing on primary brake disc side. If front
wheel has two brake discs, install bearing on the left side first.
1. Obtain WHEEL BEARING INSTALLER/REMOVER (Part
No. B-43933) and assemble.
a. Sparingly apply graphite lubricant to threads of
threaded rod to prolong service life and ensure
smooth operation.
b. See Figure 2-15. Place threaded rod through sup-
port plate. Insert assembly through wheel.
c. See Figure 2-16. Place the new bearing (6) on rod
(1) with lettered side outward.
d. Install pilot (5), Nice bearing (4), washer (3) and nut
(2) over rod.
2. Hold hex end of threaded rod (1) and turn nut (2) to
install bearing (6). Bearing will be fully seated when nut
can no longer be turned. Remove tool.
3. Install spacer sleeve inside wheel hub.
4. Reverse tool and install opposite side bearing.
5. Tighten bearing tool until bearing inner race contacts
spacer.
Figure 2-14. Remove Bearing
Figure 2-15. Installation Tool Support Plate
a020x2x
2
1. Forcing screw
2. Nut
1
a0202x2x
Figure 2-16. Installing Bearing
a0203x2x
1
2
3
5
6
4
1. Threaded rod
2. Nut
3. Washer
4. Nice bearing
5. Pilot
6. Wheel bearing